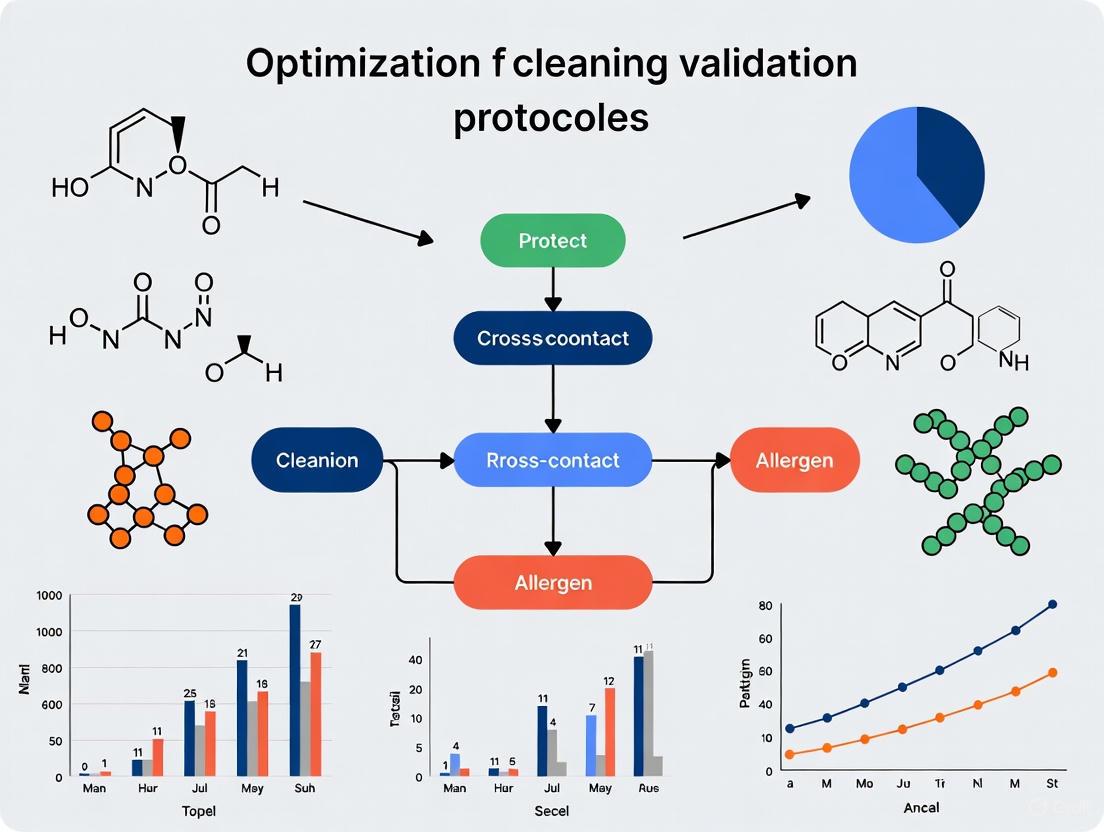
Optimizing Allergen Cleaning Validation: A Science-Based Protocol for Cross-Contact Prevention
This article provides researchers, scientists, and drug development professionals with a comprehensive framework for establishing, optimizing, and validating robust cleaning protocols to prevent allergen cross-contact.
Optimizing Allergen Cleaning Validation: A Science-Based Protocol for Cross-Contact Prevention
Abstract
This article provides researchers, scientists, and drug development professionals with a comprehensive framework for establishing, optimizing, and validating robust cleaning protocols to prevent allergen cross-contact. It covers foundational principles from regulatory and scientific perspectives, details methodological steps for protocol implementation, addresses common troubleshooting scenarios, and offers a comparative analysis of verification techniques. The guidance synthesizes current industry best practices and analytical methodologies to ensure the production of safe products for allergic consumers, with direct implications for quality control in biomedical and clinical research settings.
The Science and Regulation of Allergen Cross-Contact: Establishing a Baseline
Core Definitions and Distinctions
What is the fundamental difference between cross-contact and cross-contamination?
The terms "cross-contact" and "cross-contamination" are often used interchangeably, but they describe distinct hazards with different implications for food safety and cleaning validation protocols. Understanding this difference is critical for developing effective preventive controls.
Cross-contact refers to the inadvertent transfer of a food allergen from a food containing that allergen to a food that does not contain it [1] [2]. The key characteristic of cross-contact is that the hazard—the allergenic protein—cannot be eliminated by subsequent cooking or processing [3] [2]. Even microscopic amounts are sufficient to trigger a severe reaction in sensitive individuals [1].
Cross-contamination describes the transfer of biological, chemical, or physical food safety hazards from one point to another [2]. The most common form involves pathogenic microorganisms (biological hazards), which can often be reduced to acceptable levels through proper cooking, unlike allergens [3] [2].
Table: Comparative Analysis of Cross-Contact and Cross-Contamination
| Feature | Cross-Contact | Cross-Contamination |
|---|---|---|
| Hazard Type | Food allergens (e.g., proteins from peanuts, milk, sesame) [2] | Biological (bacteria, viruses), Chemical, or Physical hazards [2] |
| Elimination by Cooking | No; allergen proteins are not neutralized by heat [3] [2] | Yes, for many biological hazards; proper cooking can kill pathogens [3] [2] |
| Primary Concern | Life-threatening allergic reactions (e.g., anaphylaxis) [4] | Foodborne illnesses (e.g., from Salmonella, Listeria) [2] |
| Visible Residue | Often invisible; trace amounts are sufficient [1] | Not always visible |
Experimental Protocols for Cleaning Validation
What methodologies are used to validate cleaning protocols for allergen removal?
Validating a cleaning process provides scientific evidence that the regimen consistently and effectively removes allergen residues to a predetermined acceptable level [5]. The following workflow outlines a standard validation approach.
1. Allergen Mapping and Risk Assessment: Begin by creating a detailed visual map of your facility that identifies all locations where allergens are stored, handled, and processed [5]. This map forms the basis for a risk matrix, scoring each allergen based on factors like severity of potential reaction and likelihood of cross-contact.
2. Worst-Case Scenario Selection: To ensure robustness, validation studies should focus on "worst-case" conditions [5]. This involves selecting:
- The most challenging allergen: Choose an allergen that is difficult to clean (e.g., sticky, particulate, or in powdered form) and abundant in the process.
- The most difficult equipment: Select equipment with complex geometries, hard-to-clean surfaces, or that is located at the end of a production line. If a cleaning protocol works for these worst-case scenarios, it is likely effective for less challenging situations [5].
3. Execution of Cleaning Protocol: The cleaning procedure (e.g., wet clean with detergents, dry clean) is executed exactly as defined in the standard operating procedure. The equipment is then sampled using validated methods, such as swabbing surfaces in predefined locations [6] [5].
4. Quantitative Testing Methods: Post-cleaning samples are analyzed using quantitative or highly sensitive qualitative methods. The table below summarizes common analytical techniques.
Table: Allergen Detection and Analytical Methods
| Method | Function | Application in Validation/Verification |
|---|---|---|
| ELISA(Enzyme-Linked Immunosorbent Assay) | Highly sensitive and accurate lab technique for quantifying specific allergenic proteins [5] | Primary Validation: Provides numerical data to prove a cleaning process reduces allergen residues to an acceptable level [5]. |
| Lateral Flow Devices (LFDs) | Portable, rapid tests that provide qualitative (yes/no) or semi-quantitative results on-site [5] | Ongoing Verification: Useful for routine, post-cleaning checks to ensure protocols remain effective after initial validation [5]. |
| ATP Monitoring | Measures Adenosine Triphosphate as an indicator of general organic residue | Indirect Check: Does not detect allergens specifically. Can be used for general hygiene monitoring but is not sufficient for allergen validation. |
| PCR(Polymerase Chain Reaction) | Detects allergen DNA | Complementary Testing: Can be useful for identifying the presence of an allergenic source, but does not detect the protein itself. |
5. Data Analysis and Establishing Effectiveness: The data from quantitative tests is compared against a pre-defined threshold (e.g., based on scientific literature or a conservative "safe" level) to conclude whether the cleaning process is validated [5]. It is critical to understand that regulatory bodies like the FDA have not established universal threshold levels for allergens [4].
The Scientist's Toolkit: Essential Reagents and Materials
Table: Key Reagents for Allergen Cleaning Validation Research
| Research Reagent / Material | Primary Function |
|---|---|
| Validated Swabs | Consistent and efficient collection of residues from defined surface areas. |
| ELISA Test Kits | Gold-standard for quantitative measurement of specific allergenic proteins. |
| Lateral Flow Devices (LFDs) | Rapid, on-site verification of cleaning effectiveness. |
| Reference Allergen Standards | Positive controls to ensure analytical method accuracy and calibration. |
| Commercial Detergents & Sanitizers | Formulated solutions proven to break down and remove protein residues [6]. |
FAQs and Troubleshooting
FAQ 1: Why is hand sanitizer insufficient for preventing allergen cross-contact, and what is the correct protocol?
Answer: Alcohol-based hand sanitizers are designed to kill germs, but they do not remove or break down allergenic proteins [6]. The only reliable way to decontaminate hands is by washing with warm water and soap, scrubbing thoroughly [6] [2].
FAQ 2: We have a robust cleaning protocol, but we still get positive allergen results during verification. What are the most likely causes?
Answer: This is a common troubleshooting issue. The most likely causes, in order of priority, are:
- Ineffective Cleaning Chemistry: Standard sanitizers may not be sufficient. Use a commercial detergent proven to remove protein residues and follow the recommended concentrations [6] [2].
- Poor Equipment Design: Equipment with cracks, dead ends, or complex parts can harbor allergens. Hygienic equipment design is a foundational control [3] [5].
- Inconsistent Procedure Execution: Human error in following the cleaning protocol. Reinforce training and document each step [3] [5].
- Inadequate Rework Process: Incorporating unused product (rework) from an allergenic run back into a non-allergenic product is a high-risk practice that requires stringent controls [3].
FAQ 3: How does the FASTER Act of 2021 impact cleaning validation requirements?
Answer: The FASTER Act declared sesame as the 9th major food allergen in the U.S., effective January 1, 2023 [4] [7]. This means sesame must be integrated into all existing allergen control programs. Facilities must:
- Update their hazard evaluations and allergen maps to include sesame.
- Validate that their cleaning protocols are effective for removing sesame residues, as it can be a particularly challenging allergen due to its small seed size and oil content [7].
- Ensure accurate labeling on all products.
FDA Food Allergen Labeling and Requirements
Major Food Allergens: The Current List
The U.S. Food and Drug Administration (FDA) identifies nine major food allergens that require specific labeling on packaged foods [4]. These are:
- Milk
- Eggs
- Fish
- Crustacean shellfish
- Tree nuts
- Peanuts
- Wheat
- Soybeans
- Sesame (effective January 1, 2023) [4]
Key Updates in FDA Guidance (2025)
The FDA's revised "Guidance for Industry: Questions and Answers Regarding Food Allergens (Edition 5)", issued in January 2025, includes several critical updates for researchers and manufacturers to note [8] [9].
- Expanded Definitions for Milk and Eggs: The definitions of "milk" and "eggs" as major food allergens have been broadened. "Milk" now includes milk from domesticated cows, goats, sheep, and other ruminants. "Eggs" now includes eggs from domesticated chickens, ducks, geese, quail, and other fowl [8] [9] [10]. Labels must declare the specific source (e.g., "goat milk" or "duck eggs") [8].
- Refined Tree Nut List: Several tree nuts are no longer considered major food allergens. Coconut, beech nut, butternut, chestnut, chinquapin, cola/kola nut, ginkgo nut, hickory nut, palm nut, pili nut, and shea nut have been removed from the list [8] [9]. They are not required to be declared in a "Contains" statement but must still be listed in the ingredient list by their common or usual name [8].
- Clarification on Shellfish: The major allergen "shellfish" refers specifically to Crustacean shellfish (e.g., crab, lobster, shrimp). Mollusks (e.g., clams, mussels, oysters) are not classified as a major food allergen [4] [10].
- "Free-From" Claims and Advisory Statements: It is not appropriate to use an allergen-free claim (e.g., "milk-free") alongside an advisory statement (e.g., "may contain milk") for the same allergen, as this is considered misleading [8]. Similarly, a "Contains" statement should not be paired with a "may contain" advisory for the same allergen [8].
Allergen Controls under FSMA Preventive Controls Rule
The Food Safety Modernization Act (FSMA) rule for Preventive Controls for Human Food mandates that covered facilities implement a food safety plan that includes food allergen controls [11]. These are written procedures to control cross-contact and ensure proper labeling [11].
Global Food Safety Standards: GFSI and SQF
GFSI Recognition and Benchmarking
The Global Food Safety Initiative (GFSI) does not create standards itself but benchmarks existing certification program standards against its requirements [12]. Recognition by GFSI signifies that a certification program is rigorous and credible, facilitating acceptance by retailers and buyers globally [12] [13].
Safe Quality Food (SQF) Program
SQF is a GFSI-benchmarked food safety and quality certification system [13]. It is unique in offering certification for all sectors of the food supply chain, from primary production to distribution [13]. The current version is SQF Code Edition 9, effective since May 2021 [14] [13].
SQF Program Structure:
| Program | GFSI-Benchmarked? | Purpose & Best For |
|---|---|---|
| SQF Fundamentals | No | Entry-level program for small/medium businesses as a stepping stone to full certification [13]. |
| SQF Food Safety Code | Yes | Main certification route for companies seeking globally recognized food safety certification [13]. |
| SQF Quality Code | No | Optional add-on to address product quality and consistency beyond food safety [13]. |
Comparison of Common GFSI-Recognized Schemes:
| Scheme | Key Characteristics | Common Audit Cadence |
|---|---|---|
| SQF | Flexible, HACCP-based, broad supply-chain coverage; often mandated by major U.S. retailers [13]. | Annual audit; unannounced audit at least once every three audit cycles [13]. |
| BRCGS | Product-focused, prescriptive requirements; prevalent in UK and EU markets [13]. | Annual audit; unannounced option available [13]. |
| FSSC 22000 | Based on ISO standards, integrates easily with ISO 9001 (Quality Management) [13]. | Three-year certification with annual surveillance audits [13]. |
Optimizing Cleaning Validation and Verification Protocols
Preventing allergen cross-contact in a shared production environment requires a robust cleaning process. A critical distinction must be made between validation and verification [15].
- Validation: The initial scientific proof that the cleaning procedure is capable of effectively removing the specific allergen to a safe level [15].
- Verification: The routine checks conducted after cleaning to ensure the validated procedure was followed correctly and was effective on that specific occasion [15].
When to Re-validate Cleaning Protocols
Cleaning validation is not a one-time activity. The protocol should be re-validated periodically or whenever a significant change occurs in production that could impact cleaning efficacy [15]. Key triggers include:
- Introduction of new products or changes in product formulation [15].
- Changes in raw material or chemical suppliers [15].
- Installation of new equipment or modification of existing equipment [15].
- Changes in packaging materials [15].
The specific frequency of periodic re-validation should be determined by the facility's allergen map and risk assessment [15].
Frequently Asked Questions (FAQs)
Q1: My product contains cow's milk and goat milk. How do I declare these allergens on the label? You must declare both sources. In the ingredient list, you would declare "milk" and "goat milk." If you use a "Contains" statement, it must say, "Contains milk, goat milk" [8].
Q2: Are "may contain" advisory statements required by law? No. Advisory statements such as "may contain [allergen]" are not required by the FDA [4]. They can be used on a voluntary basis to inform consumers about potential cross-contact, but only if the manufacturer has implemented Good Manufacturing Practices to avoid cross-contact [4]. They cannot be used as a substitute for such practices [4].
Q3: Has the FDA established a threshold level for any major food allergens? No. As of now, the FDA has not established a threshold level (a value below which an allergic reaction is unlikely) for any food allergens [4] [9].
Q4: What is the difference between SQF Fundamentals and the SQF Food Safety Code? The SQF Fundamentals Program is an entry-level, non-GFSI-benchmarked program designed to help smaller businesses build a foundational food safety system. The SQF Food Safety Code is the main, GFSI-benchmarked certification that is globally recognized and typically required by major retailers [13].
Research Reagent Solutions for Allergen Control
The following table details key tools and materials essential for developing and validating cleaning protocols to prevent allergen cross-contact.
| Research Reagent / Material | Function in Allergen Control Research |
|---|---|
| Allergen-Specific ELISA Kits | Quantifies specific allergen protein residues on surfaces or in rinsate to scientifically validate cleaning efficacy and establish a baseline for control. |
| Lateral Flow Devices (Rapid Tests) | Provides rapid, on-site verification of allergen presence/absence after cleaning for routine monitoring and investigative purposes. |
| Protein Swabs & Recovery Buffers | Used for environmental monitoring to collect surface samples from equipment for subsequent protein analysis via ELISA or other methods. |
| ATP Monitoring Systems | Verifies general sanitation effectiveness by measuring Adenosine Triphosphate (a marker of biological residue), though it is not allergen-specific. |
| Allergen Mapping Software | Digitally documents the flow of allergens through a facility, identifying high-risk cross-contact zones to focus cleaning validation efforts. |
The Nine Major Food Allergens and Emerging Concerns
For researchers and professionals developing protocols to prevent allergen cross-contact, a clear understanding of both regulated and emerging allergens is fundamental. The landscape of food allergens is defined by a core group of nine major allergens, mandated for labeling in the United States, and a growing list of emerging allergens driven by global changes in food formulation and consumption patterns [4] [16]. Any protein in food has the potential to cause an allergic reaction in a sensitized individual, making rigorous scientific assessment crucial [17]. This guide provides the foundational data and methodologies needed to optimize cleaning validation studies and risk assessment protocols within research and development settings.
Foundational Allergen Data Tables
The following tables consolidate key quantitative and qualitative data on major and emerging allergens to inform risk assessment and protocol design.
Table 1: The Nine Major Food Allergens: Prevalence and Clinical Characteristics
| Allergen | Prevalence in Specific Populations | Typical Age of Onset | Likelihood of Outgrowing | Key Clinical Notes & Cross-Reactivity |
|---|---|---|---|---|
| Cow's Milk [16] [18] | ~2.5% of children under 3 [16] | Infancy [18] | High: ~80% by age 16 [16] | Distinct from lactose intolerance; most common childhood allergy [16]. |
| Egg [16] [18] | ~2% of children [16] | Early Childhood [18] | High: ~70% by age 16 [16] | Proteins primarily in white; some can tolerate baked egg [16]. |
| Peanut [16] [18] | ~2.5% of children [16] | Early Childhood [18] | Low: ~20% [16] | Legume; risk of anaphylaxis; ~40% co-allergy with tree nuts [16]. |
| Tree Nuts [16] [18] | 0.4-0.5% of U.S. population [16] | All ages | Very Low: <10% [16] | Includes almond, cashew, walnut, etc.; distinct from peanut [16] [18]. |
| Soy [16] [18] | Common in infants/children [18] | Infancy/Childhood [18] | High: Most outgrow [18] | Legume; high co-allergy with peanut (up to 88%) [16]. |
| Wheat [16] [18] | Up to 1% of children [16] | Childhood [18] | High: ~66% by age 12 [16] | Distinct from Celiac disease (autoimmune) [16]. |
| Fish (Finned) [16] [18] | ~1% of Americans [16] | Childhood & Adulthood | Low: Usually lifelong [18] | ~40% of allergies first appear in adulthood [16]. |
| Crustacean Shellfish [16] [18] | ~2% of Americans [16] | All ages | Low: Usually lifelong [18] | Most common adult food allergy; crustaceans (shrimp) > mollusks [16] [18]. |
| Sesame [16] [18] | ~0.23% of Americans [16] | All ages | Information Missing | Labeling mandated in U.S. as of Jan 1, 2023; often found as tahini, benne [16] [18]. |
Table 2: Emerging Food Allergens of Concern for Research & Development
| Emerging Allergen | Associated Food Examples | Key Driver for Emergence | Known Cross-Reactivity with Major Allergens |
|---|---|---|---|
| Legumes (non-peanut) [17] [19] | Green peas, lentils, chickpeas, lupin [17] | Use in plant-based proteins [17] | Peanut (e.g., lupin, pea) [17] |
| Seeds [17] [19] | Sunflower, pumpkin, chia, flax, hemp, pine nuts [17] [19] | Use in health foods and toppings [17] | Sesame (potential, based on seed category) |
| Goat/Sheep Milk [19] | Cheeses, specialty dairy products [19] | Alternative dairy consumption | Cow's milk [19] |
| Grains & Pseudocereals [17] [19] | Buckwheat, oats [17] | Alternative grain consumption | Wheat (potential, based on grain category) |
| Fruits [17] [19] | Kiwi, mango, banana, strawberry, apple [17] [19] | Global availability and year-round consumption | Latex-Fruit Syndrome (for some, e.g., kiwi) |
| Other [19] | Insect protein, canola protein, red meat (alpha-gal) [17] [19] | Novel foods and changing diets | Crustacean shellfish (for insect protein); Mustard (for canola protein) [17] |
Allergen Categories and Cross-Reactivity
Troubleshooting Guides and FAQs for Cleaning Validation
FAQ 1: How do I establish an acceptable threshold for allergen cleaning validation?
- Answer: Currently, no universally mandated threshold levels for allergens have been established by regulatory bodies like the FDA [4]. Individual reactive doses vary significantly and can be influenced by co-factors like exercise and sleep deprivation [20]. Therefore, industry best practice for cleaning validation is to demonstrate that the cleaning procedure reduces allergen carry-over to non-detectable levels using validated analytical methods [21]. This conservative approach is designed to protect even the most sensitive individuals.
FAQ 2: What is the critical first step in designing an allergen cleaning validation study?
- Answer: The foundational step is Allergen Mapping [21]. Before any validation plan is drafted, you must understand the location and movement of all allergens within your facility. This involves creating a comprehensive list of every ingredient and the allergens they contain, which can then be extended to the product or recipe level. A visual diagram of the production process is highly recommended to trace the flow of allergens and identify potential points of cross-contact.
FAQ 3: How do I select the appropriate target allergen and testing method for validation?
- Answer: Your validation study should be based on a worst-case scenario to provide the highest assurance of effectiveness [21].
- Target Selection: Choose an allergen that is present at high levels, has a high protein content, and is known to be difficult to clean from the production line. Validating for this worst-case scenario allows you to make informed assumptions about less challenging situations [21].
- Testing Method: The recommended method is a quantitative ELISA (Enzyme-Linked Immunosorbent Assay) test, as it detects protein—the component that causes allergic reactions [21]. PCR (Polymerase Chain Reaction) testing is generally not recommended for cleaning validation because it detects DNA, which does not directly correlate with protein levels or allergenic potential [21].
FAQ 4: What samples are required for a successful cleaning validation study?
- Answer: A robust sampling plan is crucial for generating defensible data.
- Positive Control: The material used to contaminate the line (e.g., an ingredient or finished product). Tested once to confirm the allergen is detectable at expected levels [21].
- Post-Clean Samples: These demonstrate the effectiveness of the clean. They can be swabs from equipment surfaces, final rinse waters, or purge material. Focus sampling on the areas most challenging to clean (e.g., dead legs, seals, complex equipment) [21].
- Next Off-Line Product: The first product or ingredient that contacts the equipment after cleaning. This is the most direct measure of potential consumer exposure. Testing this is critical for risk assessment [21].
- Industry best practice is to repeat the entire validation exercise three times successfully (with non-detectable results for all post-clean and next off-line samples) to demonstrate consistency [21].
Allergen Cleaning Validation Workflow
Experimental Protocols: Allergen Cleaning Validation
Detailed Methodology for Allergen Cleaning Validation
This protocol provides a step-by-step guide for validating the effectiveness of cleaning procedures in removing allergenic material from shared equipment [21].
Objective: To demonstrate that the current cleaning procedure reduces residual allergenic protein to a non-detectable level, thereby preventing cross-contact.
Step-by-Step Workflow:
- Allergen Mapping: Document all allergens present in the facility. Create a list and/or flow diagram identifying every ingredient, intermediate, and finished product, along with their specific allergens, and trace their movement through the production process [21].
- Allergen Risk Assessment: Conduct a risk assessment to identify all points where cross-contact could occur. Determine where cleaning is a key control measure. Prioritize these areas for validation [21].
- Validation Planning:
- Target Allergen Selection: Choose the most challenging allergen to clean (e.g., high protein, powder-based, sticky consistency) as your target for a worst-case validation [21].
- Define Acceptance Criteria: The criterion for success is a non-detectable level of the target allergen in all post-clean and next off-line samples [21].
- Determine Sampling Locations: Identify the hardest-to-clean areas on the equipment (e.g., interfaces, valves, pumps, conveyor belts) [21].
- Select Testing Method: Engage an accredited laboratory and select a quantitative ELISA method specific to the target allergen protein. The laboratory should perform spike recovery testing on the relevant product matrices to confirm the method's suitability [21].
- Execute Sampling Plan (Three Successful Rounds):
- Round 1:
- Contaminate the line with the "positive control" material.
- Execute the standard cleaning procedure.
- Collect and submit post-clean samples (swabs/rinse water) and the next off-line product for analysis.
- If all results are non-detectable, proceed to Round 2.
- Round 2 & 3: Repeat the exact process of Round 1. The validation is only successful if three consecutive rounds show non-detectable results for all critical samples [21].
- Round 1:
- Analysis and Documentation: Document all procedures, sample points, test results, and any deviations. A successful validation provides evidence that the cleaning procedure is effective and consistent. If any sample shows a detectable result, the round fails. Investigate the root cause, implement corrective actions, and restart the validation from the beginning [21].
The Scientist's Toolkit: Research Reagent Solutions
Table 3: Essential Materials for Allergen Detection and Analysis
| Reagent / Material | Function in Experimental Protocol | Key Considerations for Use |
|---|---|---|
| ELISA Test Kits | Quantitative detection of specific allergen proteins in samples (swabs, rinse water, food) [21]. | Must be validated for the specific target allergen and sample matrix (e.g., surface swab, finished product). Check for cross-reactivity with other ingredients [21]. |
| Surface Swabs | Collection of residual protein from equipment surfaces post-cleaning for laboratory analysis [21]. | Use swabs compatible with the chosen ELISA kit. Follow standardized swabbing techniques and patterns for reproducible results. |
| Positive Control Material | The substance used to contaminate the line during validation; provides a known positive for the assay [21]. | Should be representative of the worst-case scenario material (e.g., high-protein ingredient, finished product). Test once to confirm expected allergen level [21]. |
| Reference Materials | Certified calibrants and controls used to standardize and validate analytical methods. | Essential for ensuring the accuracy and precision of quantitative results. Use matrix-matched materials when possible. |
| Allergen-Specific Antibodies | The core component of ELISA kits; provides the specificity to bind and detect the target allergen protein. | Understanding the antibody's epitope (the specific part of the protein it binds to) is important, as processing can alter protein structure and detectability. |
The Fundamental Difference: Removal vs. Inactivation
Why is the approach to cleaning allergens fundamentally different from microbial sanitization?
The core difference lies in the objective: allergen control requires the physical removal of protein residues, whereas microbial control focuses on the inactivation or killing of microorganisms through chemical or thermal means [22].
An allergen is a substance, often a food protein, that can trigger an adverse immune reaction in sensitized individuals [23]. These reactions are caused by specific proteins (e.g., tropomyosin in crustaceans and insects, or storage proteins in peanuts) that can remain immunologically active even if the microorganism carrying them is dead [23]. Therefore, the hazard is the physical presence of the protein residue itself. Merely killing a bacterium or mold spore does not eliminate the allergenic potential of the protein; it must be physically removed from the surface [22].
- Allergen Cleaning Goal: Physically remove protein residues to a level below which they pose no significant risk. The industry best practice is often to aim for non-detectable levels using sensitive analytical methods [21].
- Microbial Sanitization Goal: Inactivate or kill microorganisms to a level that is safe for public health, typically measured by log reductions in microbial population.
Table 1: Core Differences Between Allergen and Microbial Cleaning
| Aspect | Allergen Control | Microbial Control |
|---|---|---|
| Primary Goal | Physical removal of protein residues [22] | Inactivation or killing of microorganisms |
| Key Hazard | Protein structure and epitopes that trigger immune response [23] | Viable microorganisms (bacteria, viruses, fungi) |
| Validated Via | Protein-specific tests (ELISA, LFDs); visual inspection [21] | Microbial swabs, ATP monitoring, contact plates |
| Verification Tools | Allergen-specific Lateral Flow Devices (LFDs), protein swabs (e.g., AllerSnap), ELISA lab testing [21] [24] [22] | ATP bioluminescence, microbial culture, pathogen-specific tests |
Key Concepts: Validation vs. Verification
What is the difference between validating and verifying an allergen cleaning procedure?
In the context of allergen management, validation and verification are distinct but complementary processes [25].
- Validation is the process of gathering evidence to prove that a designed cleaning regime can effectively and repeatedly remove allergen soils to an acceptable level. It is conducted prior to implementation to demonstrate that the cleaning objectives have been met. Validation should be performed under a "worst-case scenario" to ensure robustness [21] [22].
- Verification proves that the validated cleaning procedure was performed correctly and remains effective during routine operations. It is an ongoing activity conducted after cleaning, such as through visual inspection, rapid protein tests, or ATP monitoring [25] [22].
Validation and Verification Workflow
Troubleshooting Common Allergen Cleaning Issues
FAQ 1: Our rapid protein test shows a "pass" after cleaning, but subsequent product testing detects allergens. What could be the cause?
This discrepancy can arise from several factors:
- Insufficient Method Sensitivity or Specificity: The on-site rapid test (e.g., a protein swab or LFD) may not be sensitive enough to detect low levels of the specific allergenic protein, whereas a more sensitive lab method (like ELISA) used on the product can [22]. The rapid test might also be affected by the food matrix or cleaning chemical residues, interfering with the result.
- Improper Sampling Location: The rapid test might have been performed on an easily cleaned surface, while the allergen residue remained trapped in a hard-to-clean area (e.g., a dead leg in a pipe, a crevice, or behind a seal) that later contaminated the product [21] [22].
- Post-Cleaning Contamination: The equipment may have been re-contaminated after the verification swab was taken, for example, from airborne dust, improper handling, or an adjacent unclean surface.
FAQ 2: How do we select the correct target allergen for a cleaning validation study?
The selection should be based on a scientifically justified "worst-case scenario" to ensure the cleaning validation is robust [21] [22]. Consider the following criteria, which should be documented in your risk assessment:
- Difficulty of Removal: Choose the allergen or soil that is most adherent and difficult to clean from the equipment.
- Protein Content and Allergen Potency: Prioritize ingredients with high protein content and known high allergenicity.
- Concentration: Use the formulation where the allergen is present at the highest level.
- Physical State: Powders (e.g., milk or egg powder) can become airborne and be more challenging to remove than liquids.
Validating for the worst-case scenario can often provide assurance that the cleaning procedure will be effective for other, less challenging allergens used on the same line [22].
FAQ 3: What is the role of ATP monitoring versus allergen-specific tests in an allergen control program?
ATP (Adenosine Triphosphate) monitoring and allergen-specific tests play different, complementary roles:
- Allergen-Specific Tests (LFDs, ELISA): These are verification tools for the specific hazard (the allergenic protein). They are necessary to directly demonstrate the absence of the specific allergen residue after cleaning [21] [22].
- ATP Monitoring: This is a general hygiene indicator. It detects residual organic matter (from any biological source, including allergens, microbes, and general food soil) but does not specifically detect allergenic protein [22]. It is excellent for monitoring the overall effectiveness of the cleaning process in real-time.
It is possible to use ATP for frequent verification (e.g., daily) if a correlation has been established during the validation process that demonstrates an absence of detectable allergen residue at a certain ATP level [22].
Experimental Protocols for Allergen Cleaning Validation
A well-designed validation study is critical for proving a cleaning protocol's effectiveness. The following workflow and table detail the key steps and considerations.
Cleaning Validation Protocol Workflow
Table 2: Experimental Protocol for Allergen Cleaning Validation
| Protocol Step | Key Activities & Methodologies | Rationale & Technical Notes |
|---|---|---|
| 1. Pre-Study Planning | - Allergen Mapping: Document all allergens present in the facility and their flow [21].- Risk Assessment: Identify where cross-contact could occur and where cleaning is a key control measure [21].- Define "Worst-Case": Select the target allergen/product based on highest protein, most difficult soil to clean, and highest concentration [21] [22]. | Provides a science-based justification for the study design. The worst-case scenario ensures that a successful validation covers less challenging situations [22]. |
| 2. Method Selection | - Primary Method: Use a quantitative ELISA where possible, as it detects protein and provides concentration data within a range [21].- Alternative Methods: Use PCR only if no suitable ELISA exists (e.g., for celery), noting it detects DNA, not protein [21].- Spike Recovery: Conduct with the "next off-line" product to ensure the test can detect the allergen in that matrix [21]. | The protein is the hazard, so the method must detect it. ELISA is the gold standard for validation. Spike recovery validates the test method for your specific product [21]. |
| 3. Sampling Strategy | - Sample Types: - Positive Control: The allergenic material used to soil the line. - Post-Clean Samples: Environmental swabs from worst-case locations (e.g., hard-to-clean areas), rinse waters, or purge material [21]. - Next Off-Line Product: The first product run after cleaning—this is the ultimate test of consumer exposure [21].- Sampling Locations: Focus on areas hardest to clean (e.g., seals, joints, dead legs) [21] [22]. | Directly measures what the consumer will be exposed to. Sampling the hardest-to-clean areas provides confidence that easier areas are also clean [22]. |
| 4. Study Execution | - Replicates: Perform the entire clean-sampling cycle three consecutive times with successful results to demonstrate consistency [21].- Variables: Conduct studies across different shifts and operators to prove robustness [21]. | A single successful clean could be a fluke. Three consecutive successes under varying conditions provide statistical confidence in the procedure's reliability. |
| 5. Acceptance Criteria & Data Analysis | - Objective: Industry best practice is to achieve non-detectable levels of the allergen in all post-clean and next off-line samples [21].- Action on Failure: Any detected result fails that validation round. An investigation must be conducted, the cleaning procedure modified, and the entire 3-round validation repeated [21]. | Establishes a clear, health-protective standard. A rigorous corrective action process is essential for maintaining the integrity of the validation. |
The Scientist's Toolkit: Key Research Reagent Solutions
Table 3: Essential Materials for Allergen Cleaning Research
| Item / Reagent Solution | Function in Allergen Cleaning Research |
|---|---|
| ELISA Test Kits | Quantitative detection and measurement of specific allergenic proteins in samples collected during validation studies (e.g., from swabs, rinse water, or food products) [21]. |
| Lateral Flow Devices (LFDs) | Rapid, on-site qualitative or semi-quantitative verification of the presence or absence of a specific allergen on surfaces after cleaning [22]. |
| General Protein Swabs (e.g., AllerSnap) | Non-specific detection of protein residues on surfaces for routine verification. Provides a colorimetric result (green for clean, purple for dirty) indicating general protein removal [24]. |
| ATP Monitoring System | Verification of general hygiene and cleaning effectiveness by measuring Adenosine Triphosphate, a molecule found in all biological cells. Serves as a general hygiene indicator but is not allergen-specific [22]. |
| Positive Control Material | A characterized sample of the allergenic ingredient or product used to confirm that the analytical method (ELISA, LFD) can detect the target allergen as expected [21]. |
| Spike Recovery Samples | Samples of the "next off-line" product that have been intentionally contaminated (spiked) with a known amount of the allergen. Used to validate the analytical method's ability to recover and detect the allergen from a specific food matrix [21]. |
The Critical Role of Hygienic Equipment Design in Prevention
FAQs: Your Hygienic Design Questions Answered
Q1: What are the most common equipment design flaws that hinder effective cleaning and lead to allergen cross-contact?
Design flaws often create harborage points where allergens can accumulate and evade cleaning. Key problem areas include:
- Dead Legs in Piping: Stagnant zones in unused piping where product can accumulate [26].
- Hollow Rollers and Components: Internal volumes that cannot be inspected or cleaned [26].
- Poor Welds and Surface Finishes: Rough, pitted, or cracked surfaces that trap residue [26].
- Inaccessible Areas: Gaps between guards and frames, underneath belts, and areas around tensioners [26].
- Equipment with Tool-Locked Disassembly: Parts that require tools for removal are less likely to be fully disassembled and cleaned during changeovers [26].
Q2: How do we validate that our equipment design is truly cleanable?
Validation is a documented process proving your cleaning procedure consistently removes residues to acceptable levels [27]. It involves:
- Risk-Based Sampling: Identifying and swabbing worst-case, hard-to-clean locations (e.g., seal jaws, transfer points, internal welds) [28] [26].
- Analytical Testing: Using sensitive methods like ELISA (1-5 ppm detection) or Lateral Flow tests (5-10 ppm detection) to quantify specific allergen residues after cleaning [26].
- Data-Driven Acceptance Criteria: Establishing a passing threshold, such as a negative allergen test result or a specific ppm level, to prove the cleaning process is effective [26].
Q3: Our facility handles both allergenic and non-allergenic products. What is the single most impactful design strategy to prevent cross-contact?
Physical segregation and zoning is the most impactful strategy [26]. This involves:
- Dedicated Equipment Lines: Where possible, use separate packaging lines for allergenic and non-allergenic products [26].
- Color-Coding: Implement a facility-wide color-coding system for tools, change parts, and utensils used in specific allergen zones (e.g., orange for nuts, purple for dairy) [26].
- Badge-Restricted Access: Controlling and logging personnel entry into high-risk zones to prevent inadvertent allergen transfer [26].
Q4: We are retrofitting older equipment. What retrofits give the best return on investment for cleanability?
Focus on retrofits that eliminate major harborage points and improve access [26]:
- Replace hollow rollers with sealed, solid versions.
- Install quick-release mechanisms and tool-less fasteners on guards, belts, and catch pans to encourage proper disassembly for cleaning [26].
- Add sloped surfaces to flat areas where product dust can accumulate.
- Upgrade to FDA/EU-approved belt materials and ensure easy belt release for cleaning underneath [26].
Troubleshooting Guides
Problem: Consistent Allergen Test Failures After Cleaning
Investigate these potential causes:
- Inadequate Cleaning Procedure: The current procedure may not effectively remove the specific allergen (e.g., oily or sticky residues).
- Sampling Error: Swabs may not be taken from the actual contaminated (worst-case) location.
- Hidden Harborage Point: A newly identified design flaw (e.g., a crack or hollow component) is releasing residue after cleaning.
- Personnel Error: The validated procedure is not being followed correctly during routine operation.
Corrective Actions:
- Re-clean and Re-test: Perform an intensified, documented manual clean on the failed area and re-test [26].
- Re-train Operators: Verify all personnel are trained on the correct disassembly and cleaning techniques for that specific piece of equipment [26].
- Re-validate the Process: If failures persist, the cleaning process itself may need to be re-developed and re-validated to address the specific residue [29].
Problem: Unacceptable Downtime During Allergen Changeover Cleaning
Investigate these potential causes:
- Overly Complex Disassembly: The equipment requires excessive tool use and time to access critical parts.
- Inefficient Cleaning Method: The chosen method (e.g., full wet-clean) may be overkill for the specific residue or product type.
- Poorly Designed Cleaning Protocols: The procedure is not optimized for speed and efficiency.
Corrective Actions:
- Optimize Equipment Design: Retrofit with tool-less, quick-release fasteners and color-coded components to speed up disassembly [26].
- Select the Right Cleaning Method: Choose the least burdensome, effective method. For dry products, a validated dry-clean or vacuum-only process (1-2 hours) is far faster than a full wet-clean (4-8 hours) [26].
- Create Visual SOPs: Develop standard operating procedures with before-and-after photos to clearly show cleanliness standards and reduce decision time [26].
Data Presentation: Equipment Design & Validation Metrics
Table 1: Key Material and Design Specifications for Hygienic Equipment
Essential characteristics to specify when selecting or designing equipment to minimize allergen cross-contact risk.
| Specification | Minimum Standard | Rationale & Best Practices |
|---|---|---|
| Surface Material | 316 Stainless Steel (high-risk zones) [26] | Corrosion-resistant, non-porous, and able to withstand aggressive cleaning agents. |
| Surface Finish | #4 Brushed or better finish [26] | A smooth, polished finish (low Ra value) prevents residue from adhering to microscopic crevices. |
| Sealing (IP Rating) | IP66 or higher [26] | Protects against dust ingress and powerful water jets, enabling effective cleaning. |
| Fasteners | Tool-less (e.g., quarter-turn) [26] | Encourages complete disassembly for cleaning by reducing time and effort. |
| Belts & Conveyors | Quick-release, FDA/EU-approved materials, edge-sealed [26] | Enables cleaning of all contact surfaces and prevents fraying that can trap residue. |
| Welds | Continuous, ground, and polished smooth [26] | Eliminates pits and cracks that can become bacterial and allergen harborage points. |
Table 2: Validation Methods and Action Limits for Allergen Control
A comparison of common testing methods used to validate cleaning effectiveness on equipment surfaces.
| Test Method | Detection Limit | Time to Result | Primary Use | Action if Positive [26] |
|---|---|---|---|---|
| ELISA | 1 - 5 ppm | 2 - 4 hours | Quantitative validation of allergen removal. | Stop production. Re-clean and investigate root cause. |
| Lateral Flow | 5 - 10 ppm | 10 - 20 minutes | Rapid, qualitative verification during changeover. | Immediate re-clean of the specific area. |
| ATP | N/A (general soil) | 1 - 2 minutes | General hygiene monitoring (not allergen-specific). | Re-clean if >100 RLU; does not confirm allergen removal. |
| Visual Inspection | Presence/Absence | Immediate | Basic check for gross particulate or residue. | Remove all visible residue. |
Experimental Protocols
Protocol 1: Swab Sampling for Allergen Residue Recovery
This protocol details the methodology for collecting residue samples from equipment surfaces to validate cleaning effectiveness, based on standard practices in pharmaceutical and food manufacturing [30] [31].
1. Scope: Applicable for sampling flat or irregular equipment surfaces (e.g., stainless steel panels, conveyor belts, tool parts).
2. Responsibilities: Trained quality control or sanitation personnel.
3. Materials:
- Polyester or cotton swabs with plastic handles [30] [31].
- Appropriate extraction solvent (e.g., mobile phase for HPLC analysis) [30].
- Test tubes or vials for sample extraction.
- Template for defining swab area (e.g., 10 cm x 10 cm).
4. Procedure: 1. Swab Preparation: Moisten the swab tip with the designated solvent. Gently press out any excess liquid to avoid unnecessary dilution [31]. 2. Sampling: - Place the template over the surface area to be sampled. - Wipe the area systematically using horizontal parallel strokes, rotating the swab between fingers to use all sides [30]. - Repeat with vertical perpendicular strokes to ensure maximum coverage [30] [31]. 3. Sample Extraction: - Place the used swab into a test tube containing a known volume of solvent. - Sonicate the tube for 10-15 minutes to extract residues from the swab [31]. 4. Analysis: Filter the extract and submit it for analysis via a validated method (e.g., HPLC, ELISA) [31].
Protocol 2: HPLC-DAD Method for Quantifying Residues
This High-Performance Liquid Chromatography with Diode-Array Detection (HPLC-DAD) method is validated for the trace-level quantification of specific residues, such as Active Pharmaceutical Ingredients (APIs) or allergenic proteins, from swab samples [31] [32].
1. Scope: Quantitative analysis of specific residues in swab and rinse samples.
2. Chromatographic Conditions (Example for Nabumetone API [31]):
- Column: Phenomenex Luna C18 (25 cm x 5 μm x 4.6 mm i.d.)
- Mobile Phase: Methanol:Acetonitrile:Water (55:30:15, v/v/v)
- Flow Rate: 1.0 mL/min
- Detection Wavelength: 230 nm
- Injection Volume: 20 μL
- Column Temperature: Ambient
3. Solution Preparation:
- Standard Solution: Prepare a series of standard solutions from a reference standard to create a calibration curve, typically from LOQ to 200% of the target concentration [32].
- Sample Solution: Use the extract from the swab sampling protocol (Protocol 1). Filter through a 0.45μm syringe filter before injection [32].
4. Validation Parameters & Acceptance Criteria [32]:
- System Suitability: RSD of peak area from five replicate injections of standard should be NMT 2.0%.
- Linearity: Correlation coefficient (r) should be NLT 0.995 over the specified range.
- Accuracy/Recovery: Determined by spiking a known amount of analyte onto a surface (e.g., stainless steel plate) and calculating the percentage recovered. Recovery should be consistent and high (e.g., >90% [31]).
- Precision at LOQ: RSD of six injections at the Limit of Quantification should be NMT 10.0%.
Process Visualization
Cleaning Validation Lifecycle Flowchart: This diagram illustrates the continuous lifecycle of integrating equipment design with cleaning validation, emphasizing that validation is an iterative process that may require design changes.
The Scientist's Toolkit: Research Reagent Solutions
Table 3: Essential Materials for Cleaning Validation Studies
| Item | Function & Rationale |
|---|---|
| Polyester Swabs (e.g., Alpha Swab) | High-strength, low-lint material for consistent recovery of residues from equipment surfaces without introducing interference [31]. |
| HPLC-Grade Solvents (Acetonitrile, Methanol) | Used as diluents and in mobile phases for residue analysis due to high purity and effectiveness in solubilizing many APIs and organic residues [30] [31]. |
| Stainless Steel Coupons (SS 316L) | Representative test surfaces (e.g., 10x10 cm plates) used in laboratory recovery studies to validate swabbing techniques and analytical methods before field testing [32]. |
| ELISA Kit / Lateral Flow Devices | Immunoassay-based tests for specific, quantitative (ELISA) or rapid, qualitative (Lateral Flow) detection of protein allergens at ppm sensitivities [26]. |
| Reference Standards (API, Allergen) | Highly purified substances required to develop and validate analytical methods, create calibration curves, and ensure accurate quantification [31] [32]. |
Building Your Validation Protocol: A Step-by-Step Methodological Guide
Frequently Asked Questions
Q1: What is the fundamental difference between allergen cross-contact and cross-contamination? A1: Cross-contact refers specifically to the unintentional transfer of allergen proteins from one food to another. Cross-contamination involves the transfer of pathogenic microorganisms like bacteria or viruses. A critical distinction is that cooking can kill pathogens, but it does not eliminate or reduce the risk from allergen proteins [3].
Q2: Our facility is small and has limited resources. Is a full allergen mapping still necessary? A2: Yes, allergen mapping is a foundational step for any facility size. It is required by food safety standards like the BRCGS Global Food Safety Standard [33]. For a smaller facility, a simplified map that tracks allergen movement can effectively identify risks and is more efficient than dealing with a recall due to an undeclared allergen [21] [34].
Q3: How do we determine our "worst-case scenario" for validation studies? A3: The worst-case scenario is built by evaluating several factors. You should identify the hardest-to-remove allergen, the product with the highest allergen concentration, processes that make the allergen harder to detect (e.g., heating), and the equipment surfaces most difficult to clean or that are left the longest before cleaning [21] [33] [22]. Validating against this scenario provides assurance for less challenging situations [21].
Q4: Can we use ATP testing for allergen cleaning verification? A4: ATP tests are hygiene indicators and cannot detect specific allergens. They measure overall organic residue (ATP, ADP, AMP). While a passing ATP test may suggest a low likelihood of allergen presence, it does not confirm the absence of allergenic protein. Its use should be correlated with allergen-specific methods like Lateral Flow Devices (LFDs) and is not suitable for validation [33] [22].
Q5: What should we do if our allergen cleaning validation fails? A5: A failure requires immediate corrective action. Begin with a Root Cause Analysis to determine why the cleaning procedure was ineffective [33]. Review the process, potential issues like chemical concentration, contact time, or equipment dismantling. After making corrections, the entire validation exercise (typically three consecutive successful rounds) must be repeated [21] [22].
The Scientist's Toolkit: Key Reagents and Materials for Allergen Validation
| Item | Function in Experiment |
|---|---|
| ELISA Test Kits | The recommended quantitative method for validation studies. These kits detect allergenic protein and provide concentration data within a range, which is essential for establishing baselines and acceptance criteria [21] [22]. |
| Lateral Flow Devices (LFDs) | Used for rapid, qualitative (yes/no) verification of surface cleaning after validation. They are designed for on-site use and must be correlated with quantitative methods during the validation process [33] [22]. |
| Surface Swabs | For direct sampling of food contact surfaces post-clean. Swabs must be compatible with the analytical method (ELISA or LFD) and used to collect samples from worst-case scenario locations [21] [22]. |
| Positive Control Material | A sample of the ingredient or product containing the target allergen at a high level. This control is tested once to confirm the analytical method can detect the allergen in the relevant matrix [21]. |
| Rinse Water Samples | An indirect sampling method, primarily for Clean-In-Place (CIP) systems. The final rinse water is collected and tested to represent what the next product will be exposed to [21] [25]. |
Allergen Risk Assessment Factors
The table below summarizes key factors to consider when assessing the risk level of different allergens and processes in your facility. This helps in prioritizing controls and validation efforts.
| Factor | High-Risk Scenario | Lower-Risk Scenario |
|---|---|---|
| Allergen Form | Powdered, easily aerosolized allergens (e.g., milk powder, wheat flour) [33]. | Solid, liquid, or whole allergens that are less prone to becoming airborne. |
| Protein Content | Allergen source with high protein content [21]. | Allergen source with lower protein content. |
| Process Impact | Processes that heat or bake the allergen, making residues harder to remove [33] [22]. | Cold processes with minimal physical or chemical change to the allergen. |
| Equipment Complexity | Equipment with hard-to-clean areas (e.g., valves, dead spots, conveyor belts) [34] [22]. | Equipment with simple, accessible, and smooth surfaces that are easy to disassemble and clean. |
| Production Scheduling | Short runs with frequent changeovers between allergen and allergen-free products [34]. | Long runs of the same product, with allergen production scheduled at the end of a cycle followed by a full clean [3]. |
Experimental Protocol: Conducting Allergen Mapping and Risk Assessment
Objective: To systematically identify and document the presence, movement, and potential cross-contact risks of allergens throughout your facility, establishing a science-based foundation for your control plan.
Methodology
Part A: Allergen Mapping
Create a Comprehensive Allergen Inventory:
Develop a Facility Flow Diagram:
Part B: Allergen Risk Assessment
Identify Cross-Contact Points:
- Using the allergen map, analyze each step to determine where allergens could unintentionally transfer to allergen-free products or lines. Common points include:
- Shared Equipment: Using the same mixer, conveyor, or filler for multiple products [3].
- Shared Storage & Handling: Bulk ingredient storage, scoops, utensils, or rework practices [34].
- Personnel Movement: Employees moving between allergen and non-allergen zones without proper hygiene practices [34].
- Airborne Dust: Generation of dust during weighing or pouring of powdered allergens [33].
- Using the allergen map, analyze each step to determine where allergens could unintentionally transfer to allergen-free products or lines. Common points include:
Evaluate and Rank the Risks:
- For each identified risk point, assess the severity and likelihood of cross-contact. Use a risk matrix to rank risks as high, medium, or low. Consider factors from the table above, such as allergen form and processing impact [33].
Determine Necessary Controls:
- For each high-risk point, determine the appropriate control measure. This could be dedication of equipment, physical segregation, production scheduling, or validated cleaning procedures [34]. This process will identify where cleaning is a key control measure and where validation work must be carried out [21].
What defines a "worst-case scenario" in cleaning validation?
In cleaning validation, a worst-case scenario refers to a condition or set of conditions that pose the greatest chance of process or cleaning failure when compared to ideal conditions [35]. It does not necessarily induce failure but represents the most challenging situation for which your cleaning protocol must be validated to ensure effectiveness under all circumstances [35]. For allergen control, this means identifying the specific combination of product soil, allergen characteristics, and process parameters that would be most difficult to remove during cleaning.
What criteria are used to select the worst-case scenario for soil and allergens?
Selecting the worst case involves a comprehensive risk assessment based on the properties of the product (soil), the equipment, and the manufacturing process. The following criteria should be systematically evaluated [35] [36] [22].
Table: Criteria for Selecting Worst-Case Scenarios for Soil and Allergens
| Criterion | Rationale for Worst-Case Selection | Example / Application |
|---|---|---|
| Solubility of Residue | Residues with low solubility in the cleaning agent are harder to dissolve and remove [36]. | A product with a water-insoluble Active Pharmaceutical Ingredient (API) is a worse case than one that is freely soluble [36]. |
| Potency & Toxicity (LD₅₀) | Highly potent or toxic products require lower acceptable carryover limits, increasing cleaning stringency [35] [36]. | A product with a lower LD₅₀ value (more toxic) or higher potency is considered a worse case [35]. |
| Concentration of API/Allergen | Higher concentration of an active substance increases the risk of contaminating the next product [36]. | A formulation with a high percentage of a potent API is a primary candidate for worst-case [36]. |
| Adherence & Physical Properties | Sticky, gummy, or colored residues can be more challenging to remove and verify visually [35] [36]. | Products like ointments or those with intense coloring agents are often selected as worst-case soils [36]. |
| Microbial Growth Support | Residues containing excipients that support microbial growth (e.g., sugars, starches) pose an additional contamination risk [35] [36]. | Products manufactured by aqueous granulation or containing lactose/sucrose are considered worst-case [36]. |
The worst-case scenario is often a product or process that scores high across multiple criteria. For instance, the worst-case soil could be the product with the least soluble API, highest potency, and a formulation that supports microbial growth [35] [22].
What process conditions constitute a worst-case scenario?
Beyond the soil itself, the conditions under which the equipment is used and cleaned define the worst case. These process factors must be integrated into your validation study [35] [37] [22].
Table: Worst-Case Process Conditions in Cleaning Validation
| Process Factor | Worst-Case Condition | Impact on Cleaning Validation |
|---|---|---|
| Equipment Design | Equipment with complex geometry, hard-to-reach areas, or non-sanitary design (e.g., ball valves) [37]. | Creates niches where soil can hide and are shielded from cleaning agents. Sampling must target these spots [38]. |
| Holding Time | The longest possible time between the end of processing and the initiation of cleaning [37]. | Allows residues to dry and bake onto surfaces, making them significantly harder to remove [37]. |
| Cleaning Parameters | Using the lowest allowable parameters within the validated range (e.g., temperature, chemical concentration) [22]. | Represents the least effective end of your cleaning process. Validation must prove it is still sufficient [22]. |
| Equipment Scale | The largest surface area of any single equipment train [38] [36]. | A larger soiled surface area increases the potential for residue carryover [36]. |
| Manufacturing Process | Processes involving high temperatures or long durations that can alter the soil's physical state [22]. | Can make soils more adherent and difficult to remove (e.g., baked-on residues) [22]. |
Worst-Case Scenario Identification Workflow
What is the experimental protocol for a worst-case validation study?
The following protocol outlines the key steps for executing a cleaning validation study under worst-case conditions [37] [22].
- Define Objective and Scope: Clearly state that the study aims to validate the cleaning procedure for the identified worst-case scenario (e.g., "Most difficult-to-clean Product X on the hardest-to-clean Equipment Train Y") [22].
- Develop a Validation Protocol: A pre-approved protocol is mandatory. It must specify [37]:
- Equipment and product: Identify the specific worst-case product and equipment train.
- Cleaning procedure: The exact procedure to be validated, including parameters at their worst-case setting (e.g., lowest temperature, minimum contact time).
- Sampling plan: Detail the sampling method (swab, rinse, or both) and the specific, justified "worst-case" locations on the equipment (e.g., dead legs, behind blades, near seals) [38].
- Analytical methods: Specify the validated methods with their detection limits.
- Acceptance criteria: The predefined limits for residue carryover (e.g., based on MACO, 10 ppm, or visual cleanliness).
- Execute the Cleaning and Sampling:
- Soil the equipment with the worst-case product.
- Subject the equipment to the worst-case holding time.
- Execute the cleaning procedure strictly as defined in the protocol.
- Perform a visual inspection. The equipment must be visibly clean before proceeding to analytical sampling [22].
- Collect samples from the predetermined worst-case locations [38].
- Analyze Samples and Interpret Data: Analyze the samples using the specified analytical methods. The data must demonstrate that all residues are below the acceptance criteria.
- Report and Document: Compile all data and observations into a final report. The conclusion must clearly state whether the cleaning process is validated for the worst-case scenario [37]. The validation should be repeated successfully for a minimum of three consecutive cycles to prove consistency [22].
What are essential research reagents and tools for these experiments?
A successful worst-case validation study relies on specific reagents and tools for sampling, analysis, and documentation.
Table: Research Reagent Solutions for Cleaning Validation
| Tool / Reagent | Primary Function | Application in Worst-Case Study |
|---|---|---|
| Validated Swabs | Physical collection of residues from equipment surfaces. | Used for sampling from worst-case locations (e.g., crevices, seals). Material must not interfere with the analytical method [37]. |
| HPLC/UPLC Systems | Quantitative analysis of specific Active Pharmaceutical Ingredients (APIs) with high sensitivity. | The gold standard for measuring specific chemical residues to confirm levels are below the calculated MACO [38]. |
| Total Organic Carbon (TOC) Analyzer | Non-specific measurement of organic carbon residues. | A worst-case method as it detects all organic matter; a passing TOC result provides high confidence of cleanliness [38]. |
| Lateral Flow Devices (LFDs) / ELISA Kits | Allergen-specific detection on surfaces or in rinse water. | Critical for validating allergen cleaning. LFDs are used for rapid verification, while ELISA provides quantitative data for validation [22]. |
| ATP Monitoring Systems | Measures Adenosine Triphosphate as an indicator of biological residues. | Used for routine verification. Correlation with allergen/protein removal must be established during validation [22]. |
| Reference Standards | Highly pure samples of the analyte (e.g., API, allergen). | Essential for calibrating analytical instruments and validating the accuracy and specificity of the analytical method [37]. |
How do I troubleshoot a failed worst-case validation study?
If the cleaning validation study fails to meet acceptance criteria, a structured investigation is required.
- Re-inspect and Re-sample: Conduct a more thorough visual inspection to identify any areas of visible residue that were missed. Re-sample the failed locations and new, adjacent worst-case spots to confirm the initial result.
- Investigate the Cleaning Process:
- Procedure Execution: Verify that the cleaning procedure was followed exactly as written. Review logs for parameters like time, temperature, and chemical concentrations.
- Operator Technique: For manual cleaning, assess the consistency and thoroughness of the operator's technique, which can be a significant source of variability [37].
- Investigate the Analytical Process:
- Sample Handling: Ensure samples were handled correctly (e.g., proper storage, no contamination, analyzed within hold time).
- Method Performance: Confirm the analytical method was performing to specification at the time of analysis.
- Re-evaluate the Worst-Case Rationale: Determine if the correct worst-case scenario was selected. A failure may indicate that another product or condition is actually more challenging to clean than previously thought.
- Implement and Document Corrective Actions: Based on the root cause, corrective actions may include [39]:
- Retraining personnel on the cleaning procedure.
- Revising the cleaning procedure to be more robust (e.g., longer contact time, different cleaning agent).
- Improving equipment design to eliminate cleanability issues.
- Updating the risk assessment and worst-case selection rationale.
- All changes must be documented, and the validation study must be repeated successfully after changes are implemented [39].
Within optimized cleaning validation protocols for allergen cross-contact research, the selection of an appropriate analytical method is a critical control point. The choice between Enzyme-Linked Immunosorbent Assay (ELISA), Lateral Flow Devices (LFDs), and Polymerase Chain Reaction (PCR) is not one of mere preference but should be dictated by the specific objective of the test, the nature of the sample matrix, and the required information—whether qualitative, semi-quantitative, or fully quantitative [40] [41]. These methods provide the essential data to validate that cleaning procedures effectively remove allergenic residues to levels deemed safe through risk assessment, thereby protecting consumer health and ensuring regulatory compliance [42] [43].
Method Comparison at a Glance
The following table provides a high-level comparison of the three primary analytical techniques to guide initial method selection.
Table 1: Comparative Overview of ELISA, LFD, and PCR for Allergen Detection
| Feature | ELISA (Enzyme-Linked Immunosorbent Assay) | LFD (Lateral Flow Device) | PCR (Polymerase Chain Reaction) |
|---|---|---|---|
| Target Molecule | Specific allergenic proteins [44] [45] | Specific allergenic proteins [44] [41] | DNA from allergenic species [41] [45] |
| Principle | Antibody-antigen binding in a plate well, with an enzyme-mediated colorimetric readout [41] | Antibody-antigen binding on a test strip, with a visual line for detection [44] | Amplification of species-specific DNA sequences [45] |
| Output | Quantitative (ppm or mg/kg) [44] [41] | Qualitative (Yes/No) or Semi-Quantitative [42] [44] | Qualitative or Semi-Quantitative [41] [45] |
| Sensitivity | High (detects low protein levels) [45] | High (comparable to ELISA for screening) [43] | Very High (detects trace DNA) [45] |
| Time to Result | ~2-3 days [45] | Minutes (< 30 minutes) [44] [41] | ~4-5 days [45] |
| Throughput | High (batch processing) [41] | Low (single tests) | Medium to High (batch processing) [41] |
| Equipment | Plate reader, pipettes, incubator [44] | Minimal to none [41] | Thermal cycler, DNA extraction equipment [44] |
| Best For | Regulatory compliance, validating "free-from" claims, quantitative risk assessment (e.g., VITAL) [40] [41] | Rapid on-site screening, raw material checks, hygiene monitoring via environmental swabs [40] [41] | Detecting allergens in processed foods, complex matrices, or when protein-specific antibodies are unavailable [41] [43] |
Detailed Methodologies and Experimental Protocols
ELISA (Enzyme-Linked Immunosorbent Assay)
ELISA is a plate-based technique prized for its quantitative accuracy and high specificity, making it a cornerstone for laboratory-based allergen analysis [41] [43].
Protocol Workflow: The most common format for allergen detection is the sandwich ELISA [45]. The workflow involves the following key steps:
- Step 1: Plate Coating. A microtiter plate is coated with a capture antibody that is specific to the target allergenic protein [45].
- Step 2: Sample Addition. The prepared food sample or surface rinse extract is added to the wells. If the target allergen is present, it binds to the immobilized capture antibody during incubation. The plate is then washed to remove unbound materials [41].
- Step 3: Detection Antibody Addition. A second antibody, specific to a different epitope on the same allergen and linked to an enzyme (e.g., Horseradish Peroxidase), is added. This forms an antibody-allergen-antibody "sandwich" [45]. Another wash step removes unbound detection antibody.
- Step 4: Substrate Addition. A substrate solution for the enzyme is added. The enzyme catalyzes a reaction that produces a color change [41].
- Step 5: Signal Measurement & Quantification. The reaction is stopped, and the intensity of the color is measured using a plate reader [44]. The optical density is compared to a standard curve created with known allergen concentrations to determine the precise quantity of allergen in the sample [41].
LFD (Lateral Flow Device)
LFDs, or immunochromatographic strips, are designed for rapid, on-site screening and provide results within minutes [44] [41].
Protocol Workflow:
- Step 1: Sample Application. The extracted sample (liquid) is applied to the sample pad of the test strip [44].
- Step 2: Capillary Flow. The liquid migrates laterally along the strip by capillary action. It first passes through a conjugate pad containing colored particles (e.g., colloidal gold) coated with antibodies specific to the target allergen. If the allergen is present, it binds to these antibodies, forming a complex [41].
- Step 3: Test Line Formation. The complex continues to flow until it reaches the test line, which contains immobilized antibodies specific to the same allergen. The complex is captured, forming a visible colored line that indicates a positive result. The intensity of the line can sometimes be correlated with concentration for semi-quantitative analysis [42] [44].
- Step 4: Control Line Formation. The flow continues to the control line, which contains antibodies that bind the colored particles regardless of the allergen's presence. The appearance of the control line confirms that the test has functioned correctly [41].
PCR (Polymerase Chain Reaction)
PCR is a molecular biology technique that detects the DNA of the allergenic species rather than the protein itself [45]. It is particularly valuable for complex, processed, or low-protein matrices [41].
Protocol Workflow:
- Step 1: DNA Extraction. DNA is purified and isolated from the food sample or environmental swab extract [45].
- Step 2: Reaction Setup. The extracted DNA is mixed in a tube with sequence-specific primers (short DNA fragments designed to bind only to DNA from the allergenic species of interest), nucleotides, and a heat-stable DNA polymerase enzyme [41].
- Step 3: Thermal Cycling. The mixture is placed in a thermal cycler, which undergoes repeated cycles of precise temperature changes:
- Denaturation: High heat (~95°C) separates the double-stranded DNA.
- Annealing: Lower temperature allows the primers to bind to their complementary target DNA sequences.
- Extension: The DNA polymerase enzyme builds new DNA strands from the primers. Each cycle theoretically doubles the amount of the target DNA sequence, leading to exponential amplification [41] [45].
- Step 4: Detection. In real-time PCR (qPCR), a fluorescent signal is measured during each cycle. The cycle at which the fluorescence exceeds a background threshold (Ct value) is related to the initial amount of target DNA, allowing for semi-quantification [43].
The Scientist's Toolkit: Essential Research Reagent Solutions
Table 2: Key Reagents and Materials for Allergen Detection Methods
| Item | Function | Key Considerations |
|---|---|---|
| Allergen-Specific ELISA Kit | Provides pre-coated plates, antibodies, standards, and buffers for quantitative analysis. | Must be validated for the specific food matrix. Check for target protein (e.g., casein vs. beta-lactoglobulin for milk) [40] [45]. |
| Lateral Flow Devices (LFDs) | For rapid, on-site qualitative screening of surfaces or rinse waters. | Select devices validated for environmental monitoring. Color intensity readers can enable semi-quantification [42] [40]. |
| PCR Reagents & Primers | For DNA extraction, amplification, and detection of allergenic species. | Primers must be highly specific to the target species. Not suitable for allergens low in DNA (e.g., egg whites, refined oils) [44] [41]. |
| Protein Extraction Buffer | To liberate allergenic proteins from the food matrix or surface for ELISA/LFD. | Critical for accuracy; must efficiently solubilize proteins without denaturing the antibody-binding epitopes [40]. |
| Swabs for Surface Sampling | To collect residues from equipment surfaces for subsequent analysis. | Material should not interfere with the assay. Follow a consistent and documented swabbing technique [42] [40]. |
| Reference Materials | Certified calibrants and control samples with known allergen concentrations. | Essential for method validation, creating standard curves, and ensuring accuracy and precision [43]. |
Troubleshooting Guides and FAQs
FAQ: Method Selection
Q1: When should I choose ELISA over an LFD? A: Choose ELISA when you need a quantitative, regulatory-grade result—for example, for final product verification, validating a VITAL risk assessment, or providing data for a "free-from" claim [40] [41]. Choose an LFD for rapid, qualitative screening at the production line, such as checking a piece of equipment after cleaning or screening incoming raw materials, where a yes/no answer is sufficient [40] [43].
Q2: Can PCR confirm the presence of an allergen? A: PCR confirms the presence of DNA from the allergenic species, not the allergenic protein itself [45]. This is a critical distinction. While it is excellent for detecting the species in complex or processed foods, a positive PCR result does not definitively prove the presence of the reactive protein hazard. It is best used when protein-based methods are unsuitable or for orthogonal confirmation [41] [43].
Q3: What is the main pitfall in interpreting allergen test results? A: The primary pitfall is not considering the sample matrix and food processing effects. Certain matrices (e.g., chocolate, spices) can interfere with protein extraction or antibody binding, leading to false negatives [40]. Additionally, processing (e.g., heating, fermentation) can alter protein structures, making them undetectable by some ELISA kits but still potentially allergenic [41]. Always use a method validated for your specific matrix and processing conditions.
Troubleshooting Guide: Common ELISA Issues
Table 3: Common ELISA Problems and Solutions
| Problem | Potential Cause | Solution |
|---|---|---|
| Weak or No Signal | Reagents not at room temperature [46].Expired or improperly stored reagents [46] [47].Insufficient incubation time or temperature [47]. | Allow all reagents to equilibrate to room temperature before starting [46].Confirm expiration dates and storage conditions [46].Adhere strictly to recommended incubation times and temperatures [46]. |
| High Background | Insufficient or inconsistent plate washing [46] [48].Contaminated buffers or reagents [47].Non-specific binding due to inadequate blocking [47]. | Follow washing procedure meticulously; ensure automated washers are calibrated [46] [48].Prepare fresh buffers and use fresh plate sealers [46].Consider increasing blocking agent concentration or incubation time [47]. |
| Poor Replicate Data (High CV) | Pipetting errors [47].Bubbles in wells [47].Inconsistent washing across the plate [48]. | Check pipette calibration and technique. Mix samples thoroughly before addition [47].Pop bubbles before reading the plate [47].Ensure plate washer tips are not clogged and wash buffer is dispensed evenly [48]. |
| Poor Standard Curve | Improper serial dilution of standards [46] [47].Degraded standard [47].Incorrect calculation or preparation [46]. | Double-check dilution calculations and technique. Vortex standards thoroughly during reconstitution [47].Use a fresh vial of standard and ensure proper storage [47]. |
Integrated Workflow for Cleaning Validation
A robust cleaning validation protocol often integrates multiple analytical methods to leverage their respective strengths. The following workflow outlines a strategic approach:
Conclusion: There is no single "best" method for allergen detection in cleaning validation. A strategic approach involves using LFDs for rapid, on-site verification to ensure a line is clean before production, and employing ELISA for quantitative validation and ongoing monitoring to generate precise data for your risk assessment framework. PCR serves as a powerful tool for troubleshooting and analyzing challenging matrices where protein detection fails. Understanding the principles, advantages, and limitations of each technology is fundamental to designing an optimized and defensible cleaning validation protocol.
Why is a strategic sampling plan non-negotiable in cleaning validation?
A strategic sampling plan provides documented evidence that your cleaning procedure effectively removes allergen or Active Pharmaceutical Ingredient (API) residues [25] [37]. Without proof, you cannot be sure that your cleaning process is and will remain adequate [25]. Regulatory bodies expect this scientific, data-driven approach to prevent cross-contamination and ensure patient or consumer safety [37] [49].
The core principle is to sample the worst-case scenarios [21] [22]. This means focusing on equipment locations that are hardest to clean and using the most difficult-to-remove soils during your validation study [30] [21]. A successful validation, typically demonstrated through three consecutive successful rounds, proves your cleaning process is robust and reliable [21] [50].
The following table summarizes the three primary sampling methods used in cleaning validation.
| Sampling Method | Best For | Key Advantage | Key Consideration | Sample Collection |
|---|---|---|---|---|
| Surface Swabbing [30] | Flat or irregular surfaces; direct sampling of defined areas (e.g., Petri dishes, spatulas) [30]. | Directly measures residue on the most challenging-to-clean surfaces [21]. | Recovery rate of the residue from the surface and into the analytical method must be determined [30]. | Swab a defined area (e.g., 100 cm²) with horizontal and vertical strokes [30]. |
| Rinse Waters [22] | Equipment with complex internal geometries (CIP systems, pipes, tubes) [30] [22]. | Samples the entire surface area that the solvent contacts, including inaccessible spots [22]. | An indirect method; assumes residue is soluble and evenly recovered by the solvent [30]. | Use a defined volume of solvent (e.g., 10 mL per item) with agitated rinsing [30]. |
| First Product Off the Line [21] | Any process where equipment is shared between product batches. | The only direct measure of what a consumer or patient will be exposed to [21]. | A detection of allergen here represents a direct risk [21]. | Collect the first ingredient or product that contacts the equipment after cleaning [21]. |
Detailed Experimental Protocols
Protocol 1: Surface Swabbing
This is a direct sampling method for recovering residues from defined contact surfaces [30].
- Swab Selection: Use a polyester swab for its strength and consistency [30].
- Swab Preparation: Pre-wet the swab with an appropriate solvent (e.g., acetonitrile or acetone for APIs; consult allergen test kit guidelines for allergens) to solubilize residues. Remove any excess solvent [30].
- Sampling:
- Sample Extraction:
- Place the swab head into a test tube containing a known volume of extraction solvent.
- Allow it to extract for a defined period (e.g., 10 minutes) to transfer residues from the swab into the solvent [30].
- Analysis: The extract is then subjected to analytical procedures (e.g., HPLC, ELISA) for residue quantification [30].
Protocol 2: Rinse Water Sampling
This indirect method is suitable for equipment that is difficult to disassemble or swab [30].
- Solvent Selection: Choose a solvent in which the target residue has high solubility (e.g., acetonitrile for Oxcarbazepine API, or a buffered solution for allergens) [30] [21].
- Rinsing Procedure:
- Use a defined volume of solvent (e.g., 10 mL total per equipment item) [30].
- Dispense approximately half the volume (5 mL) onto the equipment surface and agitate for a standardized time (e.g., 10 seconds). Collect this as the primary rinse.
- Repeat with the remaining solvent and combine the two rinses into a single composite sample [30].
- Sample Collection: Ensure you collect the final rinse water from a CIP system or a manual clean, as this most closely represents what the next product will be exposed to [21].
- Analysis: The composite rinse sample is analyzed directly or with dilution using validated analytical methods [30].
Protocol 3: First Product Off the Line
This protocol provides the most direct assessment of potential carryover into the next product batch [21].
- Sample Identification: The sample is the first ingredient or product that comes into contact with the equipment after the cleaning process is complete [21].
- Collection: For continuous processes (e.g., CIP systems), it is considered good practice to collect samples from the first, middle, and last product from the line to ensure consistent cleanliness throughout the production run [22].
- Analysis: The product sample is typically macerated or dissolved in a diluent and analyzed using a highly sensitive quantitative method, such as ELISA for allergens [21] [22].
Diagram 1: Strategic Sampling and Validation Workflow
The Scientist's Toolkit: Key Research Reagent Solutions
The following table lists essential materials and their functions for executing a strategic sampling plan.
| Tool / Reagent | Function in Sampling & Analysis |
|---|---|
| Polyester Swabs [30] | Surface sampling; selected for strength and consistency to maximize residue recovery from equipment surfaces. |
| Organic Solvents (e.g., Acetonitrile) [30] | API residue recovery; used to pre-wet swabs and for extracting residues from swabs or equipment due to high solubility for many APIs. |
| ELISA Kits [21] [22] | Allergen detection; the preferred quantitative method for detecting allergen protein in swab extracts, rinse waters, and product samples. |
| Lateral Flow Devices (LFDs) [22] | Rapid allergen verification; used for ongoing, on-site verification of surface cleanliness after validation is complete. |
| Phosphate-Free Detergent [30] | Cleaning agent; used in the cleaning process itself. Its residues must also be removed and verified. |
| ATP Monitoring Systems [22] | Hygiene indicator; used for routine verification to monitor general hygiene, but does not detect specific allergens or APIs. |
Frequently Asked Questions (FAQs)
What is the difference between cleaning validation and verification?
Validation is the process of gathering evidence to prove that a cleaning regime can effectively and repeatedly remove soils. It is done prior to implementation to demonstrate that cleaning objectives are met [25]. Verification is an ongoing process that proves the validated cleaning regime was performed correctly and remains effective each time it is used [25]. In short, validation proves the process works, while verification checks that the procedure was followed correctly for a specific batch [50].
How many successful rounds are needed to validate a cleaning process?
It is generally accepted that the validation process must be repeated successfully no fewer than three times to demonstrate consistency and robustness [21] [50]. These rounds should be consecutive and, where possible, include different operators or shifts to prove the clean is reliable regardless of who performs it [21].
Our swab results are inconsistent. What could be the cause?
Inconsistent swab results often point to issues with the technique itself, as it is a manual process. Key factors to investigate include:
- Recovery Efficiency: The analytical method's ability to recover the residue from the swab must be determined and be consistent [30].
- Technique Variability: Ensure all personnel are trained in a standardized method for swab pre-wetting, swabbing pattern (horizontal and vertical strokes), and pressure [30].
- Solvent Compatibility: The solvent used to pre-wet the swab and for extraction must effectively dissolve the target residue [30].
We detected residue in the "first product off the line," but not on swabs. Why?
This discrepancy can occur because the first product is the most direct measure of consumer exposure [21]. A negative swab only confirms cleanliness at the specific spot swabbed. The residue detected in the product may have been present on a surface that was not swabbed, such as an inaccessible area only contacted by the product or rinse water. This highlights the importance of using a combination of sampling methods (swabs, rinses, and product) for a comprehensive assessment [21] [22].
Frequently Asked Questions (FAQs)
FAQ 1: Why is a "worst-case" approach required in cleaning validation? A worst-case approach is a fundamental risk assessment practice required by regulatory guidelines to ensure that a cleaning process is effective under the most challenging conditions [35] [51]. By validating the cleaning procedure for the product or scenario that is hardest to clean, you can provide documented evidence that the same procedure will be effective for other, less challenging products manufactured on the same equipment [36] [51]. This prevents cross-contamination, which is critical for patient safety, especially with highly potent or allergenic substances [4] [35].
FAQ 2: How many replication runs are needed to prove consistency? To prove that a cleaning procedure is validated, you must successfully demonstrate its effectiveness in three consecutive runs [50]. This replication provides evidence that the cleaning process is consistent and reliable. These runs can be performed in a dedicated campaign or during routine production, provided the cleaning procedure and parameters remain unchanged [50].
FAQ 3: What is the difference between cleaning validation and cleaning verification? Cleaning validation is a one-time, documented process that proves a cleaning procedure can consistently and effectively remove residues to an acceptable level [25] [50]. Cleaning verification is a routine, batch-to-batch activity that confirms the cleaning procedure was performed correctly for a specific batch [50]. Validation establishes the procedure, while verification monitors its ongoing application.
FAQ 4: Our lab tests many different products. Must we validate cleaning for every single API? No. A practical and scientifically sound approach is to use a "worst-case" methodology [51]. By identifying the most difficult-to-clean Active Pharmaceutical Ingredient (API) based on criteria like solubility and toxicity, and then validating your cleaning procedure for that API, you can justify that the procedure is robust enough for other compounds that are easier to clean [36] [51].
Troubleshooting Guides
Problem 1: Cleaning Validation Failure - Residue Detected Above Acceptance Limit
- Potential Causes and Corrective Actions:
- Cause: Inadequate Cleaning Procedure.
- Action: Re-evaluate and optimize the cleaning parameters (e.g., contact time, cleaning agent concentration, mechanical action). The procedure may not be effective for the identified worst-case soil [26].
- Cause: Poor Sampling Technique.
- Action: Conduct recovery studies to validate your sampling method (swab or rinse) and ensure personnel are properly trained on the technique [51].
- Cause: Incorrect Worst-Case Selection.
- Cause: Inadequate Cleaning Procedure.
Problem 2: Inconsistent Results Between Replication Runs
- Potential Causes and Corrective Actions:
- Cause: Manual Process Variability.
- Cause: Equipment Condition.
- Action: Inspect equipment for surface damage, scratches, or worn parts that could harbor residue and affect cleanability [26].
Experimental Protocols
Protocol 1: Methodology for a Cleaning Validation Study
This protocol outlines the key steps for executing a cleaning validation study, incorporating worst-case parameters and replication.
- Pre-Study Prerequisites:
- Ensure the cleaning procedure is clearly defined in an approved SOP [50].
- Confirm equipment is properly calibrated and maintained.
- Execute Cleaning Post-Soil Application: After processing the worst-case product, perform the cleaning procedure exactly as specified in the SOP [50].
- Visual Inspection: Conduct a thorough visual inspection of all product contact surfaces. All surfaces must be free of any visible residues before proceeding to analytical sampling [25] [50].
- Sample Collection:
- Swab Sampling: Use pre-defined, validated sampling locations, focusing on worst-case areas like hard-to-clean spots or those with high product contact [50] [51]. Swab a standard surface area (e.g., 100 cm²) using a validated technique and solvent [51].
- Rinse Sampling: For equipment that is difficult to access for swabbing, collect a defined volume of the final rinse water [51].
- Sample Analysis: Analyze samples using validated analytical methods (e.g., HPLC, TOC, specific allergen tests) that are sufficiently sensitive to detect residues at or below the established acceptance criteria [26] [51].
- Data Review and Report: Compile all data from the three successful runs. The final report must conclusively demonstrate that the cleaning process consistently reduces residues to an acceptable level [50].
Protocol 2: Conducting a Recovery Study for Swab Sampling
A recovery study is essential to validate that your sampling method can adequately recover residues from equipment surfaces.
- Prepare Surfaces: Use coupons made of the same material as your production equipment.
- Apply Analyte: Spike the coupons with a known concentration of the worst-case API (or a surrogate).
- Sample Recovery: Allow the solvent to evaporate. Then, swab the coupon using the exact same procedure intended for routine validation.
- Extract and Quantify: Extract the analyte from the swab and quantify it using your analytical method.
- Calculate Percentage Recovery: (Amount Recovered / Amount Applied) x 100.
- Establish Acceptance: A consistent and acceptable recovery rate (e.g., >80%) must be demonstrated to prove the sampling method is valid [51].
Data Presentation
Table 1: Key Criteria for Worst-Case Product Selection
This table summarizes the primary factors to consider when identifying your worst-case product for a cleaning validation study [36] [35].
| Criterion | Description | Rationale for Worst-Case |
|---|---|---|
| Solubility | Solubility of the API in the cleaning agent (often water). | A product with an insoluble or poorly soluble API is harder to clean than one with a freely soluble API [36] [51]. |
| Potency & Toxicity | The pharmacological activity and toxicity of the API, often indicated by a low LD50 value or a low MACO (Maximum Allowable Carryover). | Highly potent or toxic products require more stringent controls, as even trace amounts can pose a significant risk [36] [35]. |
| Concentration of API | The percentage of the active ingredient in the product formulation. | A product with a higher concentration of API presents a greater contamination risk to the subsequent batch [36]. |
| Physical Properties | Characteristics such as color or stickiness. | Products with intense colors can be visually difficult to clean, and sticky residues may adhere strongly to surfaces [36]. |
| Microbial Growth | Whether the product formulation contains excipients that support microbial growth (e.g., sugars, starches). | Residues from such products can lead to microbial contamination if not properly removed [36]. |
Table 2: Comparison of Cleaning Verification Test Methods
This table compares common methods used for verifying cleanliness during or after a validation study [25] [26].
| Test Method | What It Detects | Detection Limit | Time to Result | Primary Use |
|---|---|---|---|---|
| ELISA | Specific allergenic proteins | 1 - 5 ppm | 2 - 4 hours | Validation & Verification |
| Lateral Flow | Specific allergenic proteins | 5 - 10 ppm | 10 - 20 minutes | Rapid Verification |
| ATP Bioluminescence | General organic residue (Adenosine Triphosphate) | N/A (general soil) | 1 - 2 minutes | Routine Verification |
| HPLC | Specific chemical/API residues | Varies (e.g., ppm/ppb) | 30+ minutes | Validation |
| Visual Inspection | Macroscopic residue | Presence/Absence | Immediate | Continuous verification during cleaning [25] |
Workflow and Relationship Visualization
Cleaning Validation Logic
The Scientist's Toolkit: Research Reagent Solutions
Table 3: Essential Materials for Cleaning Validation Studies
| Item | Function/Brief Explanation |
|---|---|
| Polyester Swabs | A standard tool for direct surface sampling. Selected for strength and consistency in recovering residues from defined surface areas [51]. |
| Appropriate Solvents (e.g., Acetonitrile, Acetone) | Used to pre-wet swabs and to extract residues from them for analysis. The solvent must be capable of effectively dissolving the target residue (API or allergen) [51]. |
| Validated Analytical Methods (HPLC, ELISA) | Highly sensitive techniques used to quantify specific chemical or protein residues at low levels (ppm/ppb) to prove they are below the acceptance limit [26] [51]. |
| ATP Bioluminescence Meter | A rapid monitoring tool that measures Adenosine Triphosphate to verify general cleanliness from organic matter. It is not specific for APIs or allergens [26]. |
| Reference Standards (APIs, Allergenic Proteins) | Highly purified materials used to calibrate analytical equipment and ensure the accuracy and specificity of residue detection methods [51]. |
Beyond Validation: Troubleshooting Failures and Optimizing Protocols
Fundamental Concepts: Validation vs. Verification
In allergen cleaning protocols, understanding the distinction between validation and verification is the first critical step in any root cause analysis following an unexpected positive result.
Cleaning Validation is the process of gathering evidence to prove that a cleaning regime can effectively and repeatedly remove allergen soils. It is carried out prior to implementation to demonstrate that cleaning objectives can be met. Validation uses quantitative, scientifically rigorous methods to establish that the procedure is capable of consistently achieving the predefined cleaning goal. [25] [5] [22]
Cleaning Verification proves that the validated allergen cleaning regime was performed correctly and remains effective, and is carried out on an ongoing basis after production cleaning has occurred. [25] [15]
The table below summarizes the key differences:
| Aspect | Validation | Verification |
|---|---|---|
| Purpose | Prove the cleaning procedure is effective and reproducible [25] | Confirm the procedure was followed correctly during routine use [25] |
| Timing | Prior to procedure implementation [25] | Ongoing, after production cleanings [25] [15] |
| Frequency | Initially and after significant changes (e.g., new product, equipment) [22] [15] | Routinely (e.g., daily, weekly, or at every changeover) [22] |
| Typical Methods | Quantitative tests (e.g., ELISA) [5] [22] | Rapid, on-site tests (e.g., LFDs, ATP, protein swabs) [5] [22] |
The Root Cause Analysis Framework for Unexpected Positives
When a verification test returns an unexpected positive result for an allergen, a structured Root Cause Analysis (RCA) is essential. RCA is a process used to understand the fundamental reasons why an issue occurred and to identify the most appropriate solutions to prevent recurrence. [52] The following workflow provides a systematic approach for investigators.
Phase 1: Detection - Defining the Problem
The first phase involves immediate containment and clear definition of the issue. [53]
- Contain the Affected Batch: Isolate the product and equipment associated with the positive test to prevent cross-contact.
- Form an RCA Team: Assemble a multi-departmental team (e.g., production, engineering, technical, hygiene) with the backing of senior management to ensure seamless collaboration and access to resources. [22]
- Create a Problem Statement: Write a clear, concise challenge statement explaining the gap (e.g., "LFD verification test for milk protein on Mixer B returned positive after standard CIP clean. This poses a potential undeclared allergen risk and violates our SQF allergen controls."). [54] [22]
Phase 2: Diagnosis - Investigating Contributing Factors
This investigative phase digs deep to understand the true source of the problem. [53] The goal is to move beyond symptoms and identify all underlying contributing factors, which can relate to people, processes, equipment, materials, and the environment. [52]
Employ Structured RCA Methodologies
The 5 Whys Technique A straightforward method of drilling down into a problem by persistently asking "Why?" until the root cause is uncovered. [53] For an unexpected positive:
- Why was the allergen test positive? Because allergen residue was present on the equipment after cleaning.
- Why was residue present? The cleaning protocol failed to remove it.
- Why did the protocol fail? The flow rate of the cleaning solution during the CIP cycle was below the required specification.
- Why was the flow rate low? The pump was operating below efficiency.
- Why was the pump inefficient? It had not been serviced according to the preventive maintenance schedule due to a scheduling error. -> ROOT CAUSE
The Fishbone (Ishikawa) Diagram This tool helps visually map out all potential causes of a problem across major categories. [52] [53] Use it in a team brainstorming session to explore all possibilities.
Phase 3: Fix - Implementing and Validating Solutions
The final phase focuses on resolving the immediate incident and implementing long-term preventive measures. [53]
- Generate and Select Solutions: Address the root causes identified in the Diagnosis phase. For example, if the root cause was a faulty pump, the immediate solution is repair, and the preventive action is to review and update the preventive maintenance schedule for all critical cleaning equipment. [54]
- Implement Corrective Actions: Execute the solutions, ensuring clear communication and allocation of responsibilities. [52]
- Verify Effectiveness and Prevent Recurrence: This is crucial. The cleaning process must be re-validated under the corrected conditions to prove effectiveness. [22] [15] Continue ongoing verification monitoring to ensure the fix remains effective. [22]
- Document and Share Lessons Learned: Create a detailed report and add it to a centralized knowledge repository. This prevents repetition of past mistakes and fosters a culture of continuous improvement and transparency. [53]
Researcher's FAQs and Troubleshooting Guide
Q: Our validation was successful, but we now get sporadic positive results during routine verification. What should we investigate?
A: Sporadic failures often point to a breakdown in the consistent execution of a validated process. Focus your RCA on:
- Human Factors: Check for inadequate training, especially for new staff, or deviations from the standard operating procedure (e.g., skipping steps under production pressure). [55]
- Equipment Reliability: Investigate intermittent mechanical issues, such as fluctuating water pressure, temperature, or chemical dosing inaccuracies in CIP systems. [22]
- Tool Contamination: Verify that cleaning tools themselves (brushes, scrapers) are being effectively cleaned and are color-coded to prevent cross-contact. [56]
- Sampling Error: Re-train staff on proper swabbing technique, including selection of worst-case locations (e.g., "hot spots" like seals, elbows, and dead ends). [22] [56]
Q: How do we determine the "worst-case scenario" for our cleaning validation studies?
A: A robust worst-case scenario is built on several factors to ensure your validation can handle the most demanding conditions: [5] [22]
- The Allergen: Choose the allergen that is most difficult to clean (e.g., sticky, powdered, or high-protein) used on the line.
- The Soil: Use the product or formulation with the strongest adhering soil or highest allergen concentration.
- The Process: Consider the longest processing time, highest temperature, or the longest equipment idle time before cleaning.
- The Equipment: Focus on the equipment with the most complex hygienic design or the areas hardest to clean (e.g., crevices, belts, valves). [22]
Q: We discovered our cleaning chemical concentration was sub-optimal. What steps must we take?
A: Any change to a critical cleaning parameter, including chemical concentration, necessitates a full re-validation. [15]
- Immediate Action: Stop production and adjust the chemical concentration to the correct, specified range.
- Re-validate the Protocol: Conduct a new validation study under the worst-case scenario, using the updated chemical concentration. This process must be repeated a minimum of three times to demonstrate consistency. [22]
- Update Documentation: Revise all relevant SOPs, Cleaning Instruction Cards (CICs), and training materials to reflect the new validated parameter. [22]
- Re-train Personnel: Ensure all cleaning and technical staff are trained on the updated procedure. [55]
Experimental Protocols: Core Steps for Validation & Investigation
A rigorous validation is the foundation for preventing unexpected positives.
- Determine the Objective: Define the goal: absence of detectable allergens on equipment and in subsequent product.
- Secure Organizational Support: Form a cross-functional team with management backing.
- Know the Hygienic Design: Identify equipment "hot spots" and hardest-to-clean areas.
- Review Current Programs & Regulations: Document the existing cleaning program and ensure compliance with health, safety, and efficacy regulations.
- Determine the Worst-Case Soiling Scenario: Select the most challenging allergen, soil, and process conditions.
- Plan Sampling: Define sampling types (visual, surface swabs, rinse water, product) and locations.
- Select Analytical Tests: Choose specific, sensitive, and reproducible methods (ELISA for validation, LFDs for correlation and verification).
- Execute the Validation: Run the validation a minimum of three times under the worst-case conditions.
- Interpret the Results: The clean is successful only if both surfaces and product are free of detectable allergen.
- Establish a Verification Routine: Use LFDs, ATP, or protein swabs for ongoing monitoring, setting targets based on validation data.
Protocol for Investigating a Positive Test Result
This protocol should be initiated immediately upon an unexpected positive verification test.
- Containment: Quarantine the equipment and any associated product.
- Visual Reinspection: Conduct a thorough visual inspection of the equipment, focusing on hot spots, with adequate lighting. [56]
- Resample: Have a qualified individual re-swab the same locations and new potential hot spots.
- Retest: Use a fresh, in-control test kit to analyze the new samples. Consider sending samples to an external lab for quantitative ELISA confirmation.
- Check for Obvious Causes: Verify cleaning chemical concentrations, temperatures, times, and equipment disassembly as per the SOP.
- Document Everything: Record all observations, test results, and actions taken in a dedicated log.
- Escalate to RCA: If the positive result is confirmed, initiate the formal Root Cause Analysis framework outlined in Section 2.
The Scientist's Toolkit: Essential Research Reagents & Materials
The following table details key materials and their functions in allergen cleaning validation and investigation.
| Item / Reagent | Primary Function | Key Considerations |
|---|---|---|
| ELISA Kits | Validation: Quantitative detection and quantification of specific allergenic proteins. [5] [22] | High sensitivity and specificity; requires lab equipment; used for definitive validation and confirmation. |
| Lateral Flow Devices (LFDs) | Verification: Rapid, qualitative (Yes/No) or semi-quantitative screening for allergens on surfaces. [5] [22] | On-site, quick results; ideal for routine monitoring; should be correlated with ELISA during validation. |
| ATP Monitoring Systems | Verification: Measures Adenosine Triphosphate as a general hygiene indicator for organic residue. [22] | Does not detect allergens specifically; can be used for verification only if correlation to allergen removal is proven. [22] |
| Protein Swabs | Verification: Detects general protein residue, which encompasses many allergens. [22] | Non-specific; a positive result indicates protein presence, not necessarily a specific allergen. [22] |
| Positive Control Samples | Method Suitability: Confirms the test kit can detect the target allergen in the specific food matrix and on process surfaces. [22] | Critical for validating the analytical method itself and accounting for matrix interference. |
| Surface Swabs | Sampling: Physical collection of residues from equipment surfaces for analysis. [22] | Material (e.g., cotton, flocked) and moistening buffer can affect allergen recovery; technique is critical. |
Equipment Hotspots and Common Cleaning Blind Spots
A technical support guide for researchers and scientists optimizing cleaning validation protocols to prevent allergen cross-contact.
FAQs
1. What are the most common equipment "hotspots" for allergen accumulation?
Hotspots are areas where product residue can accumulate and evade standard cleaning procedures. These are typically hard-to-reach areas, complex equipment geometries, or surfaces with difficult-to-clean materials. Common hotspots include [56] [57] [26]:
- Conveyors & Transfers: Belt returns, tensioners, tracking hardware, and the areas underneath belts and transfers.
- Mixers & Hoppers: Seals, gaskets, agitator shafts, and corners where residue can build up.
- Fillers & Weighers: Buckets, chutes, and shut-off valves on multi-head weighers and auger fillers.
- Pipework & Valves: "Dead legs" in piping (unused sections), the internals of pumps, and valve diaphragms.
- Packaging Equipment: Seal jaws on form-fill-seal machines, film former tubes, and product guides.
- General Equipment: Crevices in welds, corners, and any tool-less fasteners or guards that are not removed during cleaning.
2. Why is "visually clean" not a reliable indicator for allergen removal?
Visual inspection alone is insufficient because allergenic proteins can persist on surfaces at levels that are not visible to the naked eye but are still high enough to provoke an allergic reaction in sensitive individuals. Research demonstrates that surfaces appearing clean can retain varying amounts of allergenic protein. One study on commercial warewashing found that all materials tested retained sesame protein (1.6 - >10.0 mg/kg) after cleaning, despite being visually clean [58]. Therefore, validation through analytical testing is essential [57].
3. What is the critical difference between cleaning validation and verification?
- Validation is the collection of objective evidence to prove that a cleaning procedure is capable of consistently removing allergenic material to an acceptable level. It is typically performed during protocol establishment or when a process changes [59] [21].
- Verification is the routine checking, through methods like swab testing or visual inspection, that the validated cleaning procedure has been correctly followed during a specific cleaning event [57] [59].
4. When should dry cleaning versus wet cleaning methods be used?
The choice depends on the product format and the nature of the manufacturing environment [57] [26]:
| Method | Best For | Pros | Cons | Common Verification |
|---|---|---|---|---|
| Dry Cleaning | Low-moisture products (powders, flour, dry blends). | Prevents microbial growth; no drying time. | Less effective on oily/sticky residues; can redistribute dust. | Visual inspection, ATP swabs. |
| Wet Cleaning | Sticky residues, validated allergen removal. | Proven allergen removal; reaches crevices. | Requires downtime for drying; potential moisture/microbial risks. | Allergen-specific swabs (e.g., ELISA, Lateral Flow). |
| Vacuum-Only | Quick changeovers, same allergen family. | Fast; minimal equipment dismantling. | Limited effectiveness; risk of dust redistribution. | Visual inspection. |
5. What are the common blind spots in a cleaning validation program?
Blind spots are systematic oversights that can compromise an entire cleaning program. Key blind spots include [56] [57] [60]:
- Indirect Contact Surfaces: Failing to sample surfaces like equipment frames, lyophilizer shelves, or control panels that can transfer allergens via hands, tools, or airflow.
- Cleaning Tools Themselves: Neglecting to clean and sanitize brushes, scrapers, and vacuum nozzles, which can harbor and redistribute allergens.
- Over-reliance on Rinse Samples: Using only rinse water tests, which may not detect insoluble residues adhered to surfaces; a combination with direct swabbing is best.
- Inconsistent Risk Assessment: Using different sampling rationales across teams or sites for identical equipment, leading to non-comparable data.
- Material Variations: Assuming a cleaning process validated for stainless steel will be equally effective on polymer or rubber components, which can absorb residues.
Experimental Protocol: Validating an Allergen Cleaning Procedure
This protocol outlines a systematic approach to validate that a cleaning procedure effectively removes a specific allergenic material from a piece of equipment.
1. Pre-Validation Planning: Allergen Mapping and Risk Assessment
- Objective: Identify the target allergen and the equipment/line to be validated based on a risk assessment [21].
- Methodology:
- Create an allergen map of your facility, tracking where all allergens are used and stored.
- Perform a risk assessment to determine where cross-contact is likely. Focus validation efforts on equipment that processes your "worst-case" allergen—one that is present at high levels, has high protein content, and is hard to clean (e.g., sticky, powdery) [21].
- Develop a detailed validation plan specifying the target allergen, equipment, sampling locations, and test methods.
2. Selecting Sampling Locations and Methods
- Objective: Collect representative samples from the most challenging-to-clean locations.
- Methodology:
- Identify Worst-Case Locations: Consult with equipment manufacturers and sanitation staff to identify hotspots (e.g., interior of a mixer, conveyor belt seams, valve interiors) [56] [59]. Use a risk matrix to prioritize locations based on factors like dismantling complexity and cleanability [60].
- Choose Sampling Method:
- Swab Sampling: Ideal for defined, hard-to-reach surfaces. Provides direct measurement of residue on a specific area [59] [21].
- Rinse Sampling: Collect the final rinse water from a Clean-in-Place (CIP) system. This provides a composite sample of the entire system [57] [21].
- Next Off-Line Product: The most direct measure of consumer exposure is testing the first product run through the equipment after cleaning [21].
3. Execution and Analysis
- Objective: Generate data to prove the cleaning procedure's efficacy.
- Methodology:
- Positive Control: Test a sample of the material containing the allergen (e.g., the product just run) to confirm the test method can detect it [21].
- Perform Cleaning & Sample: After running the target allergen, execute the cleaning procedure exactly as written in the SOP. Collect post-cleaning samples (swabs, rinse water, and/or next off-line product) from the pre-determined locations.
- Analysis: Use a quantitative test method where possible, such as an ELISA (Enzyme-Linked Immunosorbent Assay), which detects allergenic protein. PCR is generally not recommended for cleaning validation as it detects DNA, not protein [21].
- Replication: Repeat the entire validation exercise (run allergen, clean, sample) three times to demonstrate consistency [21].
The following workflow diagrams the key stages of a robust cleaning validation and verification program, from initial setup to ongoing monitoring.
Risk Assessment for Sampling Locations
A systematic risk assessment is crucial for selecting appropriate equipment sampling locations. This diagram outlines the key factors to consider.
Research Reagent Solutions for Allergen Detection
The following table details key reagents and materials used in the validation and verification of allergen cleaning.
| Reagent / Material | Function & Application in Allergen Control |
|---|---|
| ELISA Test Kits | Function: Quantitative detection of specific allergenic proteins. Application: Used for precise measurement of allergen concentration in swab samples, rinse waters, and finished product during validation studies [58] [21]. |
| Lateral Flow Devices (LFDs) | Function: Rapid, qualitative (Yes/No) or semi-quantitative detection of allergens. Application: Ideal for routine verification swabbing on equipment surfaces after cleaning due to fast results (10-20 minutes), allowing for quick release of equipment [59] [26]. |
| ATP Monitoring Systems | Function: Measure Adenosine Triphosphate as an indicator of general biological residue. Application: Provides a rapid check for general cleanliness but is not allergen-specific. A low ATP reading does not confirm allergen removal [57] [26]. |
| Surface Swabs | Function: Physical collection of residue from a defined surface area. Application: Used to sample equipment hotspots directly. Swabs must be compatible with the extraction solution of the chosen test method (ELISA or LFD) [59] [21]. |
| Color-Coded Cleaning Tools | Function: Visual segregation of equipment by allergen type or zone. Application: Prevents cross-contact from cleaning tools themselves. For example, using orange-colored brushes and scoops exclusively for nut-containing lines [56] [26]. |
FAQs: Core Cleaning Principles
Q1: What are the fundamental parameters for optimizing a cleaning process? The cleaning process is governed by four key, interdependent parameters known as TACT: Time, Action (mechanical agitation), Chemistry, and Temperature [61]. These variables are proportional; optimizing one can allow for the reduction of another. For example, using a more effective chemical (Chemistry) or increasing mechanical agitation (Action) can reduce the required cleaning time or temperature [61].
Q2: How does the pH of a cleaning agent affect its function? The pH scale is fundamental to cleaning chemistry. Cleaning agents are formulated to be acidic (low pH) or alkaline (high pH) to target specific soil types [62]:
- Alkaline Cleaners (pH >7): Effective against organic soils like fats, oils, greases, and proteins. They work by breaking down these materials through a process called saponification [62] [63].
- Acidic Cleaners (pH <7): Effective against inorganic soils like mineral scales, rust, and lime scale [62].
Q3: What is the difference between cleaning validation and verification?
- Validation is the process of gathering documented evidence that a cleaning procedure can effectively and consistently remove residues (like allergens or active pharmaceuticals) to pre-defined acceptable levels. It is performed prior to implementing the procedure [21] [25].
- Verification is an ongoing activity, performed after a validated cleaning process, to prove that the procedure was carried out correctly during routine operations. This often involves post-cleaning visual inspections and rapid testing [25].
Q4: How do I select a "worst-case" scenario for an allergen cleaning validation study? To demonstrate robustness, your validation study should be based on the most challenging conditions. This involves selecting [21]:
- The hardest-to-clean allergen on your site (e.g., one with high protein content, low solubility, or that is present in high concentrations).
- The hardest-to-clean equipment (e.g., complex machinery with cracks, seals, or dead legs).
- The longest possible interval between cleans.
Troubleshooting Guides
Problem: Inconsistent Cleaning Results
| Potential Cause | Investigation Steps | Corrective Action |
|---|---|---|
| Insufficient Mechanical Action | Check for complex geometries, internal surfaces, and blind spots. Review agitation method (e.g., static soak vs. flow). | Increase agitation intensity. For pipelines, ensure turbulent flow. Consider ultrasonic agitation for complex parts [64] [65]. |
| Suboptimal Chemical Concentration | Verify dilution procedures and check for consistent mixing. Test for residue of the cleaning agent itself. | Re-train staff on proper dilution. Use measuring equipment. Re-validate the dilution ratio [62]. |
| Temperature Degradation | Monitor solution temperature at the point of use versus the source. Check for heat loss in long pipe runs. | Insulate pipes. Increase source temperature to compensate for loss, ensuring it remains within the chemical's safe and effective range [61]. |
Problem: Recurring Allergen Cross-Contact After Cleaning
| Potential Cause | Investigation Steps | Corrective Action |
|---|---|---|
| Ineffective Cleaning Protocol | Review validation data: was the study done on a true worst-case scenario? Check that the correct target allergen was used. | Re-design and re-validate the cleaning protocol using a true worst-case allergen and equipment setup [21]. |
| Soil Re-deposition | Inspect final rinse water for cloudiness. Check filters in recirculating systems. | Improve filtration to remove suspended soils from the cleaning solution. Optimize final rinse time and volume to ensure all residues are flushed away [64] [61]. |
| Poor Rinse Efficiency | Test for detergent residue on surfaces post-rinse. Evaluate rinse time and water volume. | Extend the final rinse time or increase rinse water volume. Ensure the rinse water temperature is appropriate to effectively remove the detergent without causing flash-drying [61]. |
Optimizing Cleaning Parameters: Experimental Protocols
Protocol 1: Optimizing Chemical Strength and Temperature for Soil Removal
This protocol is designed to find the most efficient and cost-effective combination of chemical concentration and temperature.
1. Objective: To determine the minimum chemical concentration and temperature required to effectively remove a specific soil within a set time frame.
2. Materials:
- Stainless steel coupons (or other relevant material)
- Soil of interest (e.g., allergen-rich product, protein residue)
- Selected cleaning agent (e.g., alkaline detergent)
- Heating bath or hot plate with temperature control
- Beakers and magnetic stirrer (for minimal, consistent action)
- Timers, pipettes, and PPE
3. Methodology:
- Soil Application: Apply a standardized, even layer of the soil to multiple coupons and allow it to dry.
- Experimental Matrix: Create a matrix that tests multiple variables simultaneously as shown in the table below.
- Cleaning Trial: Immerse each soiled coupon in a beaker containing the cleaning solution at the specified concentration and temperature. Use a magnetic stirrer to provide consistent, minimal agitation across all trials.
- Evaluation: After the set contact time, remove the coupon and rinse. Evaluate for soil removal visually and/or with specific residue tests (e.g., protein swabs).
Table: Example Experimental Matrix for Chemical & Temperature Optimization
| Trial | Cleaning Agent | Concentration (%) | Temperature (°C) | Contact Time (min) | Agitation | Result (Visual/Residue) |
|---|---|---|---|---|---|---|
| 1 | Alkaline Detergent | 0.5 | 25 | 10 | Stir bar (200 rpm) | Partial residue |
| 2 | Alkaline Detergent | 0.5 | 50 | 10 | Stir bar (200 rpm) | No residue |
| 3 | Alkaline Detergent | 1.0 | 25 | 10 | Stir bar (200 rpm) | No residue |
| 4 | Alkaline Detergent | 2.0 | 25 | 5 | Stir bar (200 rpm) | No residue |
| 5 | Acidic Detergent | 1.0 | 40 | 10 | Stir bar (200 rpm) | Heavy residue |
Protocol 2: Evaluating Agitation Methods for Complex Equipment
This protocol compares different agitation methods to maximize cleaning efficiency in hard-to-reach areas.
1. Objective: To evaluate the efficacy of different agitation protocols in removing soil from the internal surfaces of a complex apparatus.
2. Materials:
- Soil of interest
- Fixed equipment piece or scaled-down model with internal geometries
- Agitation systems to test (e.g., static soak, turbulent flow CIP, ultrasonic bath, manual brushing)
- Method for quantifying residue (e.g., allergen-specific ELISA test, TOC analysis)
3. Methodology:
- Soil Application: Contaminate the equipment piece with a known amount of soil, ensuring coverage of internal surfaces and hard-to-clean areas.
- Cleaning Process: Use a standardized cleaning solution and time for all trials. Only the agitation method should change.
- Sampling and Analysis: After cleaning and rinsing, take surface swabs or collect rinse water from the same location for each trial. Analyze samples for residual contaminant.
Table: Example Agitation Method Results (Based on Scientific Studies)
| Agitation Method | Relative Efficacy | Key Findings / Application Notes | Source |
|---|---|---|---|
| No Agitation (Static Soak) | Low | Relies entirely on chemical and time factors. Least effective for biofilms and tenacious soils. | [65] |
| Manual Agitation (Brush/K-File) | Low to Moderate | Effectiveness highly dependent on operator technique. May not access all complex geometries. | [65] |
| Sonic / EndoActivator | Moderate | Improves chemical penetration compared to no agitation. Good for loosening debris. | [65] |
| Ultrasonic Agitation | High | Creates microscopic cavitation bubbles that implode, dislodging contaminants from surfaces. Highly effective for complex shapes and apical areas. | [64] [65] |
| Turbulent Flow (CIP) | High | Effective for pipes and vessels without internal obstructions. Performance depends on achieving sufficient flow velocity. | [61] |
Workflow Visualizations
TACT Parameter Interrelationships
This diagram illustrates how the four key cleaning parameters are interconnected and can be balanced to achieve an optimal process.
Allergen Cleaning Validation Workflow
This workflow outlines the key steps for designing and executing a successful allergen cleaning validation study.
The Scientist's Toolkit: Research Reagent Solutions
Table: Essential Materials for Cleaning Validation Research
| Item / Reagent | Function in Cleaning Research |
|---|---|
| Commercial-Grade Alkaline Detergents | Formulated with surfactants and emulsifiers to break down and suspend organic soils like fats and proteins. More potent and reliable than consumer-grade products [62]. |
| Acidic Cleaners (e.g., Citric Acid, Phosphoric Acid) | Used to dissolve inorganic mineral deposits (e.g., lime scale, rust) that alkaline cleaners cannot remove. Essential for multi-step cleaning regimens [62] [66]. |
| Surfactants (Surface-Active Agents) | The workhorses of many cleaners. They reduce water's surface tension, allowing it to penetrate and lift soils from surfaces more effectively [62]. |
| Caustic Soda (Sodium Hydroxide) | A strong alkaline agent used in heavy-duty degreasers and for removing protein-based soils. Requires careful handling and concentration control [63]. |
| Quantitative ELISA Kits | Provide quantitative results for specific allergen proteins (e.g., peanut, milk) on surfaces or in rinse water, crucial for setting and verifying acceptance criteria in validation [21]. |
| Surface Swabs | Used to physically sample a defined area of equipment after cleaning to detect residual chemical or allergen contamination [21] [25]. |
| pH Test Strips / Meter | Critical for verifying the correct dilution of cleaning solutions, as their effectiveness is highly dependent on maintaining the proper pH [62]. |
| Ultrasonic Cleaning Bath | Provides high-energy agitation through cavitation, ideal for laboratory-scale cleaning trials of small parts and for validating agitation efficacy on soiled coupons [64] [65]. |
The Role of Visual Inspection as a Primary Verification Tool
Frequently Asked Questions
Q1: What is the fundamental principle of visual inspection in cleaning validation? Visual inspection is a non-destructive testing method based on the direct observation of surfaces to detect residues or contaminants that could lead to allergen cross-contact. The principle involves the systematic identification of surface anomalies—such as discoloration, staining, or particulate matter—that may indicate inadequate cleaning. Its efficacy relies on a well-defined process of surface preparation, illumination, observation, and documentation [67].
Q2: When is visual inspection required or sufficient as a stand-alone verification tool? Visual inspection is particularly useful as a primary verification tool for quick, cost-effective, and straightforward assessment. It is often employed for initial evaluations and routine checks of non-complex, readily accessible equipment surfaces. However, its suitability as a stand-alone method depends on the risk assessment. For allergens, which can be present even when visually undetectable, visual inspection is typically used in conjunction with other analytical methods (e.g., ATP bioluminescence, protein-specific tests) to validate cleaning efficacy, rather than as the sole verification tool [67] [68].
Q3: What are the most common pitfalls in visual inspection, and how can they be avoided? Common pitfalls include:
- Skipping documentation and using uncalibrated instruments.
- Compromising standards under schedule pressure.
- Poor communication and making assumptions instead of verifying findings.
- Inspector fatigue, which can reduce defect detection rates by 15-30% [69].
To avoid these, establish clear visual standards, provide ongoing inspector training, implement scheduled breaks and task rotation to manage fatigue, and maintain simple yet effective traceability for all inspected items [69].
Q4: How do I validate the efficacy of my visual inspection cleaning protocol? Validating a visual inspection protocol involves:
- Defining Clear Criteria: Establishing unambiguous, documented standards for what constitutes a "clean" and "contaminated" surface.
- Inspector Training and Qualification: Ensuring inspectors are trained and tested using a representative defect library. Industry certifications (e.g., AWS Certified Welding Inspector, ASNT NDT Level II) help standardize qualifications [69].
- Process Verification: Using a combination of methods. This can include the use of fluorescent markers, which are invisible under normal light but glow under UV light, to challenge and verify the inspector's ability to detect difficult-to-see residues [67] [69].
Q5: What advanced technologies are enhancing traditional visual inspection?
- Remote Visual Inspection (RVI): Uses borescopes and endoscopes to examine the interior of equipment like pipes and vessels without disassembly [67].
- Automated Visual Inspection (AVI): Employs machine vision systems and AI to carry out inspections with high precision, reducing human error and achieving defect detection rates of up to 99% in some applications [69].
- Digital Aids: High-resolution cameras and AI-driven software analyze images to identify subtle defects that might escape the human eye [69].
Troubleshooting Guides
Problem 1: Inconsistent results between different inspectors.
- Potential Cause: Lack of standardized acceptance criteria and variable inspector skill levels.
- Solution:
- Develop a Visual Standard: Create a defect library with photo examples of acceptable and unacceptable surfaces.
- Implement Structured Training: Conduct regular, hands-on training and refresher courses using this library. This can increase evaluation accuracy by up to 30% [69].
- Calibrate with Tools: Use UV lights and magnifiers to give inspectors a technological advantage [67].
Problem 2: Inability to inspect complex equipment or confined spaces.
- Potential Cause: Physical barriers preventing direct line-of-sight observation.
- Solution:
- Utilize RVI Tools: Deploy borescopes or flexible video scopes to access and inspect the internals of complex equipment like reactors, blenders, and fillers [67].
- Procedure: Document a mapping of all critical hard-to-reach areas in your equipment. Establish a standard operating procedure for RVI tool use, including how to document findings with captured images or video.
Problem 3: Suspected residue is not visible to the naked eye.
- Potential Cause: The residue is transparent, present in a very thin film, or the lighting is inadequate.
- Solution:
- Optimize Lighting: Use bright field illumination to spot surface details or dark field illumination to make edges and imperfections stand out. Adjust the light angle to improve contrast [69].
- Use Enhanced Visual Aids: Employ ultraviolet (UV) lights in conjunction with fluorescent markers or tracers. Apply the marker post-cleaning; any residual marker glowing under UV light indicates an area missed by the cleaning process [67].
Data Presentation: Visual Inspection Standards and Tools
Table 1: Comparison of Visual Inspection Types
| Inspection Type | Key Description | Common Tools | Best Use Cases in Cleaning Validation |
|---|---|---|---|
| Direct Visual Inspection (DVI) | Physical observation by an inspector using their eyes or basic tools [67]. | Magnifying glasses, mirrors, high-intensity flashlights, handheld UV lights [67] [69]. | Initial post-cleaning checks of simple, open surfaces (e.g., utensil tops, open vessel lids). |
| Remote Visual Inspection (RVI) | Inspection using devices to collect visual data from difficult or dangerous-to-access areas [67]. | Borescopes, endoscopes, robotic crawlers, drones [67]. | Inspection of equipment interiors (pipes, valves, tanks) without disassembly. |
| Automated Visual Inspection (AVI) | Computer-aided testing using machine vision and AI for high-precision analysis [67]. | Automated optical inspection (AOI) systems, AI-driven image analysis software, high-resolution cameras [67] [69]. | High-volume production environments; providing objective, consistent data for trend analysis. |
Table 2: Key Metrics and Improvements from Advanced Inspection Technologies
| Advancement Type | Measurable Improvement | Application in Validation |
|---|---|---|
| AI Integration | Defect detection rates up to 99%; real-time monitoring and predictive capabilities [69]. | Automated analysis of RVI footage or images from fixed cameras to identify potential residue. |
| Digital Documentation | Enhanced traceability; quick retrieval and sharing of inspection records [69]. | Creating a permanent, auditable record of post-cleaning equipment state for regulatory purposes. |
| Structured Inspector Training | Up to 30% increase in evaluation accuracy; 25% reduction in safety incidents [69]. | Ensuring human inspectors are a reliable source of verification. |
The Scientist's Toolkit: Research Reagent & Material Solutions
Table 3: Essential Materials for Visual Inspection in Cleaning Validation
| Item | Function | Application Note |
|---|---|---|
| High-Intensity Flashlight | Provides directed, bright light to illuminate surfaces and reveal shadows cast by minute particles or residue films [67] [69]. | Critical for inspecting poorly lit areas. Adjust the angle to graze the surface for best effect. |
| Handheld UV Light | Used to detect fluorescent dyes or markers that are invisible under normal light [67]. | Apply a fluorescent marker post-cleaning to challenge and validate the cleaning and inspection process. |
| Magnifying Glass | Enlarges the image of the object, allowing inspectors to see fine details and small particles not visible to the naked eye [67]. | Useful for inspecting small components, gaskets, and seals for particulate matter. |
| Digital Camera | Captures high-resolution images and videos for documentation, analysis, and creating a defect library [67] [69]. | Ensures findings are objectively recorded for review, analysis, and audit trails. |
| Borescope / Endoscope | A flexible or rigid tube with a camera and light source for inspecting the interior of equipment without disassembly [67]. | Essential for RVI of complex equipment like fillers, hoses, and valves to prevent allergen cross-contact. |
Experimental Protocols
Protocol 1: Validating Visual Inspection Efficacy Using Fluorescent Markers
- Surface Preparation: Clean the target equipment surface according to the standard protocol.
- Application of Challenge Agent: Apply a known amount of a fluorescent marker (e.g., a non-toxic dye) to critical, hard-to-clean areas of the equipment (e.g., behind blades, in pipe joints).
- Simulated Cleaning: Execute the cleaning procedure to be validated.
- Inspection with UV Light: In a darkened environment, inspect the marked areas using a handheld UV light. Any fluorescent glow indicates residual challenge agent and a failure of the cleaning process in that location.
- Documentation and Analysis: Document all locations where fluorescence is detected. Use this data to refine both the cleaning procedure and the inspector's focus during routine checks [67].
Protocol 2: Routine Post-Cleaning Visual Inspection for Allergen Control
- Pre-Inspection Preparation: Ensure the inspection area is well-lit. Clean and calibrate all inspection tools (e.g., flashlight, magnifier) [69].
- Systematic Examination: Methodically examine all product contact surfaces, starting from high-risk areas for residue accumulation (e.g., seals, hinges, dead legs). Use a borescope for internal surfaces [67] [68].
- Result Recording: Use a standardized checklist to record findings for each equipment piece. Note any visible residue, moisture, or particulate matter. Include photographic evidence where possible [69].
- Decision and Release: Based on the pre-defined acceptance criteria (e.g., "no visible residue"), approve the equipment for use or trigger a re-cleaning process.
Visualization of Processes
Visual Inspection Workflow for Cleaning Validation
Automated Visual Inspection Dataflow
In research and industrial settings focused on preventing allergen cross-contact, the human element is often the most variable and critical factor. Consistent application of cleaning validation protocols across different shifts, teams, and individual personnel is a significant challenge. Variations in training, execution, and verification can introduce gaps that compromise data integrity and product safety. This technical support center provides targeted guidance to help researchers, scientists, and drug development professionals identify and troubleshoot common human-factor-related issues in their cleaning validation workflows, ensuring consistent and reliable results across all operational shifts.
Frequently Asked Questions (FAQs)
1. What is the core difference between cleaning validation and cleaning verification, and why does it matter for different shifts?
- Validation is the initial process of gathering evidence to prove that a cleaning regime can effectively and repeatedly remove allergen soils. It is performed prior to implementation to demonstrate that the cleaning objectives are met. [25]
- Verification is the ongoing process that proves the validated cleaning regime was performed correctly and remains effective. It is conducted routinely after cleaning events. [25]
- Impact on Shifts: A protocol is validated once, but it must be verified every time it is executed, across all shifts. Consistent verification is key to ensuring that all teams are achieving the same level of cleanliness as the original validation study.
2. How can we ensure that personnel on all shifts are equally proficient in sampling techniques like swabbing and rinsing?
Proficiency requires standardized training and regular assessment. Inconsistent sampling is a major source of data variability. Implement a certification program for all personnel that includes:
- Demonstration: A standardized video or live demonstration of the correct technique.
- Hands-on Practice: Trainees practice on contaminated surfaces under supervision.
- Recovery Studies: Personnel perform recovery studies on pre-contaminated coupons; their results must meet a predefined recovery percentage to be certified. [30]
- Re-certification: Mandate periodic re-certification (e.g., annually) to correct for technique drift.
3. Our validation protocol was developed on the day shift. How do we account for potential performance differences on night shifts?
This is a common oversight. A robust protocol should be validated under "worst-case" conditions that could apply to any shift. Key factors to consider include:
- Personnel: The protocol should be tested by personnel with less experience or training, simulating a potential scenario on any shift.
- Time Pressure: Validate the protocol under the time constraints that might be present during shift changeovers or tight production schedules.
- Fatigue: While harder to simulate, the protocol's clarity and simplicity should be such that it can be followed correctly even by fatigued personnel. High-fidelity, scenario-based training can help prepare staff for these conditions. [70]
4. What are the most common human errors in cleaning validation for allergens, and how can we prevent them?
Common errors and their solutions include: [3]
- Inconsistent Cleaning Execution: Solution: Use clear, visual work instructions with photos or videos accessible at the cleaning station.
- Inadequate Documentation: Solution: Implement simplified, checklist-style forms to ensure all steps are documented completely and correctly.
- Improper Sampling: Solution: As outlined in FAQ #2, rigorous training and certification are essential.
- Cross-Contact During Sampling: Solution: Train personnel on how to handle swabs and samples without introducing new contaminants.
5. How can we use data from different shifts to continuously improve our training programs?
Analyze verification data (e.g., ATP readings, allergen-specific test results) and deviation reports by shift.
- Identify Trends: If one shift consistently shows higher residue levels, it indicates a training or compliance gap specific to that team.
- Targeted Training: Use this data to develop targeted retraining modules instead of deploying generic training for all.
- Close the Loop: Share these findings and the resulting procedural or training improvements with all shifts to foster a culture of continuous improvement and collective responsibility.
Troubleshooting Guides
Problem: Inconsistent Verification Results Between Shifts
Symptoms: Data from allergen testing or microbiological sampling shows significant statistical variation when compared across shifts, despite the same protocol being used.
Investigation & Resolution:
| Possible Cause | Investigation Steps | Corrective & Preventive Actions |
|---|---|---|
| Inconsistent Technique | Audit swab/rinse sampling in real-time across shifts. Review training records for certification status. | Implement a hands-on re-certification program for all personnel. [30] Create a standard operating video for the technique. |
| Variation in Cleaning Execution | Observe the cleaning process on different shifts. Check the calibration records of cleaning equipment (e.g., pressure washers). | Clarify and simplify work instructions; use visual aids. Establish and enforce a rigid equipment calibration schedule. |
| Misinterpretation of Protocols | Interview personnel from different shifts on their understanding of key steps. | Revise protocols for clarity using plain language. Conduct brief, shift-based "refresher" sessions to reinforce key points. |
Problem: Recurring Non-Conformities on a Specific Shift
Symptoms: A particular shift, often the night shift, consistently fails verification tests or generates a higher rate of deviations.
Investigation & Resolution:
| Possible Cause | Investigation Steps | Corrective & Preventive Actions |
|---|---|---|
| Inadequate Shift-Specific Training | Compare the training history and experience level of shift leads and members. | Assign a senior mentor from the day shift to support the night shift lead. Develop microlearning modules for on-the-go access. [71] |
| Fatigue and Human Factors | Review shift schedules and workload distribution. Conduct anonymous surveys on shift culture and morale. | Review and optimize shift rotations to mitigate fatigue. Incorporate human factors principles into procedure design. [72] |
| Lack of Shift-Specific Feedback | Determine if performance data is communicated back to the shift team in a timely, actionable way. | Establish a direct feedback loop where data is shared with the shift team immediately after review. Involve the shift team in root cause analysis of their non-conformities. |
Experimental Protocols for Human Factor Analysis
Protocol 1: Recovery Study for Personnel Sampling Proficiency
Objective: To quantify and ensure the effectiveness and consistency of an individual's ability to recover residue from a surface using a swab. [30]
Materials:
- Research Reagent Solutions (see table below)
- Pre-cleaned stainless-steel coupons (e.g., 10cm x 10cm)
- Precision pipette and relevant API or allergen solution
- Polyester swabs
- Appropriate solvent (e.g., Acetonitrile, Acetone)
- Test tubes and vortex mixer
- Analytical equipment (e.g., HPLC, ELISA reader for specific allergen detection)
Methodology:
- Preparation: Clean the stainless-steel coupons and verify they are free of the target analyte.
- Contamination: Using a precision pipette, apply a known, quantified volume of the API or allergen solution (e.g., Oxcarbazepine) to the center of the coupon. Allow the solvent to evaporate completely, leaving a dried residue.
- Sampling: The trainee performs the swab sampling according to the standard procedure. This typically involves pre-wetting the swab with solvent, swabbing the entire surface in a systematic pattern (horizontally and vertically), and using both sides of the swab.
- Extraction: Place the swab head in a test tube containing a known volume of solvent. Vortex for a set time to extract the residue.
- Analysis: Quantify the amount of analyte recovered using the appropriate analytical method.
- Calculation: Calculate the percentage recovery:
(Amount Recovered / Amount Applied) * 100. - Certification: Set a minimum acceptable recovery rate (e.g., 80%). Personnel must consistently achieve this to be certified for the task.
Protocol 2: Inter-Shift Cleaning Validation Study
Objective: To formally assess and compare the effectiveness of the cleaning protocol when executed by different shift teams under real-world conditions.
Materials:
- The same materials as in Protocol 1.
- Identical equipment or surfaces to be cleaned on each shift.
Methodology:
- Study Design: Deliberately contaminate identical pieces of equipment or surface areas with the same amount of a "worst-case" allergen or API. [30] [25]
- Execution: Have each shift team (Day, Evening, Night) clean their assigned equipment according to the standard protocol. The teams should not be given any special warning or preparation beyond what is normal.
- Verification Sampling: After cleaning, a single, certified quality control team (or a certified member from each shift) performs the verification sampling using the standardized swab or rinse method.
- Blinded Analysis: Analyze the samples, keeping the data labeled only by a shift code to avoid bias.
- Data Analysis: Statistically compare the residual analyte levels from each shift. Significant differences (using ANOVA or similar tests) indicate a human factor issue related to a specific shift.
- Action: Use the results to target training and process improvements for the underperforming shift.
Research Reagent Solutions & Essential Materials
The following table details key materials used in the development and execution of cleaning validation protocols, particularly those involving human factor analysis.
| Item | Function/Explanation |
|---|---|
| Polyester Swabs | A direct surface sampling tool selected for its strength and consistency in recovering residues from flat or irregular surfaces. [30] |
| "Worst-case" API/Allergen (e.g., Oxcarbazepine) | A deliberately hard-to-clean substance used in validation studies. A protocol effective for the most difficult substance ensures robustness for easier ones. [30] |
| Recovery Solvents (e.g., Acetonitrile) | Organic solvents used to wet swabs and extract residues from them during analysis. Selected based on their high solubility for the target analyte. [30] |
| Stainless-Steel Coupons | Standardized test surfaces made of a common manufacturing material, used in recovery studies to simulate equipment and ensure consistent testing conditions. [30] |
| Phosphate-free Alkaline Detergent | A cleaning agent used in manual or automated washing processes. Phosphate-free options are often chosen for environmental considerations. [30] |
| Rapid Allergen Test Kits | On-site testing tools used for ongoing verification, providing quantitative or qualitative results to quickly confirm the absence of allergen cross-contact. [25] |
Process Workflow for Shift Management
The diagram below outlines a logical workflow for managing training and verification across different shifts to ensure consistent protocol adherence.
Verification and Comparative Analysis of Monitoring Techniques
Frequently Asked Questions (FAQs)
What is the fundamental difference between cleaning validation and verification?
Validation is the process of gathering evidence to prove that a cleaning regime can effectively and repeatedly remove allergen soils. It is carried out prior to implementation to demonstrate that cleaning objectives can be met consistently. Verification, in contrast, proves that the validated allergen cleaning regime was performed correctly and remains effective, which is why it is carried out on an ongoing basis after each cleaning cycle [25].
In practice, validation establishes that your cleaning procedure can work under worst-case conditions, while verification confirms that it did work during routine operations [50].
Why is a "worst-case scenario" approach recommended for validation studies?
Using a worst-case scenario during validation provides the highest level of assurance that your cleaning procedure is robust. This involves selecting conditions that present the greatest challenge to the cleaning process, such as the allergen with the highest protein content, a product with strong-adhering soil, or the longest processing time before cleaning [21] [22].
By validating under these stringent conditions, you can gain confidence that the cleaning process will also be effective for less challenging situations, thereby optimizing resources and strengthening your overall risk management [21].
What are the common pitfalls in an allergen control loop?
Common pitfalls include:
- Relying on visual inspection alone: Visual checks are important but cannot detect microscopic allergen residues [50].
- Inadequate sampling locations: Failing to sample from the hardest-to-clean areas of equipment, which are critical worst-case points [21].
- Using unverified rapid tests: Implementing Lateral Flow Devices (LFDs) for verification without first validating that they can detect the specific allergen in your product matrix [22].
- Poor documentation: Lack of traceable records for cleaning activities, results, and any deviations [50].
Troubleshooting Guides
Problem: Inconsistent or Failed Validation Study Results
| Symptom | Potential Root Cause | Corrective Action |
|---|---|---|
| Allergen detected in post-clean samples | Ineffective cleaning procedure | Review and optimize cleaning parameters (e.g., chemical concentration, temperature, contact time) [22]. |
| Inadequate hygienic equipment design | Identify and address hard-to-clean areas (e.g., cracks, dead legs); consider equipment modifications [22]. | |
| Variable results between study repeats | Inconsistent cleaning execution | Standardize the procedure and retrain personnel across different shifts to ensure uniform performance [21]. |
| Allergen detected in the "next off-line" product | Allergen carry-over from a surface not sampled | Expand environmental swabbing to include additional product contact surfaces and transfer points [21]. |
Investigation Protocol:
- Review Data: Scrutinize all data from the failed run to identify the specific sample points where the allergen was detected [21].
- Physical Audit: Conduct a thorough visual inspection of the equipment to look for visible residue or design flaws [25].
- Process Review: Verify that the cleaning procedure was followed exactly as written and documented.
- Re-train and Re-run: Address any identified gaps in training or procedure, then repeat the entire validation exercise. Industry best practice is to achieve three consecutive successful runs [21] [50].
Problem: Positive Verification Results After a Validated Clean
| Symptom | Potential Root Cause | Corrective Action |
|---|---|---|
| Allergen detected by a lateral flow device (LFD) during routine verification | Breakdown in the cleaning execution | Investigate whether the correct procedure was followed, including chemical concentrations, water temperatures, and contact times [22]. |
| Change in raw material or formulation | Re-run spike recovery tests to ensure the verification method (e.g., LFD) can still detect the allergen in the new matrix [22]. | |
| Inadequate equipment reassembly after maintenance | Audit equipment assembly and train engineering staff on the impact of hygienic reassembly on allergen control. |
Investigation Protocol:
- Immediate Action: Place the affected equipment or production line on hold. Perform a documented re-clean and re-verify before releasing for production [50].
- Root Cause Analysis: Use a structured method (e.g., 5 Whys) to determine the underlying cause of the failure.
- Assess Impact: Determine if other batches or products are potentially affected and initiate a CAPA (Corrective and Preventive Action) as required [50].
Essential Concepts and Workflows
The Validation and Verification Control Loop
The relationship between validation and verification forms a continuous control loop essential for maintaining allergen control. The following diagram illustrates this ongoing process.
Experimental Workflow for a Cleaning Validation Study
A robust cleaning validation study requires meticulous planning and execution. The workflow below outlines the key stages.
Research Reagent Solutions and Key Materials
The following table details essential materials and methods used in allergen cleaning validation studies.
| Item | Function & Rationale |
|---|---|
| Polyester Swab | A direct surface sampling tool selected for its strength and consistency in recovering residues from defined surface areas (e.g., 100 cm²) [30]. |
| ELISA Kit (Enzyme-Linked Immunosorbent Assay) | The preferred quantitative method for validation. It detects and measures specific allergenic proteins with high sensitivity and accuracy, providing the numerical data needed to establish a cleaning benchmark [21] [22]. |
| Lateral Flow Device (LFD) | A qualitative or semi-quantitative rapid test used for verification. It provides on-site results in minutes but must be correlated with ELISA during validation to confirm its reliability for the specific allergen and product matrix [22]. |
| Rinse Water Sample | An indirect sampling method suitable for Clean-In-Place (CIP) systems. Analyzing the final rinse water helps assess the level of allergen residues the next product would be exposed to [25] [21]. |
| Positive Control Material | The specific ingredient or product used to contaminate the line during validation. It confirms that the analytical method can detect the target allergen in the relevant matrix [21] [22]. |
Key quantitative benchmarks and methodological details for validation studies are summarized below.
Table: Analytical Methods for Allergen Detection
| Method | Detection Target | Output | Typical Use | Key Consideration |
|---|---|---|---|---|
| ELISA | Specific Protein | Quantitative (ppm) | Cleaning Validation | Provides numerical data to set a baseline; high sensitivity [21] [22]. |
| Lateral Flow Device (LFD) | Specific Protein | Qualitative (Detect/Non-Detect) or Semi-Quantitative | Routine Verification | Speed and convenience; requires correlation with ELISA for validation [22]. |
| ATP Bioluminescence | Adenosine Triphosphate | Quantitative (Relative Light Units - RLU) | General Hygiene Verification | Does not detect allergen protein specifically; can be used for ongoing monitoring if correlation to allergen absence is proven [22]. |
| PCR | DNA | Qualitative / Quantitative | Species Identification | Not recommended for cleaning validation as it detects DNA, not the allergenic protein itself [21]. |
Table: Key Parameters for a Successful Validation Study
| Parameter | Industry Best Practice | Rationale |
|---|---|---|
| Number of Consecutive Successes | 3 successful runs [21] [50] | Demonstrates that the cleaning process is consistent and reproducible. |
| Acceptance Criteria | Non-detectable levels of the target allergen in all post-clean and next off-line samples [21] | Aligns with the goal of preventing any cross-contact and provides a clear, unambiguous pass/fail standard. |
| Sampling Location | Worst-case areas (e.g., hardest-to-clean surfaces) [21] [22] | If the most challenging areas are clean, simpler areas are also likely to be clean. |
| Sample Types | Environmental surface swabs, rinse waters, and/or first product off the line ("next off-line" product) [25] [21] | Provides a comprehensive picture of cleanliness from different perspectives. The "next off-line" product is the ultimate test of consumer exposure [21]. |
For researchers and scientists in drug development and food safety, selecting the appropriate environmental monitoring tool is a critical decision that directly impacts product safety and regulatory compliance. Within cleaning validation protocols designed to prevent allergen cross-contact, the choice often lies between highly specific methods, like Lateral Flow Devices (LFDs), and non-specific methods, such as Adenosine Triphosphate (ATP) testing and general protein swabs. This technical resource center provides a detailed comparison, troubleshooting guides, and FAQs to support your experimental design and implementation, helping you optimize your cleaning validation strategy.
Tool Comparison: Core Principles and Applications
The following table summarizes the fundamental characteristics of each monitoring tool.
Table 1: Fundamental Characteristics of Monitoring Tools
| Feature | Lateral Flow Device (LFD) | General Protein Swab | ATP Test |
|---|---|---|---|
| Target Analyte | Specific allergenic proteins (e.g., peanut, milk, gluten) [73] [74] | General protein (any source) [73] | Adenosine Triphosphate (ATP) from all living cells and organic residues [73] [75] |
| Specificity | High (uses antibody-antigen binding) [73] [74] | Low (detects any protein) [73] | Low (does not distinguish between sources) [73] [76] |
| Result Output | Qualitative / Semi-quantitative (visual or reader-based) [42] | Semi-Quantitative (color change) [77] | Quantitative (RLU - Relative Light Units) [73] [75] |
| Primary Role in Cleaning Validation | Verification of specific allergen removal [74] [42] | Screening for protein-based residue [73] [42] | Verification of general hygiene and sanitation [73] [75] |
| Detects Allergen Risk? | Directly detects specific allergenic proteins [73] | Indirectly infers risk, as all allergens are proteins [78] | Poor correlate; allergen can be present even with low ATP [73] [79] |
Quantitative Performance Data
Understanding the detection capabilities of each method is crucial for protocol design. The table below compares key performance metrics.
Table 2: Quantitative Performance and Methodological Comparison
| Aspect | Lateral Flow Device (LFD) | General Protein Swab | ATP Test |
|---|---|---|---|
| Reported Sensitivity (Limit of Detection) | Very high (e.g., detects specific allergens at ppm/ppb levels) [74] | Detects as little as 3 µg of protein on a surface [77] | Varies by manufacturer (RLU); not directly comparable [75] |
| Comparative Sensitivity (from Saito et al.) | Best sensitivity for 10 out of 14 tested foods [80] | Lower detection sensitivity than A3 and LFD tests for most foods [80] | Lower detection limits than A3 test; less sensitive than protein swabs for many allergens [80] |
| Time to Result | ~15 minutes [73] | ~15 minutes [77] | Within 30 seconds [76] [75] |
| Equipment Required | None (visual read) or optional reader [73] [42] | None (visual color comparison) [77] | Luminometer (specific to brand) [73] [75] |
| Sample Types | Surfaces, rinse water, finished product [73] | Surfaces [73] | Surfaces [73] |
Experimental Protocols for Cleaning Validation
Protocol for Validation Using Specific Allergen LFDs
This protocol is ideal for validating the removal of a known, high-risk allergen from a production line [74] [79].
- Define Critical Control Points (CCPs): Identify equipment surfaces and zones where allergen cross-contact is most likely (e.g., shared equipment, difficult-to-clean areas) [73] [79].
- Post-Cleaning Sampling:
- Use sterile swabs, often provided with the LFD kit.
- Swab a defined area (e.g., 10x10 cm) using consistent pressure and a systematic pattern (e.g., rolling the swab horizontally and vertically) [78].
- Focus on high-risk sites like crevices, joints, and other difficult-to-clean areas, not just flat, smooth surfaces [78].
- Sample Elution and Testing:
- Place the swab into a pre-filled extraction buffer tube and vortex to elute the sample.
- Apply the extracted solution to the sample window of the LFD test strip.
- Incubation and Interpretation:
- Allow the test to develop for the specified time (typically 15 minutes) [73].
- Read the result: the appearance of a control line indicates a valid test. The appearance of a test line indicates the presence of the specific allergen.
- Corrective Action: A positive result requires immediate recleaning of the surface and retesting. The process must be repeated until two successive negative results are achieved to validate the cleaning procedure [78].
Protocol for Screening Using General Protein Swabs
This method provides a cost-effective means for routine monitoring of cleaning effectiveness where specific allergen identity is less critical [73].
- Swab Activation: Moisten the swab with the provided moisturizer if required by the specific product instructions [77].
- Surface Sampling: Swab a defined area as described in the LFD protocol.
- Sample Development:
- Activate the swab by breaking the ampoule of reagent inside the device, allowing the swab to contact the developing solution.
- The biuret method is commonly used, where copper salts in an alkaline solution form a purple complex with peptide bonds [73].
- Incubation and Reading:
Workflow for Integrating Monitoring Tools
The following diagram illustrates a logical workflow for deploying these tools within a holistic cleaning validation program.
Tool Integration Workflow for Cleaning Validation
Troubleshooting Guides and FAQs
FAQ 1: When should I use a specific LFD test versus a general protein swab?
Use a specific LFD when you need to verify the removal of a known, high-risk allergen (e.g., peanut, milk) from a surface, especially after a product changeover [73] [79]. LFDs are also critical for the initial validation of your cleaning protocol [73] [74].
Use a general protein swab for routine, cost-effective screening to verify that basic cleaning has occurred, or when you need to detect a wide range of protein residues for which specific LFD tests may not be available [73] [42].
FAQ 2: Can I rely on ATP testing for my allergen control program?
No, ATP testing is not a reliable stand-alone method for allergen control [73] [79]. ATP measures biological energy from all living cells and food residues, but it is not a direct marker for protein. It is possible to have a surface with low ATP (passing RLU) but high allergenic protein content, and vice versa [73]. ATP testing is excellent for verifying general sanitation effectiveness against microbial growth but should be used as a complementary tool alongside protein-specific methods [73] [75] [79].
FAQ 3: What are common causes of false positive or false negative results?
- False Positives/Negatives in LFD/Protein Swabs: Can be caused by matrix interference (e.g., detergent residues), protein structure changes, or antibody cross-reactivity [42]. For protein swabs, using a sponge instead of a recommended swab for sampling can prevent the release of protein, leading to a false negative [78].
- False High Readings in ATP: Can be caused by surface moisture or contamination from gloves [76]. Residual sanitizers can also sometimes interfere with the bioluminescence reaction, though this can be verified with a positive control [75].
FAQ 4: How can I quantitatively validate my swab sampling method for ELISA?
Swab samples are generally not suitable for reliable quantification by ELISA [42]. ELISA protocols require very specific starting material amounts for accurate quantification, and it is unknown how much material is collected from a surface swab. ELISA is best used with standardized liquid samples or sample extracts of known volume and weight. For surface monitoring, LFDs provide a semi-quantitative alternative, while quantitative data for products should be obtained through lab-based ELISA on the product itself [73] [74].
The Scientist's Toolkit: Essential Research Reagents & Materials
Table 3: Key Materials for Allergen Monitoring Experiments
| Item | Function & Application |
|---|---|
| Lateral Flow Devices (LFDs) | Immunoassay strips for rapid, specific detection of a single allergen (e.g., peanut, egg) on surfaces, in rinse water, or in product samples [73] [74]. |
| General Protein Swabs | Integrated swab and developer system for semi-quantitative detection of broad-spectrum protein residues on surfaces as an indicator of cleaning effectiveness [73] [77]. |
| ATP Luminometer & Swabs | Electronic reader and chemical swabs that produce bioluminescence measured in RLUs to quantify total organic residue on surfaces for general hygiene monitoring [73] [76] [75]. |
| Sterile Sampling Swabs | Medical-grade, lint-free swabs (e.g., polyurethane foam) for consistent sample collection from surfaces without introducing contamination [78]. |
| Extraction Buffers | Solutions used to elute proteins from sampling swabs into a liquid medium compatible with LFD or ELISA tests [73]. |
| Color Reference Card | A visual guide used with general protein swabs to semi-quantify the level of contamination based on the intensity of the color change [77]. |
Establishing Correlation Between Rapid Tests and Laboratory ELISA
Within allergen cleaning validation protocols, establishing a reliable correlation between rapid onsite tests and quantitative laboratory ELISA (Enzyme-Linked Immunosorbent Assay) is fundamental for ensuring effective prevention of allergen cross-contact. This technical support center provides targeted guidance to help researchers and scientists navigate the challenges of this correlation process, ensuring their data is both accurate and actionable for compliance and safety.
Key Concepts: Validation vs. Verification
In the context of allergen control, it is critical to distinguish between validation and verification, as they require different approaches and tools.
- Validation is the initial process of gathering evidence to prove that a cleaning regime can effectively and repeatedly remove allergen soils. It is ideally carried out prior to implementation. For validation, quantitative methods like ELISA are preferred to establish whether allergen cross-contact has occurred and, if so, by how much [25].
- Verification is an ongoing process that proves the validated cleaning regime was performed correctly and remains effective. Rapid tests, such as Lateral Flow Devices (LFDs), are ideal for this purpose due to their speed and ease of use [74] [25].
Comparison of Allergen Testing Methods
The following table summarizes the core characteristics of the two primary testing methods used in correlation studies.
| Feature | Laboratory ELISA | Rapid Tests (LFD) |
|---|---|---|
| Primary Use | Validation of cleaning protocols [25] | Ongoing verification of cleaning efficacy [74] [25] |
| Result Type | Quantitative (e.g., ppm or mg/kg of protein) [21] [25] | Qualitative or Semi-Quantitative (Positive/Negative against a threshold) [74] |
| Analysis Location | Off-site laboratory [81] | On-site (production or lab environment) [81] |
| Throughput | Higher, batch processing | Lower, individual tests |
| Key Advantage | Provides precise, quantitative data essential for risk assessment [21] | Rapid results for real-time decision-making [81] |
Experimental Workflow for Correlation Studies
The diagram below outlines a systematic workflow for establishing a correlation between rapid test results and laboratory ELISA analyses.
Detailed Experimental Protocol for Correlation
Step 1: Define Study Scope and Sample Plan
Before sampling, conduct allergen mapping to understand where allergens are present and move within the facility [21]. Based on this, perform an allergen risk assessment to identify where cleaning is a key control measure and where correlation studies are most critical [21].
Your sampling plan should include:
- Surface Swabs: Focus on "hot spots" or areas most challenging to clean (e.g., elbows, scrapers, product guides). Use cross-sectional swabbing techniques and ensure swab kits are compatible with ELISA or PCR, not microbiological tests [56] [82].
- Rinse Water: Collect the final rinse water from clean-in-place (CIP) systems [21].
- First Product Off-Line: The first ingredient or product that contacts the equipment after cleaning. This is the most direct measure of consumer exposure [21].
- Positive Control: A sample of the product containing the allergen before cleaning. This is tested once to confirm the allergen is detectable [21].
Step 2: Execute Controlled Cleaning and Parallel Testing
- Perform the cleaning procedure under normal conditions, not with extra effort [82].
- For each sampled location, collect a pair of samples. One is tested immediately with the rapid LFD on-site, and the other is sent to the laboratory for ELISA analysis [81].
- It is industry best practice to repeat this validation exercise three times to demonstrate consistency [21].
Step 3: Data Analysis and Statistical Comparison
Compile all paired results into a table for analysis. The primary goal is to determine the concordance rate between the two methods.
Table Example: Paired Test Results for Allergen X
| Sample Pair ID | LFD Result | ELISA Result (ppm) | Concordant? |
|---|---|---|---|
| SP-001 | Positive | 25.5 | Yes |
| SP-002 | Negative | < LOD (2.5) | Yes |
| SP-003 | Positive | 5.1 | Yes |
| SP-004 | Negative | 15.0 | No (False Negative) |
Calculate the following performance metrics for the rapid test:
- Sensitivity: Ability to correctly identify positive samples (when ELISA detects the allergen).
- Specificity: Ability to correctly identify negative samples (when ELISA shows no allergen).
- Overall Concordance: Percentage of total samples where LFD and ELISA results agree.
A high concordance rate (e.g., >95%) indicates a reliable rapid test that can be trusted for routine verification. Any discrepancies, particularly false negatives, must be investigated.
Frequently Asked Questions (FAQs)
Why is my rapid test (LFD) giving a positive result when the laboratory ELISA is negative?
This "false positive" can occur due to:
- Cross-Reactivity: The antibodies in the LFD may be detecting similar protein structures from a non-target ingredient [82]. Review the LFD's specification sheet for known cross-reactivities.
- Sample Matrix Interference: Components in the sample itself (e.g., spices, tannins) may interfere with the LFD's immunoassay chemistry [47].
- User Error: Inconsistent sample application or incorrect interpretation of the read window can lead to erroneous results.
Troubleshooting Steps:
- Confirm with the LFD manufacturer that your product matrix has been validated for the test.
- Re-test the sample, ensuring strict adherence to the protocol.
- Use a different LFD lot or brand to rule out kit-specific issues.
- For critical results, always rely on the quantitative confirmation from the laboratory ELISA [25].
How do I handle a situation where the rapid test is negative, but the ELISA detects allergen (a false negative)?
This is a critical failure as it poses a direct risk to allergic consumers. Potential causes include:
- Allergen Threshold: The allergen concentration is above the LFD's stated detection limit but the test failed to detect it, indicating a potential kit sensitivity problem [74].
- Processing Effects: The allergen in the residue may have been denatured (e.g., by heat or fermentation) such that the LFD antibodies no longer recognize it, while the ELISA method still can [82].
- Ineffective Sample Recovery: The swab may not have effectively picked up the allergen residue from the surface.
Corrective Actions:
- Immediately quarantine any product produced after the cleaning in question.
- Re-evaluate the cleaning procedure itself; it may not be effective enough to reduce allergen levels below the LFD's detection limit.
- Investigate whether the LFD is the right tool for your specific allergen and matrix. You may need to select a different rapid test or rely more heavily on ELISA for verification [21] [82].
Our correlation was good initially, but now we see drifting results. What could be the cause?
Inconsistencies over time can be attributed to:
- Reagent Degradation: The rapid test kits or ELISA components may have expired or been stored improperly [46] [83].
- Changes in the Production Process: A new raw material supplier, a reformulated product, or a slight equipment modification can alter the nature of the allergen residue [82].
- Variability in Sampling Technique: Different personnel may be swabbing surfaces with varying pressure or technique, leading to inconsistent sample recovery.
Solution: Implement a routine re-correlation schedule, especially when any change occurs in your process, ingredients, or cleaning chemicals. Use a positive control to regularly check that both the LFD and ELISA methods are performing as expected [21].
The Scientist's Toolkit: Essential Research Reagent Solutions
The following table details key materials and their functions in conducting successful correlation studies.
| Item | Function & Importance |
|---|---|
| Validated Swab Kits | Specifically designed for allergen testing (ELISA/PCR). Microbiological swabs containing peptone can interfere with results [82]. |
| Protein Standard | A purified preparation of the target allergen protein. Essential for creating the standard curve in quantitative ELISA and confirming assay sensitivity [83]. |
| LFD Positive/Negative Controls | Packaged with rapid test kits. Used to verify that the LFD is functioning correctly before use [74]. |
| ELISA Kit | Provides all necessary pre-optimized reagents (antibodies, substrates, buffers) for precise, quantitative analysis in the lab. Preferred for validation studies [21] [25]. |
| Blocking Buffer (e.g., BSA, Casein) | A protein-rich solution used in ELISA to coat any remaining binding sites on the microplate, reducing background noise and preventing false positives [83] [47]. |
Developing a Risk-Based Routine Verification Sampling Plan
FAQs: Core Principles and Definitions
What is the difference between cleaning validation and verification in allergen management?
- Validation is the process of gathering evidence to prove that a cleaning regime can effectively and repeatedly remove allergen soils. It is carried out prior to implementation to demonstrate that the cleaning objectives have been met [25]. This involves a structured study to prove the cleaning procedure can consistently achieve a predefined acceptable level of allergen removal under worst-case scenarios [21].
- Verification proves that the validated allergen cleaning regime was performed correctly and remains effective on an ongoing basis. It is a routine check conducted after cleaning, such as through visual inspection, rapid allergen tests, or ATP monitoring, to confirm the procedure was followed and was successful for that specific cycle [25] [57].
Why is a risk-based approach critical for a sampling plan?
A risk-based approach ensures that resources are focused on the areas of highest concern, providing a structured method to determine the appropriate level of scrutiny for a process [84]. It directly ties sampling efforts to the potential harm to the consumer, ensuring patient safety while optimizing resource allocation. This approach is required by regulations like ISO 13485 and FDA guidelines, which demand that sampling plans are justified and that validation activities are commensurate with the risk of the process [85] [84].
How do I determine the 'worst-case scenario' for validation studies?
Choosing a worst-case scenario involves selecting conditions that present the greatest challenge to your cleaning process. Key factors include [21]:
- Product Soil: The allergen chosen should be present at high levels, have a high protein content, and be historically difficult to clean from the line.
- Equipment Parameters: Focus on areas that are most challenging to clean (e.g., hollow rollers, tight spaces, conveyors) and times when the process might be most vulnerable, such as after a long production run or during a quick product changeover.
- Process Parameters: The least rigorous cleaning parameter settings within their validated ranges.
FAQs: Developing and Implementing Your Sampling Plan
What statistical methods can I use to determine my sample size?
Two common statistical methods for determining sample size are the Success-Run Theorem and sampling based on the Acceptable Quality Limit (AQL) [85].
Table 1: Statistical Methods for Sample Size Determination
| Method | Basis | Key Inputs | Typical Application |
|---|---|---|---|
| Success-Run Theorem [85] | Binomial distribution; assumes zero failures in the sample set. | Confidence Level (C), Reliability (R). Sample size ( n = \frac{\ln(1-C)}{\ln(R)} ) | High-risk process validation where a high degree of assurance is needed. |
| Acceptable Quality Limit (AQL) [85] [84] | Standards like ISO 2859; defines the worst tolerable defect rate. | AQL level, lot size, inspection level. | Ongoing verification and release testing where a certain defect rate can be tolerated. |
What confidence and reliability levels should I use?
The required confidence and reliability are determined by the risk level of the process step, which can be established through a Failure Mode and Effects Analysis (FMEA) [85].
Table 2: Risk-Based Confidence and Reliability Levels
| Process Risk | Confidence Level | Reliability Level |
|---|---|---|
| High (e.g., cleaning process) | 95% | 99% |
| Medium | 95% | 95% |
| Low | 95% | 90% |
Example Calculation using Success-Run Theorem: For a high-risk cleaning process requiring 95% confidence and 99% reliability: ( n = \frac{\ln(1-0.95)}{\ln(0.99)} = \frac{\ln(0.05)}{\ln(0.99)} ≈ 299 ) This means 299 samples must be taken and tested with zero failures to validate the process [85].
What types of samples should I collect for cleaning validation and verification?
The sample type depends on the cleaning method and the goal (validation vs. verification). Industry best practice is to collect a combination of samples [21] [57]:
- Post-clean environmental samples: Swabs from product contact surfaces, especially in hard-to-clean areas.
- Rinse waters: The final rinse water from Clean-In-Place (CIP) systems.
- Next off-line product: The first product or ingredient that contacts the equipment after cleaning. This is the only direct measure of what the consumer will be exposed to.
How often should a validated cleaning protocol be re-verified?
Verification should be performed on an ongoing basis, such as during routine product changeovers [15]. The frequency of re-validation is determined by your facility's allergen map and risk assessment but should be conducted periodically or whenever changes occur, such as the introduction of new products, changes in formulation, installation of new equipment, or changes in chemical suppliers [15].
Troubleshooting Guide: Addressing Common Scenarios
Problem: Inconsistent or unexpected positive results during routine verification.
- Potential Cause 1: Inadequate cleaning procedure.
- Solution: Revisit the cleaning protocol. Ensure it includes a pre-rinse to remove excess residue and mechanical scrubbing to break up biofilm, as chemicals alone are ineffective at removing debris [56]. Re-validate the cleaning procedure.
- Potential Cause 2: Human error or variability.
- Potential Cause 3: Poorly chosen sampling site.
- Potential Cause 4: Unsuitable or unvalidated test method.
- Solution: Consult with your testing laboratory. Use quantitative methods like ELISA where possible, as they detect protein. Ensure the method has been validated for your specific product matrix through spike recovery testing [21].
Problem: A single unit fails in a large release sample set that otherwise meets risk-based acceptance criteria.
- Scenario: Your risk-based sampling plan allows for a certain number of defects, but you encounter a single failure.
- Solution: According to a risk-based approach, if the acceptance criteria for the entire sample set are met, the lot can be released. The sampling plan is designed to account for this statistical possibility. However, it is a best practice to formally document the out-of-specification result in an event system to track potential trends or lab errors. Barring a troublesome trend, the event can be closed as acceptable based on the statistical power of the sampling plan [84].
Problem: How to justify reducing sampling after initial process validation.
- Scenario: After a process (e.g., equipment cleaning) has been successfully validated and shown to be in control, you wish to reduce the sample size for routine verification.
- Solution: This is an acceptable and encouraged practice. The purpose of release testing can shift post-validation from proving a lot meets specification to detecting a change in the process. You can justify a reduction in sampling by [84]:
- Demonstrating through process validation data that the process is stable and reliably produces in-specification results.
- Implementing control charts for ongoing monitoring.
- Formally adjusting your sampling plan by recalculating based on historical data, which may involve increasing your α (producer's risk) and/or β (consumer's risk) values or adjusting your RQL target.
Experimental Protocol: Workflow for a Risk-Based Sampling Study
The following diagram outlines the key stages in developing and executing a risk-based sampling plan.
Diagram 1: Risk-Based Sampling Workflow
Step 1: Allergen Mapping & Risk Assessment
- Action: Create a comprehensive map of all allergens present in ingredients and products, tracking their movement through the facility [21]. Follow this with a risk assessment to identify where allergens could be unintentionally transferred and where cleaning is a key control measure [21] [3].
- Output: A documented risk assessment identifying high-priority areas and processes for validation.
Step 2: Define Study Parameters
- Action: Based on the risk assessment, define the specific parameters for your validation study.
- Target Allergen: Choose a worst-case scenario allergen (high protein, difficult to clean) [21].
- Test Method: Select a quantitative method like ELISA where possible, as it detects the allergenic protein [21].
- Statistical Basis: Define the required confidence and reliability levels based on process risk (refer to Table 2) [85].
Step 3: Select Sample Sites and Types
- Action: Identify where and what to sample. Focus on equipment "hot spots" and worst-case scenario locations, such as areas that are hardest to clean or furthest from the cleaning source [21] [56]. Plan to collect a combination of samples:
Step 4: Determine Sample Size
- Action: Use a statistical method like the Success-Run Theorem (see calculation above) to determine the number of samples required to demonstrate with your desired confidence that the process meets the reliability target [85]. The study should be repeated successfully in three consecutive rounds to demonstrate consistency [21] [57].
Step 5: Execute Study and Analyze Results
- Action: Execute the planned sampling and conduct laboratory analysis.
- Success Criteria: All post-clean and next off-line samples must show non-detectable levels of the target allergen in three consecutive rounds [21]. Any detected result constitutes a failure, requiring investigation and repetition of the entire validation exercise [21].
Step 6: Review and Implement Routine Verification Plan
- Action: Once validation is successful, document the results and establish a routine verification sampling plan. This plan will have a different (often reduced) sampling frequency and size, justified by the validated state of control [84] [25].
The Scientist's Toolkit: Research Reagent Solutions
Table 3: Essential Tools for Allergen Cleaning Validation & Verification
| Tool / Reagent | Function | Key Considerations |
|---|---|---|
| ELISA Kits [21] | Quantitative detection of specific allergenic proteins in samples. | Preferred for validation; choose kits specific to your target allergen (e.g., milk, peanut, egg). Check for cross-reactivity with your product matrix. |
| Rapid Test Strips [3] | Quick, qualitative or semi-quantitative onsite verification of allergen presence. | Ideal for routine verification and changeover checks. Less quantitative than lab-based ELISA. |
| ATP Monitoring Systems [56] | Measures adenosine triphosphate as an indicator of general hygiene and organic residue. | Useful for routine verification of cleaning effectiveness but is not allergen-specific. |
| Surface Swabs / Samplers [21] [25] | Used to collect residues from equipment surfaces for analysis. | Must be compatible with the analytical method. Consistent swabbing technique is critical for reproducible results. |
| Positive Control Material [21] | The substance containing the target allergen used to contaminate the line during validation. | Should be representative of the worst-case product soil (e.g., high protein content, high viscosity). |
Frequently Asked Questions (FAQs)
FAQ 1: Why can't we rely solely on ATP monitoring for allergen cleaning validation? ATP monitoring is an excellent tool for verifying the general cleanliness of a surface by detecting Adenosine Triphosphate (ATP), which is present in all biological cells. However, it is not a specific indicator for allergenic proteins [86]. A surface may have low ATP but still be contaminated with allergenic residues, especially from processed foods where ATP may have degraded but proteins remain. Therefore, ATP monitoring should be used for rapid, routine verification, but must be supplemented with periodic allergen-specific tests (like ELISA or LFDs) that directly detect the target allergenic proteins to validate the cleaning process [86] [5].
FAQ 2: What is the core difference between cleaning validation and cleaning verification? In the context of allergen control, validation and verification are distinct, critical steps:
- Cleaning Validation: This is the initial, scientific process of collecting data to prove that your cleaning procedure is capable of effectively and consistently removing allergenic residues to a predetermined acceptable level. It is typically done during process setup or when a procedure changes [5].
- Cleaning Verification: These are the ongoing, routine checks performed after a cleaning process to confirm it was performed correctly and effectively on that specific occasion. ATP monitoring and visual inspections are common verification tools [86] [5].
FAQ 3: How do we establish appropriate pass/fail limits for our ATP monitoring system? Setting limits requires a risk-based approach and correlation with your allergen-specific testing. A general process is:
- Baseline Data Collection: Perform simultaneous ATP monitoring and allergen-specific testing (e.g., with Lateral Flow Devices) on surfaces after cleaning.
- Correlation Analysis: Establish the correlation between ATP results (in RLU) and the presence or absence of allergenic protein.
- Limit Setting: Set your ATP action limit at a level where any reading above it consistently correlates with the detection of allergen residues. This limit must be low enough to ensure safety but practical for your facility. The A3 system, an advanced hygiene monitoring tool, uses a similar principle by establishing bespoke pass/fail limits for total organic residue [86].
FAQ 4: Our ATP tests pass, but periodic allergen tests sometimes fail. What are the most likely causes? This discrepancy points to specific issues in your process or the limitations of ATP testing:
- Protein Persistence: The allergen in your process may be low in ATP or the ATP may degrade faster than the allergenic protein, making it invisible to the ATP monitor but detectable by protein-specific tests [86].
- Cross-Contact Hotspots: The allergen may be accumulating in hard-to-clean areas (e.g., equipment elbows, tensioners, under belts) that are not part of your routine ATP swabbing protocol. A thorough allergen risk assessment and mapping is needed to identify these spots [56].
- Ineffective Cleaning Procedure: The cleaning method itself may not be effective at removing proteins, even if it removes general soil. Re-evaluate your Sanitation Standard Operating Procedure (SSOP), focusing on mechanical action (scrubbing) and detergent efficacy [56].
FAQ 5: What is the recommended frequency for conducting periodic allergen-specific testing? The frequency should be determined by your risk assessment. Key factors to consider are:
- Product Changeover: Always validate cleaning after a change from an allergen-containing to an allergen-free product.
- Schedule: Perform allergen-specific tests after predefined production cycles (e.g., weekly, monthly, or quarterly) to re-validate the cleaning process.
- Event-Driven: Conduct tests after any significant event, such as equipment maintenance, a major spill, or a change in cleaning chemicals or procedures.
Troubleshooting Guides
Problem 1: Inconsistent Correlation Between ATP and Allergen-Specific Test Results
Issue: ATP readings are low (passing), but periodic allergen-specific tests (e.g., Lateral Flow Devices) are positive for allergen residue.
Investigation and Resolution:
| Probable Cause | Investigation Steps | Corrective and Preventive Actions |
|---|---|---|
| Presence of processed/heat-denatured allergens. These have degraded ATP but proteins remain detectable. | Review your product matrix. Check if thermal processing (cooking, blanching) is involved. | 1. Adjust Monitoring Strategy: Increase the frequency of allergen-specific testing for these product lines.2. Validate Cleaning Efficacy: Ensure your cleaning process is validated specifically for removing denatured proteins, which can be more stubborn [86]. |
| Inadequate swabbing technique or location. | 1. Retrain Personnel: Ensure staff are trained to swab worst-case locations (e.g., behind seals, in pipes) and use correct technique [56].2. Review Allergen Map: Verify that swab sites are based on a documented allergen risk assessment and map [5]. | 1. Create Swabbing SOP: Develop a detailed standard procedure for swab locations and method.2. Use Fluorescent Markers: Periodically use fluorescent gel and UV light to check if cleaning is effective in hard-to-reach areas. |
| The ATP system's sensitivity is not sufficient for your allergen risk. | Compare the sensitivity of your ATP system with that of your allergen test. Literature shows some advanced systems (A3) can detect allergens at 10ppm, while conventional ATP may not [86]. | Re-evaluate Technology: Consider adopting a more sensitive rapid monitoring system for organic residue, such as the A3 system, which detects AMP, ADP, and ATP, providing a broader picture of cleanliness [86]. |
Problem 2: Failure in Periodic Allergen-Specific Testing
Issue: A routine ELISA or Lateral Flow Device test confirms the presence of an allergen on equipment that was deemed clean.
Investigation and Resolution:
| Probable Cause | Investigation Steps | Corrective and Preventive Actions |
|---|---|---|
| Ineffective cleaning procedure. | 1. Observe Cleaning: Audit the cleaning process in real-time. Is mechanical scrubbing performed before chemical application? [56]2. Check Parameters: Verify that parameters like water temperature, chemical concentration, and contact time are adhered to. | 1. Re-train Cleaning Crew: Focus on proper disassembly and scrubbing of equipment.2. Re-validate the Cleaning Protocol: The cleaning process itself may need to be re-developed and validated to prove it can remove the specific allergen [5]. |
| Cross-contact from shared or poorly cleaned tools. | Inspect cleaning tools (brushes, scrapers) for residue and check if they are cleaned and stored properly. | 1. Implement Color Coding: Designate tools for specific allergen zones or equipment [56].2. Dedicate Tools: Where risk is high, dedicate tools for allergen-free lines. |
| Equipment design flaws creating "hot spots." | Conduct a detailed inspection of equipment for areas where product can accumulate (e.g., cracks, dead ends, porous surfaces). | 1. Immediate Action: Enhance manual cleaning and disassembly protocols for these hotspots.2. Long-term Solution: Work with engineering to modify or replace equipment with hygienic design principles in mind [5]. |
The Scientist's Toolkit: Key Research Reagent Solutions
The following table details essential materials and their functions for developing and executing an integrated allergen monitoring protocol.
| Item | Function / Explanation |
|---|---|
| ATP Monitoring System | A device and compatible swabs used for rapid, real-time verification of general sanitary condition by measuring Adenosine Triphosphate (ATP) from biological residues. It is ideal for routine verification but not allergen-specific [86]. |
| Lateral Flow Devices (LFDs) | Immunoassay-based rapid tests designed for the specific, qualitative detection of a single allergenic protein (e.g., peanut, egg, gluten). They are used for on-site periodic verification and provide results in minutes [86] [5]. |
| ELISA Kits | Enzyme-Linked Immunosorbent Assay (ELISA) kits are laboratory-based, quantitative tests for specific allergens. They provide highly sensitive and accurate numerical data and are typically used for the initial validation of a cleaning process [5]. |
| Polyester Swabs | Sterile, low-lint swabs used for surface sampling. They are pre-wetted with an appropriate solvent to maximize residue recovery for both ATP and specific allergen testing [30]. |
| Recovery Solvents (e.g., Acetonitrile, Acetone) | Solvents used to pre-wet swabs and to extract residues from them post-sampling. Selection is based on the solubility of the target analyte (e.g., specific allergen or general residue) to ensure efficient recovery from the surface [30]. |
| A3 System & Lucipac Swabs | An advanced hygiene monitoring system that detects all three adenosine phosphates (ATP, ADP, AMP), providing a measurement of total organic residue. This offers greater sensitivity for detecting processed food residues and allergens compared to conventional ATP tests [86]. |
Experimental Protocols & Data
Protocol 1: Concurrent ATP and Allergen-Specific Testing for Correlation
Objective: To establish a correlation dataset between ATP readings (RLU) and the presence of specific allergenic proteins on a cleaned surface.
Methodology:
- Surface Selection: Identify at least 10 critical control points on processing equipment based on a risk assessment (e.g., cutter blades, pipe joints, conveyor belts) [56] [5].
- Sampling: After the routine cleaning process, swab a defined area (e.g., 100 cm²) at each point.
- First, use an allergen-specific LFD swab following the manufacturer's instructions.
- Immediately after, use an ATP swab on the same, adjacent area and take a reading.
- Data Recording: Record the LFD result (positive/negative) and the corresponding ATP value (in RLU) for each location.
- Analysis: Plot the data to identify an ATP threshold below which no positive allergen results occur. This threshold becomes a candidate for your routine ATP limit.
Quantitative Comparison of Rapid Testing Methods
The table below summarizes performance data for different testing methodologies, highlighting the need for a complementary approach.
Table 1: Sensitivity Comparison of Rapid Hygiene Monitoring Methods for Peanut Residue [86]
| Testing Method | Detection Capability (Peanut) | Key Characteristic |
|---|---|---|
| Conventional ATP Test | Up to 10²-fold dilution | Measures general hygiene; not allergen-specific. |
| Protein-Specific Swab | Up to 10²-fold dilution | Detects general protein; protein denaturation can cause false negatives. |
| Lateral Flow Immunoassay (LFI) | Up to 10⁵-fold dilution | Highly sensitive and specific to a single allergen. |
| A3 System | Between 10⁵ and 10⁶-fold dilution | Most sensitive for total organic residue; not allergen-specific. |
Table 2: RLU Value Comparison for Various Allergens [86]
| Allergen Tested | Conventional ATP Test (RLU) | A3 System (RLU) |
|---|---|---|
| Skim Milk Powder | ~2,500 | ~9,500 |
| Whole Egg Powder | ~4,000 | ~13,000 |
| Wheat Flour | ~1,700 | ~9,000 |
| Raw Shrimp | ~1,200 | ~6,000 |
Integrated Monitoring Workflow
The following diagram illustrates the recommended workflow for integrating ATP monitoring with periodic allergen-specific testing within a cleaning validation program.
Conclusion
A robust, scientifically sound cleaning validation protocol is not a one-time event but a dynamic system fundamental to preventing allergen cross-contact. Success hinges on a foundational understanding of the hazard, a meticulously planned and executed validation study under worst-case conditions, proactive troubleshooting strategies, and a sustainable verification program using fit-for-purpose analytical methods. For biomedical and clinical research, these principles ensure the integrity of products and protect vulnerable patients. Future directions will involve the adoption of more sensitive and rapid detection technologies, the potential establishment of science-based threshold levels for allergens, and the increased harmonization of global regulatory standards to strengthen public health protection.
References
- 1. Avoiding Cross-Contact [https://www.foodallergy.org/resources/avoiding-cross-contact]
- 2. Cross-Contact VS Cross-Contamination: What's the ... [https://www.fooddocs.com/post/cross-contact-vs-cross-contamination]
- 3. Understanding Allergen Cross-Contact: What Every Food ... [https://blog.aibinternational.com/understanding-allergen-cross-contact-what-every-food-facility-should-know]
- 4. Food Allergies [https://www.fda.gov/food/nutrition-food-labeling-and-critical-foods/food-allergies]
- 5. Know: Allergen Cleaning Validation [https://foodindustryhub.com/food-industry-knowledge-centre/know-allergen-cleaning-validation/]
- 6. Avoiding Cross-Contact Allergen Contamination | FAACT [https://www.foodallergyawareness.org/food-allergy-and-anaphylaxis/cross-contact/cross-contact/]
- 7. Navigating Allergen Cross Contact: 5 Questions for Food ... [https://certified-laboratories.com/blog/the-complex-world-of-allergen-cross-contact-controls/]
- 8. Food Allergen Labeling Guidance for Industry [https://www.fda.gov/food/food-allergensgluten-free-guidance-documents-regulatory-information/frequently-asked-questions-food-allergen-labeling-guidance-industry]
- 9. FDA Finalizes Two Guidance Documents Related to Food ... [https://www.cov.com/en/news-and-insights/insights/2025/01/fda-finalizes-two-guidance-documents-related-to-food-allergens]
- 10. Navigating the New FDA Food Allergen Labeling Guidelines [https://oklahomaallergy.com/blog/fda-food-allergen-2025/]
- 11. FSMA Final Rule for Preventive Controls for Human Food [https://www.fda.gov/food/food-safety-modernization-act-fsma/fsma-final-rule-preventive-controls-human-food]
- 12. GFSI-Recognised Certification Programme Owners [https://mygfsi.com/how-to-implement/recognition/certification-programme-owners/]
- 13. SQF Food Safety Explained: 2025 Certification Guide For ... [https://foodtech.folio3.com/blog/sqf-food-safety-guide-for-manufacturers/]
- 14. SQF Food Safety Program and Codes [https://www.sqfi.com/our-program/certification-programs/food-safety-program]
- 15. Allergen Cleaning Procedure: Validation vs. Verification [https://glenwood.ph/2021/07/allergen-cleaning-procedure-validation-vs-verification-2/]
- 16. Major Allergens: The Big Nine [https://www.cacfp.org/2025/05/08/major-allergens-the-big-nine/]
- 17. Ask the Expert - Emerging allergens - Spring 2025 issue [https://foodallergycanada.ca/ask-the-expert-understanding-allergen-thresholds-spring-2025-issue/]
- 18. Common Allergens - Peanut, Egg, and Sesame Allergies [https://www.foodallergy.org/living-food-allergies/food-allergy-essentials/common-allergens]
- 19. New food allergies: Pine nuts can make the list, say experts [https://www.bbc.com/news/articles/c5ypgrzxx9go]
- 20. Food allergy thresholds, context, and balance in 2025 - PMC [https://pmc.ncbi.nlm.nih.gov/articles/PMC12322902/]
- 21. Designing a successful allergen cleaning validation strategy [https://www.rssl.com/insights/food-consumer-goods/designing-a-successful-allergen-cleaning-validation-strategy/]
- 22. 10 Steps to Validating and Verifying Allergen Cleaning ... [https://www.romerlabs.com/en/library/knowledge/detail/10-steps-to-validating-and-verifying-allergen-cleaning-procedures]
- 23. Allergenicity of Alternative Proteins : Reduction Mechanisms and... [https://pmc.ncbi.nlm.nih.gov/articles/PMC11969658/]
- 24. AllerSnap® | Hygiena [https://www.hygiena.com/food-safety/allergen-detection/general-protein/allersnap]
- 25. Allergen Cleaning Validation and Verification [https://www.hygiena.com/news/allergen-cleaning-validation-and-verification]
- 26. Allergen Control In Packaging Lines: Equipment Design & ... [https://wolf-packing.com/allergen-control-in-packaging-lines-equipment-design-best-practices/]
- 27. : Cleaning & Validation | SafetyCulture Protocol Guidelines [https://safetyculture.com/topics/cleaning-validation]
- 28. Current Industry Trends Impacting Cleaning Validation [https://validation.org/current-industry-trends-impacting-cleaning-validation/]
- 29. Why Modernizing Cleaning Validation Is Crucial for ... [https://www.valgenesis.com/blog/why-modernizing-cleaning-validation-is-crucial-for-compliance]
- 30. Cleaning validation in pharmaceutical quality control ... [https://pmc.ncbi.nlm.nih.gov/articles/PMC12229404/]
- 31. Cleaning level acceptance criteria and HPLC-DAD method ... [https://pmc.ncbi.nlm.nih.gov/articles/PMC5760904/]
- 32. Cleaning Method Validation Protocol for Pharmaceutical ... [https://www.pharmaguideline.com/2014/03/cleaning-method-validation-protocol-for-pharmaceutical-equipmemts.html]
- 33. Allergen Cleaning Validation: A Practical Guide for Food ... [https://www.klipspringer.com/blogs/allergen-cleaning-validation-a-practical-guide-for-food-factories/]
- 34. Managing Food Allergen Risks - A Guide for Manufacturers [https://www.mda.state.mn.us/food-feed/managing-food-allergen-risks-guide-manufacturers]
- 35. Worst Case Selection In Cleaning Validation [https://gmpinsiders.com/worst-case-selection-in-cleaning-validation/]
- 36. Identification of Worst Case in Cleaning Validation [https://www.pharmaguideline.com/2019/04/identification-of-worst-case-in-cleaning-validation.html]
- 37. Validation of Cleaning Processes (7/93) [https://www.fda.gov/inspections-compliance-enforcement-and-criminal-investigations/inspection-guides/validation-cleaning-processes-793]
- 38. What's a “Worst Case”? [https://cleaningvalidation.com/memos/whats-a-worst-case-february-2021/]
- 39. How to Develop HACCP Corrective Actions for Allergen Risks [https://www.eatfresh.tech/blog/how-to-develop-haccp-corrective-actions-for-allergen-risks]
- 40. Food Allergen Analysis [https://allergenbureau.net/food-allergens/food-allergen-analysis/]
- 41. Food allergen testing: should you use ELISA, PCR, or LFA ... [https://blog.invitek.com/articles/foodsafetyintegrity/food-allergen-testing-should-you-use-elisa-pcr-or-lfa-methods]
- 42. Validation vs Verification in a Food Factory Webinar [https://www.hygiena.com/news/validation-vs-verification-food-factory-webinar]
- 43. Allergen Analysis – key considerations (including gluten & ... [https://www.ifst.org/resources/information-statements/allergen-analysis-%E2%80%93-key-considerations-including-gluten-food]
- 44. What's the difference between LFD , ELISA and PCR testing? [https://emportllc.com/lfd-elisa-pcr-testing/]
- 45. PCR & ELISA Allergen Testing: How Manufacturers Detect ... [https://certified-laboratories.com/blog/pcr-elisa-allergen-testing-how-manufacturers-detect-hidden-risks/]
- 46. ELISA Troubleshooting Guide [https://www.thermofisher.com/us/en/home/life-science/protein-biology/protein-biology-learning-center/protein-biology-resource-library/pierce-protein-methods/overview-elisa/elisa-troubleshooting-guide.html]
- 47. ELISA Tips: Troubleshooting Common Challenges - Blog [https://www.arp1.com/blog/post/elisa-kit-troubleshooting-tips.html]
- 48. Troubleshooting Guide: ELISA [https://www.rndsystems.com/resources/troubleshooting-guide-elisa-development]
- 49. How to Avoid Allergen Cross Contact in Food Manufacturing [https://certified-laboratories.com/blog/food-allergen-testing-avoiding-allergen-cross-contact/]
- 50. Cleaning validation protocol for pharmaceutical industry [https://www.gmpsop.com/cleaning-validation-protocol/]
- 51. a structured protocol for contamination risk mitigation [https://link.springer.com/article/10.1007/s40199-025-00566-x]
- 52. What Is Root Cause Analysis? | Cordant [https://rca.bakerhughes.com/page/about]
- 53. Three Ways to Simplify Root Cause Discovery ... [https://www.accrete.ai/blog/three-ways-to-simplify-root-cause-discovery-root-cause-analysis]
- 54. Root Cause Analysis: What It Is & How to Perform One [https://online.hbs.edu/blog/post/root-cause-analysis]
- 55. SQF Allergen Controls: Preventing Cross-Contact and ... [https://www.registrarcorp.com/blog/food-beverage/food-safety/sqf-allergen-controls/]
- 56. Cleaning Tips To Prevent Allergen Cross-Contact Issues [https://blog.aibinternational.com/cleaning-tips-to-prevent-cross-contact-issues]
- 57. Cleaning [https://info.allergenbureau.net/infographic/cleaning/]
- 58. Capability of commercial cleaning procedures to remove ... [https://www.sciencedirect.com/science/article/pii/S0260877425001517]
- 59. Validation for food allergens in an environmental ... [https://www.neogen.com/en/usac/neocenter/blog/validation-for-food-allergens-in-an-environmental-monitoring-program/]
- 60. Top 7 Mistakes in selecting Equipment Sampling Locations [https://www.leucine.io/cleaning-validation-blogs/top-7-mistakes-in-selecting-equipment-sampling-locations]
- 61. What is TACT and Why is It Important? - Dober [https://www.dober.com/chematic/resources/what-is-tact-and-why-is-it-important]
- 62. How Understanding Chemistry Enhances Corporate Cleaning ... [https://dropngocleaningproducts.com/post/Art-of-Cleaning-How-Understanding-Chemistry-Enhances-Corporate-Cleaning-Practices]
- 63. The Power of Caustic Cleaning: Safe & Effective Solutions [https://elchemy.com/blogs/intermediates-solvents/caustic-cleaning-safe-effective-solutions]
- 64. The Importance of Agitation & Filtration in Cleaning [https://blog.ultrasonicllc.com/optimizing-results-the-importance-of-agitation-filtration-in-cleaning]
- 65. Final rinse optimization: influence of different agitation ... [https://pubmed.ncbi.nlm.nih.gov/20113791/]
- 66. Optimization of chemical cleaning of a reverse osmosis ... [https://www.sciencedirect.com/science/article/pii/S1944398624051129]
- 67. Visual Inspection: An In-Depth Guide [New for 2025] [https://mfe-is.com/visual-inspection/]
- 68. Cleaning and other control and validation strategies to ... [https://pubmed.ncbi.nlm.nih.gov/18326204/]
- 69. Visual Inspection Tips for 2025 Quality Checks [https://www.tradeaiders.com/visual-inspection-tips-for-2025-quality-checks.html]
- 70. Training, Law, and Human Factors – SHOT 2025 Highlights [https://www.forcescience.com/2025/02/training-law-and-human-factors-shot-2025-highlights/]
- 71. HR Training Process Problems & Solutions for 2025 [https://kroolo.com/blog/hr-training-process-problems]
- 72. Regulatory Compliance & Human Error: Navigating the ... [https://www.dragnetsecure.com/blog/regulatory-compliance-human-error-navigating-the-human-factor-in-2025s-evolving-cybersecurity-landscape?hsLang=en]
- 73. What is the difference between Allergen and ATP Testing? [https://emportllc.com/surface-testing-for-food-safety-what-is-the-difference-between-allergen-testing-and-atp-testing/]
- 74. Allergen Cross-Contamination: Risks and Prevention, Part II [https://www.hygiena.com/news/allergen-cross-contamination-risks-and-prevention-part-ii]
- 75. Your Guide to Adenosine Triphosphate (ATP) Testing [https://www.neogen.com/en/usac/neocenter/blog/your-guide-to-atp-testing/]
- 76. ATP Testing: The Complete Guide for Cleaning Companies. [https://www.foremost-uk.com/section/ATP-Testing-The-Complete-Guide]
- 77. Clean-Trace® ALLTEC60 Surface Protein Test Swab [https://www.neogen.com/en/categories/allergens/clean-trace-surface-allergen-protein-test-swab/]
- 78. Protein Test Swabs: How to Verify Allergen Control [https://blog.puritanmedproducts.com/protein-test-swabs-how-to-verify-allergen-control]
- 79. Environmental Monitoring for Food Allergens [https://www.neogen.com/en/usac/neocenter/blog/environmental-monitoring-for-food-allergens/]
- 80. Comparison of Detection Limits for Allergenic Foods ... [https://pubmed.ncbi.nlm.nih.gov/32221524/]
- 81. A study to reduce the allergen contamination in food- ... [https://www.sciencedirect.com/science/article/abs/pii/S1878450X19300174]
- 82. Validation cleaning [https://www.allergenenconsultancy.nl/en/validatie-reiniging?srsltid=AfmBOorPb91EVBuU5XaHWE5AfR4I4_OR86h1De01oWrPLqb4DwsHeNyX]
- 83. ELISA Troubleshooting Guide [https://www.bio-techne.com/resources/protocols-troubleshooting/elisa-troubleshooting]
- 84. Considerations for Risk-Based Sampling During ... [https://www.americanpharmaceuticalreview.com/Featured-Articles/580332-asdf/]
- 85. Risk-based approach and statistical methods in process ... [https://www.seleon.com/en/risk-based-approach-and-statistical-methods-in-process-validation/]
- 86. Allergen Testing and the A3 System [https://www.klipspringer.com/blogs/allergen-testing-and-the-a3-system-everything-you-need-to-know/]