Microfluidic Origami Nano-aptasensors for Peanut Allergen Detection: A Comprehensive Guide for Researchers
This article provides a detailed exploration of microfluidic origami nano-aptasensors, an emerging technology for rapid, sensitive, and on-site detection of peanut allergens.
Microfluidic Origami Nano-aptasensors for Peanut Allergen Detection: A Comprehensive Guide for Researchers
Abstract
This article provides a detailed exploration of microfluidic origami nano-aptasensors, an emerging technology for rapid, sensitive, and on-site detection of peanut allergens. Aimed at researchers, scientists, and drug development professionals, it covers the foundational principles of using paper-based microfluidics and aptamer bioreceptors, the methodology for fabricating and operating these devices, critical optimization parameters for enhancing performance, and the validation of these sensors against complex food matrices and established techniques. The content synthesizes recent advancements, including the application of novel nanomaterials like black phosphorus for signal amplification, to present a complete picture of the current state and future potential of this transformative point-of-need diagnostic tool.
The Foundation of Microfluidic Origami Aptasensors: Principles, Components, and Significance
What are μPADs?
Microfluidic Paper-Based Analytical Devices (μPADs) are a class of analytical devices that use paper as a substrate to create microfluidic structures, such as channels and reaction zones, by patterning hydrophobic materials onto the hydrophilic paper [1] [2]. The field was notably advanced by the work of Whitesides and colleagues in 2007 [1]. These devices leverage the natural capillary action of paper to wick fluids without the need for external pumps or power sources, making them particularly suited for developing low-cost, portable, and disposable diagnostic tools [1] [2]. The most common application of paper-based microfluidic devices is in the development of point-of-care (POC) diagnostic devices, which could eliminate the need for costly and time-consuming laboratory-based analytical procedures [2].
Key Advantages of μPADs
The appeal of μPADs stems from a combination of physicochemical and practical benefits.
- Affordability and Accessibility: Paper is a low-cost, readily available, and lightweight material, making μPADs inexpensive to produce [1]. This enables their deployment in resource-limited and remote areas [3].
- Power-Free Operation: The cellulose fiber network of paper wicks fluids by capillary action, enforcing complete mixing and reaction at the micro-level without requiring external power [3] [1].
- Miniaturization and Portability: μPADs are miniaturized systems that consume small volumes of samples and reagents [3] [1]. Their small size and simplicity contribute to excellent portability.
- Ease of Use and Disposal: The design of μPADs is often simple and user-friendly, requiring minimal training to operate [1]. Being made primarily of paper, they are also easy to dispose of, often by incineration [1].
- Versatility and Biocompatibility: Paper is an excellent substrate for immobilizing various biological recognition elements (e.g., antibodies, aptamers, enzymes) [4]. Its inherent biocompatibility makes it suitable for a wide range of chemical and biochemical analyses [1].
Fabrication and Detection Techniques
Fabrication Methods
A variety of techniques exist for creating hydrophobic barriers on paper to define the microfluidic pathways.
- Wax Printing: A low-cost and simple method where a wax pattern is printed onto paper and then heated to allow the wax to penetrate through the paper, creating a hydrophobic barrier [1].
- Photolithography: This was the first method used to create μPADs. It involves using UV light to pattern a photoresist on paper, resulting in high-resolution structures [1].
- Inkjet Etching/Printing: This technique can be used to modify the surface properties of paper to create hydrophilic channels [1].
- Plasma Etching and Flexographic Printing: Other methods that can define hydrophobic and hydrophilic regions on paper substrates [1].
- PDMS Plotting: A computer-controlled plotter is used to deposit polydimethylsiloxane (PDMS) onto the paper to form the fluidic channels [1].
Detection Methods
Detection of analytes on μPADs can be achieved through several means, each with its own advantages.
- Colorimetric Detection: This is a cost-effective and simple method where a color change indicates the presence or concentration of an analyte. It is easily read by the naked eye or with a simple scanner [1].
- Electrochemical Detection: This method offers high sensitivity and selectivity. It involves measuring electrical signals (e.g., current, potential) resulting from a biochemical reaction and is well-suited for portable instrumentation [1] [5].
- Chemiluminescence (CL) Detection: CL detection involves measuring light emitted from a chemical reaction. It provides high sensitivity and a wide dynamic range and is highly amenable to miniaturization [1] [4].
- Fluorescence Detection: This method relies on measuring the light emitted by a fluorescent molecule and can offer very high sensitivity [1].
Application in Allergen Detection: A Model Protocol
The following section details a specific application of a μPAD for detecting the peanut allergen Ara h1, demonstrating the integration of the principles discussed above. This protocol is adapted from recent research and serves as an excellent model for point-of-care food safety analysis [5].
Workflow for an Electrochemical μ-PAD for Ara h1 Detection
The overall process, from device preparation to final detection, is visualized in the following workflow. This particular approach utilizes an electrochemical detection method with signal amplification via nanocomposites.
Detailed Experimental Protocol
Objective: To quantitatively detect the peanut allergen Ara h1 in food products using a portable microfluidic paper-based analysis device (μ-PAD) with electrochemical detection.
Principle: The device operates based on the variation in the differential pulse voltammetry (DPV) response current induced by the specific capture of the target Ara h1 allergen. Black phosphorus–Au nanocomposites (BP–Au) are used to enhance the electron transfer rate at the electrode interface for signal amplification. A specific sulfhydryl-terminated aptamer is immobilized on the nanocomposite via Au–S bonding. When the target Ara h1 is present, it binds to the aptamer, causing steric hindrance that reduces the DPV current. The decrease in current is proportional to the concentration of Ara h1 [5].
Materials:
- Black phosphorus crystals: Served as the starting material for synthesizing black phosphorus nanosheets (BPNSs) [5].
- Chloroauric acid (HAuCl₄·3H₂O): Used for the in-situ growth of AuNPs on BPNSs to form BP-Au nanocomposites [5].
- Ara h1 aptamer: A single-stranded DNA oligonucleotide with a 5' sulfhydryl modification (-SH). Its sequence is: 5'-SH-C6-TCG CAC ATT CCG CTT CTA CCG GGG GGG TCG AGC GAG TGA GCG AAT CTG TGG GTG GGC CGT AAG TCC GTG TGT GCG AA-3' [5].
- Phosphate Buffered Saline (PBS): Used as a buffer solution.
- Food samples: e.g., cookies, bread, milk.
- Whatman chromatographic paper: Used as the substrate for the μ-PAD.
- Electrochemical workstation: For performing DPV measurements.
Procedure:
- Device Fabrication: Create the μ-PAD using a patterning method such as wax printing on Whatman chromatographic paper. The design should include a working electrode, a counter electrode, and a reference electrode [5].
- Nanocomposite Synthesis and Electrode Modification:
- Exfoliate black phosphorus crystals to obtain BPNSs.
- Synthesize BP-Au nanocomposites by immersing BPNSs in a HAuCl₄ solution, leading to the in-situ growth and anchoring of AuNPs on the BPNSs.
- Drop-cast the prepared BP-Au nanocomposite suspension onto the surface of the working electrode and allow it to dry.
- Aptamer Immobilization: Incubate the modified working electrode with the sulfhydryl-modified Ara h1 aptamer solution. The AuNPs on the nanocomposite will form stable Au–S bonds with the aptamer, fixing it to the electrode surface. Wash with PBS to remove unbound aptamers.
- Sample Analysis:
- Sample Extraction: Extract proteins from the homogenized food sample using an appropriate buffer.
- Detection: Apply the extracted sample solution to the detection zone of the μ-PAD. Incubate for a specific time (e.g., 20 minutes) to allow the Ara h1 allergen to bind to the immobilized aptamer.
- Measurement: Perform DPV measurements on the device. Record the peak current response.
- Quantification: Compare the DPV current response of the sample to a calibration curve obtained from standards with known concentrations of purified Ara h1 to determine the concentration in the sample.
Performance Data of the Ara h1 μ-PAD
The analytical performance of the described μ-PAD for detecting Ara h1 is summarized in the table below.
Table 1: Analytical performance of the electrochemical μ-PAD for Ara h1 detection [5].
| Parameter | Result |
|---|---|
| Detection Principle | Electrochemical (Differential Pulse Voltammetry) |
| Linear Range | 25 – 800 ng mL⁻¹ |
| Limit of Detection (LOD) | 11.8 ng mL⁻¹ |
| Total Analysis Time | < 20 minutes |
| Specificity | Good (tested against Ara h2) |
| Recovery in Spiked Food | 93.50% – 101.86% |
| Correlation with ELISA (R²) | 0.9956 |
Research Reagent Solutions for μ-PADs
The table below lists key reagents and materials commonly used in the development and operation of μ-PADs, particularly for biosensing applications like allergen detection.
Table 2: Essential research reagents and materials for μ-PAD-based biosensing.
| Reagent/Material | Function and Role in μ-PADs |
|---|---|
| Chromatography Paper (e.g., Whatman) | Serves as the hydrophilic, porous substrate that drives fluid flow via capillary action and provides a surface for reactions [5] [4]. |
| Aptamers | Single-stranded DNA or RNA oligonucleotides that act as synthetic recognition elements; they bind targets with high specificity and offer advantages in cost and stability over antibodies [5]. |
| Magnetic Microbeads (MBs) | Functionalized particles used for easy and efficient immobilization of biomolecules (e.g., antigens, antibodies) on paper, increasing the surface area for immunoreactions [4]. |
| Black Phosphorus-Au Nanocomposite | A nanomaterial used to modify electrodes; it improves electrical conductivity for signal amplification and provides a substrate for immobilizing biomolecules via bonding with gold [5]. |
| Electrochemical Probes (e.g., in DPV) | The measurement technique for quantitative detection; it offers high sensitivity, portability, and is compatible with miniaturized systems [5]. |
| Chemiluminescence Substrates (e.g., Luminol) | A highly sensitive detection method where light emission from a chemical reaction is measured, eliminating the need for an external light source [4]. |
The Evolution: μPAEDs and 3D Origami Devices
The field of paper-based microfluidics continues to evolve. A significant advancement is the development of microfluidic paper-based analytical extraction devices (μPAEDs). These are all-in-one devices that integrate an extraction system (e.g., solid-phase extraction) directly with the detection system on a single paper platform. This integration minimizes sample preparation steps, reduces the time between extraction and detection, and further enhances the device's suitability for on-site analysis [3].
Another major innovation is the creation of 3D μPADs using origami (folding) and kirigami (cutting) techniques. This approach allows for the construction of devices that can conduct complex, multi-step analytical procedures, such as full immunoassays, by controlling fluid flow vertically between layers. Reagents can be pre-loaded and stored in different layers, making the device a ready-to-use, self-contained analytical platform [4]. The following diagram illustrates the concept of an origami-based device for a multi-step assay.
In conclusion, μPADs represent a powerful and versatile analytical platform whose advantages—cost-effectiveness, portability, and ease of use—make them ideally suited for point-of-care applications. Their continued development, including integration with extraction methods and complex 3D designs, is poised to have a significant impact on fields ranging from clinical diagnostics to food safety and environmental monitoring.
In the realm of biosensing and diagnostic development, the selection of an appropriate biorecognition element is paramount. For decades, antibodies have been the cornerstone reagent for molecular detection in applications from research to clinical diagnostics. However, aptamers, which are short, single-stranded DNA or RNA oligonucleotides selected for specific target binding, have emerged as a powerful alternative [6]. For researchers developing advanced sensors, such as a microfluidic origami nano-aptasensor for peanut allergen detection, understanding the fundamental distinctions between these two molecular tools is critical for making an informed choice that aligns with the performance needs and practical constraints of the project [7].
This article provides a objective comparison, structured within the context of food allergen research, to equip scientists with the information needed to strategically select bioreceptors. We will compare the intrinsic properties of aptamers and antibodies, summarize quantitative data for easy comparison, and provide detailed experimental protocols that highlight the integration of aptamers into state-of-the-art sensing platforms.
Molecular Characteristics: A Head-to-Head Comparison
Aptamers and antibodies differ fundamentally in their origin, structure, and production, which gives rise to unique performance characteristics.
Origin and Production: Aptamers are discovered entirely in vitro through a process called SELEX (Systematic Evolution of Ligands by EXponential enrichment), which selectively enriches oligonucleotide sequences from a vast random library for their ability to bind a specific target [6]. In contrast, antibodies are large protein immunoglobulins generated in vivo by the immune system of animal models or by recombinant expression [6]. This difference in production has a direct impact on batch-to-batch consistency, with aptamers exhibiting near non-existent variability due to their chemical synthesis [6] [8].
Size and Structure: Aptamers are significantly smaller, typically 5–10 times smaller (1–3 nm) and 10 times lighter (~15 kDa) than antibodies (~150 kDa, 10–15 nm) [6]. This compact size allows for high packing density on sensor surfaces, which can enhance sensitivity.
Stability and Renaturation: A key operational advantage of aptamers is their robust stability. They can tolerate a wide range of pH and temperature, be dried and rehydrated, and can often be heat-denatured and refolded to restore function. Antibodies, once denatured, typically aggregate irreversibly and lose function [6]. The table below provides a detailed breakdown of these properties.
Table 1: Comparative Properties of Bioreceptors
| Feature | Aptamers | Antibodies |
|---|---|---|
| Molecule Type | Single-stranded DNA or RNA | Protein (Immunoglobulin) |
| Size / Molecular Weight | 1–3 nm / ~15 kDa [6] | 10–15 nm / ~150 kDa [6] |
| Production Process | Chemical synthesis (in vitro SELEX) [6] | Biological production (in vivo or cell culture) [6] |
| Batch-to-Batch Variability | Very low [6] [8] | Can be significant [6] |
| Thermal Denaturation | Can often renature after cooling [6] | Typically irreversible [6] |
| Storage Requirements | Lyophilized at room temperature; no cold chain needed [6] | Often requires refrigerated cold chain (2–8°C) [6] |
| Target Range | Virtually any molecule (ions, small molecules, proteins, cells) [6] | Limited by immunogenicity [6] |
| Modification | Easy, site-specific chemical modification [6] [7] | More challenging and unpredictable [6] |
Biosensing Applications and Experimental Protocols
The distinct properties of aptamers translate into tangible benefits in various biosensing formats, particularly in microfluidic and point-of-care devices where stability, cost, and miniaturization are critical.
Lateral Flow Assays (LFAs) and Microfluidic Platforms
Traditional LFAs and emerging microfluidic devices heavily rely on the stability and cost-effectiveness of their biorecognition elements.
Advantages of Aptamers: Aptamers remain functional after heat exposure and drying, making them ideal for settings without refrigeration [6]. Their synthetic nature also makes them about 5–6 times cheaper to manufacture at scale than antibodies [6]. Substituting aptamers can significantly reduce per-test reagent costs.
Protocol: Microfluidic Origami Nano-Aptasensor for Peanut Allergen (Ara h1) Detection [7]
- Objective: To construct a low-cost, rapid, and sensitive 3D microfluidic electrochemical sensor for detecting the major peanut allergen, Ara h1.
- Materials:
- Aptamer Probe: Ara h1-specific aptamer (sequence: 5́-TCG CAC ATT CCG CTT CTA CCG GGG GGG TCG AGC GAG TGA GCG AAT CTG TGG GTG GGC CGT AAG TCC GTG TGT GCG AA-3́) [7].
- Substrate: Chromatography paper patterned with PDMS microchannels and screen-printed electrodes (working, counter, reference).
- Nanomaterial: Black phosphorus nanosheets (BPNSs) to enhance electrochemical signal.
- Apparatus: Electrochemical workstation.
- Method:
- Probe Preparation: Decorate BPNSs with the Ara h1-specific aptamer via electrodeposition onto the paper-based working electrode.
- Chip Fabrication: Create the 3D sensor by sequentially folding the patterned paper substrate into an origami structure.
- Sample Incubation: Apply the extracted food sample to the sensor and allow it to react with the aptamer-decorated BPNSs for up to 20 minutes.
- Electrochemical Detection: Measure the current output. The specific binding of Ara h1 to the aptamer causes a variation in charge transfer on the electrode, resulting in a measurable change in current.
- Performance: This aptasensor achieved a detection limit of 21.6 ng/mL for Ara h1 in a linear range of 50–1000 ng/mL, demonstrating the potential for point-of-need testing [7].
Electrochemical Biosensors
Aptamers are exceptionally well-suited for electrochemical biosensing due to their ability to be engineered into reagentless, signal-on platforms.
E-AB Sensor Principle: In a typical electrochemical aptamer-based (E-AB) sensor, the aptamer is end-labelled with a redox molecule (e.g., methylene blue) and attached to an electrode surface. In the absence of the target, the aptamer is flexible, keeping the tag far from the electrode and limiting electron transfer. Upon target binding, the aptamer undergoes a conformational change that swings the redox tag closer to the electrode surface, resulting in a measurable increase in current [6]. This mechanism is rapid, real-time, and requires no wash steps or secondary reagents.
Protocol: HOF-Based Ultrasensitive Aptasensor for Ara h1 [9]
- Objective: To develop a highly sensitive electrochemical aptasensor using a conductive hydrogen-bonded organic framework (HOF) for signal amplification.
- Materials:
- Conductive HOF: Nickel-anchored PFC-73-Ni, serving as an excellent electrocatalyst.
- Electrode: Gold-electrodeposited glassy carbon electrode (DpAu@GCE).
- Aptamer: Thiol-modified Ara h1 aptamer immobilized on the electrode.
- Complementary DNA (cDNA): Sequence modified on the PFC-73-Ni for connection to the aptamer.
- Redox Mediator: Hydroquinone (HQ).
- Method:
- Electrode Functionalization: Immobilize the thiolated Ara h1 aptamer on the DpAu@GCE via Au-S bonding.
- Probe Assembly: Hybridize the PFC-73-Ni@cDNA conjugate with the aptamer on the electrode surface.
- Detection Mechanism: In the absence of Ara h1, the assembled structure catalyzes the oxidation of HQ, generating a strong electrochemical signal. When Ara h1 is present, it binds to the aptamer with higher affinity, displacing the PFC-73-Ni@cDNA and causing a signal decrease.
- Measurement: Record the differential pulse voltammetry (DPV) signal corresponding to the concentration of Ara h1.
- Performance: This sensor demonstrated an exceptionally low detection limit of 0.26 nM and a wide linear range of 1–120 nM, successfully detecting Ara h1 in spiked food samples [9].
The workflow below illustrates the core signaling mechanism of an electrochemical aptasensor.
Diagram 1: E-AB Sensor Signaling Mechanism
The Scientist's Toolkit: Key Research Reagent Solutions
For scientists embarking on the development of an aptamer-based sensor, the following reagents and materials are essential components of the experimental workflow.
Table 2: Essential Research Reagents for Aptasensor Development
| Reagent / Material | Function / Role in Development | Example from Context |
|---|---|---|
| Target-Specific Aptamer | The core biorecognition element that binds the analyte with high specificity and affinity. | Ara h1 aptamer (e.g., sequence P1-16 with Kd ~54 nM) [10]. |
| Chemical Modification Kits | Enable functionalization of aptamers (e.g., with thiol, biotin, or fluorescent tags) for immobilization and signaling. | Thiol modification for gold surface attachment [9]; Texas Red or Alexa Fluor 647 for optical assays [10]. |
| Nanomaterial Enhancers | Used to increase surface area, improve electron transfer, and amplify the detection signal. | Black Phosphorus Nanosheets (BPNSs) [7]; Conductive Hydrogen-Bonded Organic Frameworks (HOFs) like PFC-73-Ni [9]. |
| Microfluidic Chip Substrates | Provide a low-cost, portable platform for fluidic handling and sensor assembly. | Chromatography paper for origami devices [7]; PDMS or glass for conventional microfluidics [11]. |
| SELEX Kit Components | For the in vitro selection of new aptamers, including initial random oligonucleotide libraries and reagents for partitioning and amplification. | Used in the discovery of aptamers like P1-16 for peanut allergens [10] [12]. |
The choice between aptamers and antibodies is not merely a substitution of one reagent for another, but a strategic decision that influences sensor design, performance, and commercial viability. For applications demanding high stability, low-cost production, minimal batch variability, and ease of chemical modification—such as in point-of-care food allergen detection—aptamers present a compelling case [6] [13].
The ongoing development of sophisticated platforms like microfluidic origami aptasensors and HOF-enhanced electrochemical sensors underscores the growing synergy between novel materials and the unique properties of oligonucleotide bioreceptors [7] [9]. As the library of validated aptamers continues to expand, their role in empowering researchers to create next-generation diagnostic tools is set to increase significantly, potentially bridging critical gaps between complex laboratory testing and real-world analytical needs.
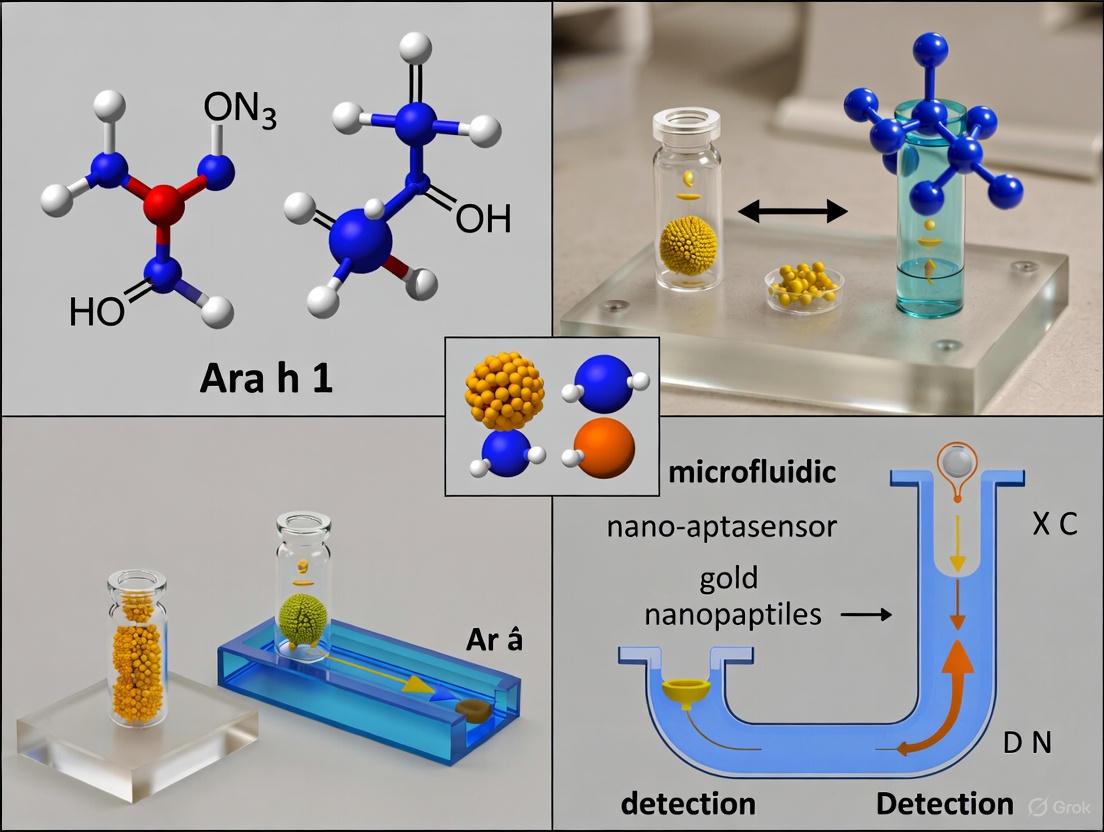
The peanut allergen Ara h1 is a major allergenic protein, constituting approximately 12–16% of the total peanut protein and being responsible for 35–95% of all peanut-induced allergic reactions [5]. Its reliable detection is crucial for public health. Microfluidic origami nano-aptasensors represent a cutting-edge analytical platform that combines the portability and low cost of paper-based microfluidics with the high specificity of nucleic acid aptamers. These devices are designed to bridge the gap between complex laboratory testing and rapid food allergen analysis at the point of need, offering detection times as short as 20 minutes [14] [5].
Performance Data and Analytical Figures of Merit
The analytical performance of different configurations of microfluidic aptasensors for Ara h1 detection is summarized in Table 1. The data demonstrate that these devices achieve clinically relevant detection limits and wide linear ranges suitable for monitoring allergen contamination in food products.
Table 1: Performance Comparison of Microfluidic Aptasensors for Ara h1 Detection
| Sensor Type / Key Material | Detection Method | Linear Range (ng/mL) | Limit of Detection (LOD) (ng/mL) | Total Analysis Time | Reference |
|---|---|---|---|---|---|
| Origami Nano-aptasensor / Black Phosphorus Nanosheets (BPNSs) | Electrochemical | 50 – 1,000 | 21.6 | ≤ 20 min | [14] |
| Paper-Based μ-PAD / BP–Au Nanocomposites | Electrochemical (DPV*) | 25 – 800 | 11.8 | ≤ 20 min | [5] |
*DPV: Differential Pulse Voltammetry
Experimental Protocol: Fabrication and Assay of a Microfluidic Origami Nano-Aptasensor
The following protocol details the fabrication of an origami microfluidic electrochemical nano-aptasensor and the procedure for the detection of Ara h1, based on optimized parameters from recent research [14] [5].
Materials Fabrication and Sensor Preparation
- Device Fabrication: Pattern a piece of chromatography paper with hydrophobic materials (e.g., wax or PDMS) to create microfluidic channels and screen-printed electrodes [14] [15].
- Synthesis of Black Phosphorus Nanosheets (BPNSs): Exfoliate black phosphorus crystals to obtain BPNSs. Characterize the resulting nanosheets using Transmission Electron Microscopy (TEM) to confirm a multi-layer structure with surface folds [5].
- Preparation of Sensing Probe: Decorate the synthesized BPNSs with Ara h1-specific aptamers. The aptamer sequence (5′-SH-C6-TCG CAC ATT CCG CTT CTA CCG GGG GGG TCG AGC GAG TGA GCG AAT CTG TGG GTG GGC CGT AAG TCC GTG TGT GCG AA-3′) should be used, with the thiol (-SH) modification allowing for binding to nanomaterials [5].
- Probe Immobilization: Electrodeposit the aptamer-decorated BPNSs onto the surface of the paper-based working electrode. This creates the core sensing interface.
Assay Procedure for Ara h1 Detection
- Sample Introduction: Apply the prepared food extract (approximately 20-50 µL) directly to the sample inlet zone of the folded origami device.
- Immunoreaction: Allow the sample to wick through the device for a defined incubation period (optimized to be within 20 minutes). During this time, the target Ara h1 protein in the sample binds specifically to the immobilized aptamers on the electrode surface.
- Washing: Unfold and refold the origami device to align the reaction zone with pre-loaded washing buffers. This step removes unbound substances. The use of multiple washing layers in the 3D origami design ensures efficient cleaning [15].
- Signal Measurement: After washing, the electrochemical signal is measured directly on the paper-based electrode. The common technique used is Differential Pulse Voltammetry (DPV). The binding of the target protein hinders electron transfer at the electrode surface, resulting in a measurable decrease in the DPV current response, which is proportional to the Ara h1 concentration [5].
- Quantification: Quantify the Ara h1 concentration in the unknown sample by interpolating the measured signal against a standard calibration curve prepared with known concentrations of purified Ara h1.
Critical Optimization Parameters
For optimal sensor performance, the following parameters should be optimized:
- Aptamer Probe Concentration: The density of aptamers on the nanosheets affects sensitivity.
- Aptamer Self-Assembly Time: The duration allowed for the aptamers to correctly fold and assemble on the nanomaterial surface.
- Antigen-Aptamer Reaction Time: The incubation time for the target allergen to bind to the aptamer probe [14].
Workflow and Signaling Pathway Visualization
The following diagrams, generated using Graphviz and adhering to the specified color palette, illustrate the experimental workflow and the signaling mechanism of the aptasensor.
Aptasensor Assay Workflow
Signaling Mechanism
This diagram illustrates the electrochemical signaling mechanism based on electron transfer hindrance upon target binding.
The Scientist's Toolkit: Essential Research Reagents and Materials
Table 2: Key Reagent Solutions for Aptasensor Development
| Item | Function/Description | Application in Ara h1 Detection |
|---|---|---|
| Black Phosphorus Nanosheets (BPNSs) | A two-dimensional nanomaterial with high carrier mobility and large surface area for probe immobilization; serves as an excellent signal amplification platform [14] [5]. | Used as the core sensing substrate. Often decorated with aptamers and electrodeposited on the electrode. |
| BP-Au Nanocomposites | Formed by in-situ growth of AuNPs on BPNSs; enhances electrical conductivity and stability of the sensing platform, and provides a surface for aptamer attachment via Au-S bonds [5]. | Improves electron transfer rate and serves as a stable substrate for immobilizing thiol-modified aptamers. |
| Ara h1 Specific Aptamer | A single-stranded DNA oligonucleotide selected for high affinity and specificity to the Ara h1 protein; serves as the biological recognition element [14] [5]. | The primary bioreceptor that specifically captures the target Ara h1 allergen from complex sample matrices. |
| Magnetic Microbeads (MBs) | Micron-sized particles used for easy and efficient immobilization of biomolecules (e.g., antigens) on paper substrates within defined reaction zones [15]. | Can be used in competitive assay formats to immobilize a reference antigen, facilitating separation and washing steps. |
Application Notes: BPNSs in Microfluidic Aptasensors
The integration of Black Phosphorus Nanosheets (BPNSs) into microfluidic origami aptasensors represents a significant advancement in the development of rapid, sensitive, and portable platforms for peanut allergen detection. These nanomaterials enhance biosensor performance through their unique physicochemical properties.
Key Properties and Functional Advantages
BPNSs contribute critical functionalities to the nano-aptasensor system. Their two-dimensional, layered structure provides an exceptionally large surface area for the immobilization of high-density aptamer probes, which are the biological recognition elements for the peanut allergen Ara h 1 [7]. Furthermore, BPNSs exhibit high carrier mobility and considerable catalytic activity, which directly enhances the electrochemical signal transduction, leading to improved detection sensitivity [7]. The functionalization of BPNSs is a crucial step; in the referenced microfluidic origami aptasensor, BPNSs were decorated with a specific Ara h 1 aptamer and poly-L-lysine (PLL) to form stable BPNSs-PLL-Apt bioconjugates on the paper-based working electrode [7].
Performance in Allergen Detection
The application of this BPNS-enhanced aptasensor for detecting the peanut allergen Ara h 1 has demonstrated high performance, as summarized in the table below.
Table 1: Analytical Performance of the BPNSs-based Microfluidic Origami Nano-aptasensor
| Performance Parameter | Result |
|---|---|
| Detection Principle | Electrochemical, Label-free [7] |
| Target Allergen | Peanut Ara h 1 [7] |
| Linear Detection Range | 50 – 1000 ng/mL [7] |
| Sensitivity | 0.05 µA·ng/mL [7] |
| Limit of Detection (LOD) | 21.6 ng/mL [7] |
| Total Assay Time | < 20 minutes [7] |
| Sensor Cost | ~USD $0.8 [7] |
This sensor has been successfully validated with real food samples, such as cookie dough spiked with Ara h 1, confirming its practicality for food allergen analysis at the point of need [7].
Experimental Protocols
Protocol 1: Fabrication of the Microfluidic Origami Nano-aptasensor
This protocol details the construction of the paper-based electrochemical sensor platform.
2.1.1 Materials and Reagents
- Chromatography paper substrate [7]
- Conductive carbon ink (for screen-printing electrodes) [7]
- Ag/AgCl ink (for reference electrode) [7]
- Polydimethylsiloxane (PDMS) for microchannel patterning [7]
2.1.2 Procedure
- Microchannel Patterning: Create an array of microfluidic channels on the chromatography paper by patterning with PDMS. The paper's inherent capillary action enables fluid flow without external pumps [7].
- Electrode Screen-Printing: Pattern the working electrode (WE), counter electrode (CE), and reference electrode (RE) onto the paper substrate using conductive carbon and Ag/AgCl inks [7].
- Origami Assembly: Design the chip in a two-dimensional flat geometry that can be sequentially folded to create a 3D structure with a separate layer for the working electrode [7].
Protocol 2: Synthesis of Aptamer-Decorated BPNSs (BPNSs-PLL-Apt)
This protocol covers the preparation and functionalization of the BPNS-based sensing probe.
2.2.1 Materials and Reagents
- Bulk black phosphorus crystals [7]
- N-methyl-2-pyrrolidone (NMP) solvent [7]
- Ara h 1-specific aptamer (sequence: 5́-TCG CAC ATT CCG CTT CTA CCG GGG GGG TCG AGC GAG TGA GCG AAT CTG TGG GTG GGC CGT AAG TCC GTG TGT GCG AA-3́) [7]
- Poly-L-lysine (PLL) [7]
2.2.2 Procedure
- Liquid-phase Exfoliation of BPNSs: Exfoliate bulk black phosphorus in NMP solvent under a nitrogen atmosphere to produce few-layer BPNSs [7].
- Characterization: Verify the successful exfoliation using Scanning Electron Microscopy (SEM) and Transmission Electron Microscopy (TEM). The resulting BPNSs should exhibit a typical sheet-like and layered structure [7].
- Bioconjugation: Immobilize the Ara h 1-specific aptamer onto the BPNSs using poly-L-lysine (PLL) as a linking polymer to form the BPNSs-PLL-Apt bioconjugates [7].
- Electrodeposition: Electrodeposit the prepared BPNSs-PLL-Apt bioconjugates onto the surface of the paper-based working electrode [7].
Protocol 3: Allergen Detection and Measurement
This protocol describes the operational steps for detecting Ara h 1 in a food sample.
2.3.1 Procedure
- Sample Preparation: Homogenize a 0.1 g food sample in a capsule containing extraction buffer. Filter the homogenate to remove large particulates [10].
- Sample Introduction: Apply the filtered sample homogenate to the microfluidic aptasensor.
- Incubation and Binding: Allow the sample to flow through the fluidic channels and incubate for a defined period (optimized to 20 minutes). During this time, the Ara h 1 allergen binds specifically to the aptamer on the BPNSs [7].
- Electrochemical Measurement: Use a ferro/ferricyanide redox probe in a label-free electrochemical detection. The specific binding event causes a variation in charge transfer on the electrode, leading to a measurable change in current output [7].
- Data Analysis: Quantify the Ara h 1 concentration based on the measured current, using the established calibration curve (linear range: 50–1000 ng/mL) [7].
The following workflow diagram illustrates the key experimental steps from sensor fabrication to result analysis.
The Scientist's Toolkit: Key Research Reagent Solutions
The development and operation of a BPNS-based microfluidic aptasensor rely on several critical reagents and materials. The table below lists these essential components and their functions.
Table 2: Essential Research Reagents and Materials for BPNS-based Aptasensor
| Reagent/Material | Function/Description | Key Characteristics |
|---|---|---|
| Black Phosphorus Nanosheets (BPNSs) | Two-dimensional nanomaterial serving as the sensing platform [7]. | High surface area, excellent electroconductivity, direct bandgap [7]. |
| Ara h 1-specific DNA Aptamer | Biological recognition element that binds specifically to the target allergen [7]. | High affinity and specificity; alternative to antibodies; selected via SELEX [16]. |
| Poly-L-lysine (PLL) | A cationic polymer used as a linker for aptamer immobilization on BPNSs [7]. | Facilitates stable bioconjugate formation (BPNSs-PLL-Apt) [7]. |
| Chromatography Paper | Substrate for the microfluidic origami chip [7]. | Enables capillary-driven fluid flow; low-cost; portable [7]. |
| Ferro/Ferricyanide Redox Probe | Mediator for electrochemical signal transduction in label-free detection [7]. | Change in electron transfer efficiency upon allergen-aptamer binding is measured [7]. |
| N-methyl-2-pyrrolidone (NMP) | Solvent used for the liquid-phase exfoliation of bulk BP into BPNSs [7]. | Provides appropriate surface energy for efficient exfoliation [7]. |
The Concept of Origami Folding for 3D Microfluidic Architecture
The integration of origami folding principles with microfluidic technology represents a transformative approach for creating sophisticated three-dimensional (3D) analytical devices from two-dimensional (2D) precursors. This paradigm shift enables the development of compact, multi-functional lab-on-a-chip systems that facilitate complex fluid manipulation and multi-step analytical processes through simple folding techniques. Origami microfluidic devices leverage the inherent capillary action of porous substrates like paper, eliminating the need for external pumping systems and making them particularly valuable for point-of-need testing applications [7] [11]. The folding architecture allows for the creation of separate functional layers that can be brought into precise alignment, enabling sequential reagent delivery, washing steps, and detection protocols in a self-contained format [17]. This technical note details the application of origami 3D microfluidic architecture within the specific context of developing a nano-aptasensor for peanut allergen detection, providing comprehensive protocols and analytical performance data for researchers in food safety and biosensor development.
Fundamental Principles and Design Considerations
Core Architectural Concepts
Origami-inspired microfluidic devices operate on the principle of transforming 2D patterned substrates into 3D functional networks through strategic folding. This design methodology offers several distinct advantages over traditional 2D microfluidic systems, including reduced footprint, vertical fluidic connectivity, and the ability to perform multi-step assays in a predetermined sequence [17]. The 3D configuration enables complex fluid handling that would otherwise require extensive tubing and connectors in conventional microfluidic systems.
The typical origami microfluidic architecture consists of multiple layers connected via folding joints:
- Sample introduction layer: Contains predefined zones for sample application
- Reagent storage layers: House pre-loaded reagents in isolated compartments
- Reaction layers: Feature modified surfaces for specific binding events
- Detection layers: Enable signal transduction and readout
Fluid transport between these layers occurs through capillary action when layers are folded into contact, with timing controlled by the geometry of the channels and the absorbency of the substrate material [7].
Material Selection and Properties
The choice of substrate material critically influences device performance, fabrication methodology, and application suitability. The following table summarizes key material options and their characteristics:
Table 1: Material Options for Origami Microfluidic Devices
| Material | Advantages | Limitations | Suitability for Allergen Detection |
|---|---|---|---|
| Chromatography Paper | High porosity, excellent capillary action, low cost, biocompatible | Limited structural integrity, susceptible to humidity | Ideal for disposable allergen sensors; used in Ara h1 detection [7] |
| Polyvinylidene Fluoride (PVDF) | High protein binding capacity, tunable wettability | Requires surface treatment for optimal wettability | Excellent for antibody/aptamer immobilization; used in E. coli detection [17] |
| Polydimethylsiloxane (PDMS) | Transparent, gas permeable, easy molding | Hydrophobic, requires surface treatment | Suitable for hybrid designs requiring oxygen permeability [11] |
| Glass/Silicon | High stability, excellent optical properties | High cost, complex fabrication | Less common for origami applications due to rigidity |
For allergen detection applications, chromatography paper offers an optimal balance of performance and cost-effectiveness, with a typical device cost of approximately $0.80 per unit [7]. PVDF membranes provide superior protein binding capacity but require pretreatment with solvents such as ethanol, Tween-20, or Triton X-100 to achieve appropriate wettability [17].
Fabrication Protocols
Laser Ablation Fabrication Method
Laser ablation enables precise patterning of microfluidic channels and reservoirs with high resolution. The following protocol details the fabrication process for an origami microfluidic device suitable for allergen detection:
Materials and Equipment:
- PVDF or cellulose membranes (0.45 μm pore size recommended)
- Laser ablation system (e.g., Epilog Zing series)
- Double-sided adhesive (100 μm thickness recommended)
- Design software (Adobe Illustrator or similar)
- Solvents for membrane treatment (ethanol, acetate, Tween-20, Triton X-100, citrate)
Step-by-Step Procedure:
Membrane Pretreatment:
- Cut PVDF membranes to desired dimensions (typically 1.8 × 6.5 cm²)
- Treat membranes with ethanol and sonicate for 10 minutes at 37°C to remove organic residues
- Rinse with ultrapure water and dry at 74°C for 15 minutes
- Evaluate wettability via contact angle measurements (target <90° for spontaneous capillary action)
Laser Parameter Optimization:
- Optimize laser power and cutting speed to minimize structural deterioration
- Typical parameters for PVDF: Laser power 10-30%, cutting speed 40-80%
- Create circular reservoirs (4 mm diameter recommended) and connecting microchannels
Device Assembly:
- Attach one layer of the PVDF rectangles to double-sided adhesive prior to ablation
- Adhere functionalized cellulose or PVDF membranes to designated reservoirs
- Align and adhere multiple PVDF layers to create the complete device architecture
- Validate channel connectivity using dye solutions [17]
Wax Patterning Method
For paper-based devices, wax patterning offers a low-cost alternative to laser ablation:
Materials and Equipment:
- Chromatography paper (Whatman Grade 1 recommended)
- Solid wax printer or wax screen-printing setup
- Hot plate or oven (100-120°C)
- Hydrophobic barrier materials (optional)
Procedure:
- Design the microfluidic pattern using appropriate software
- Print or deposit wax onto the paper substrate in the desired pattern
- Heat the paper to 100-120°C for 1-2 minutes to allow wax penetration
- Cool to room temperature to form hydrophobic barriers
- Functionalize specific zones with biological recognition elements [7]
Application to Peanut Allergen Detection: Nano-Aptasensor Development
Sensing Mechanism and Probe Design
The origami microfluidic nano-aptasensor for peanut allergen Ara h1 employs an electrochemical detection mechanism based on aptamer-functionalized black phosphorus nanosheets (BPNSs). The detection principle relies on the specific binding between the immobilized aptamer and the target allergen, which induces a measurable change in electrochemical signal [7].
Aptamer Sequence for Ara h1:
This specific aptamer, selected through Systematic Evolution of Ligands by Exponential Enrichment (SELEX), demonstrates high affinity and specificity for the Ara h1 protein [7].
BPNSs-Aptamer Bioconjugate Preparation:
- Prepare BPNSs through mechanical exfoliation or chemical synthesis
- Functionalize BPNSs with poly-L-lysine (PLL) to enhance biocompatibility and surface area
- Incubate PLL-modified BPNSs with thiol-modified aptamers (10 μM concentration) for 12 hours at 4°C
- Purify the BPNSs-PLL-Apt bioconjugates through centrifugation at 10,000 rpm for 10 minutes
- Resuspend in appropriate buffer (e.g., 10 mM Tris-HCl, pH 7.4) for electrode modification [7]
Device Functionalization Protocol
Materials:
- Fabricated origami microfluidic device
- BPNSs-PLL-Apt bioconjugates
- Carbon ink (for screen-printed electrodes)
- Ag/AgCl ink (for reference electrode)
- Ferro-ferricyanide redox probe ([Fe(CN)₆]³⁻/⁴⁻)
- Phosphate buffered saline (PBS, pH 7.4)
Functionalization Steps:
- Electrode Preparation:
- Pattern working electrode (WE), counter electrode (CE), and reference electrode (RE) on paper substrate using screen printing
- Cure electrodes according to manufacturer specifications (typically 60°C for 2 hours)
Probe Immobilization:
- Deposit 5 μL of BPNSs-PLL-Apt bioconjugate solution onto the working electrode
- Allow to dry at room temperature for 30 minutes
- Rinse gently with PBS to remove unbound aptamers
Device Assembly:
- Fold the device according to predetermined configuration to align sample introduction zone with detection zone
- Secure layers with adhesive or magnetic fasteners
- Pre-load necessary reagents in designated reservoirs [7]
Detection Protocol and Performance
Sample Analysis Procedure:
- Sample Introduction:
- Apply 50-100 μL of extracted food sample to the sample introduction zone
- Allow capillary action to transport sample to reaction zone (approximately 3-5 minutes)
Incubation and Reaction:
- Fold device to bring sample in contact with detection zone
- Incubate for 15 minutes to allow aptamer-allergen binding
- Fold additional layers to introduce washing buffer if necessary
Electrochemical Measurement:
- Add ferro-ferricyanide redox probe to the detection zone
- Perform square wave voltammetry or electrochemical impedance spectroscopy
- Measure current output at predetermined potential [7]
Analytical Performance: Table 2: Performance Metrics of Origami Microfluidic Nano-Aptasensor for Ara h1 Detection
| Parameter | Value | Conditions |
|---|---|---|
| Detection Limit | 21.6 ng/mL | In cookie dough samples |
| Linear Range | 50-1000 ng/mL | R² > 0.99 |
| Sensitivity | 0.05 μA·ng/mL | - |
| Total Assay Time | <20 minutes | Including sample preparation |
| Reproducibility | 3.19% RSD | n=15 devices |
| Recovery in Food Samples | 90.1-104.0% | Spiked cookie dough samples |
The sensor demonstrates excellent specificity for Ara h1 with minimal cross-reactivity to other peanut proteins or common food matrix components [7].
Research Reagent Solutions
Successful implementation of origami microfluidic allergen detection requires specific reagents and materials with defined functions:
Table 3: Essential Research Reagents for Origami Microfluidic Allergen Detection
| Reagent/Material | Function | Specifications/Alternatives |
|---|---|---|
| Black Phosphorus Nanosheets (BPNSs) | Signal amplification platform; high surface area for aptamer immobilization | Layer-dependent bandgap; high carrier mobility; alternative: graphene oxide |
| Poly-L-Lysine (PLL) | Coupling agent for aptamer immobilization on BPNSs | Enhances biocompatibility; provides amine groups for conjugation |
| Anti-Ara h1 Aptamer | Biological recognition element; specific binding to target allergen | Thiol-modified for surface attachment; SELEX-selected sequence |
| Ferro-ferricyanide Redox Probe | Electrochemical signal generation | [Fe(CN)₆]³⁻/⁴⁻ in PBS buffer; concentration: 5 mM |
| PVDF Membrane | Substrate for fluid transport and reagent immobilization | 0.45 μm pore size; high protein binding capacity |
| TMB Substrate Solution | Colorimetric detection (for colorimetric variants) | Contains H₂O₂ as oxidizing agent; produces blue color upon oxidation |
| Screen-Printed Electrodes | Electrochemical transduction platform | Carbon working electrode; Ag/AgCl reference electrode |
Comparative Analysis with Alternative Detection Platforms
Origami microfluidic platforms offer distinct advantages compared to conventional allergen detection methods:
Table 4: Comparison of Allergen Detection Platforms
| Platform | Detection Limit | Assay Time | Cost per Test | Equipment Needs | Suitability for POC |
|---|---|---|---|---|---|
| Origami Microfluidic Aptasensor | 21.6 ng/mL [7] | 20 minutes | ~$0.80 [7] | Portable potentiostat | Excellent |
| Traditional ELISA | 1-10 ng/mL [11] | 4-6 hours | $5-15 | Plate reader, washer | Poor |
| Colorimetric LAMP Microfluidic | 0.4 ng/μL (DNA) [18] | 60 minutes | $1-3 | Water bath, centrifuge | Good |
| LC-MS/MS | 0.1-1 ng/mL | 30-60 minutes | $50-100 | HPLC, mass spectrometer | Poor |
| Lateral Flow Immunoassay | 10-50 ng/mL | 10-15 minutes | $2-5 | None | Excellent |
The origami microfluidic approach balances sensitivity, cost-effectiveness, and operational simplicity, making it particularly suitable for resource-limited settings and point-of-need testing scenarios.
Troubleshooting and Optimization Guidelines
Successful implementation of origami microfluidic allergen detection requires attention to several critical parameters:
Key Optimization Parameters:
- Aptamer Concentration: Optimize between 1-20 μM for maximum surface coverage without steric hindrance
- Self-Assembly Time: Typically 12 hours at 4°C for complete aptamer orientation
- Antigen-Aptamer Reaction Time: 15 minutes provides optimal balance between sensitivity and assay speed
- Wettability Control: Ensure contact angle <90° for spontaneous capillary action through membrane pretreatment
Common Issues and Solutions:
- Incomplete fluid flow: Check membrane pretreatment; ensure proper folding alignment
- High background signal: Optimize washing steps; consider blocking agents (e.g., BSA)
- Poor reproducibility: Standardize fabrication parameters; control environmental humidity
- Signal drift: Ensure stable redox probe concentration; check electrode integrity
Visualizations
Origami μPAD Fabrication and Folding Sequence
Allergen Detection Signaling Workflow
The integration of origami folding principles with microfluidic technology creates a powerful platform for developing sophisticated biosensors for food allergen detection. The 3D architecture enables complex multi-step assays in a compact, inexpensive format suitable for point-of-need testing. The specific application to peanut allergen Ara h1 detection demonstrates excellent analytical performance with a detection limit of 21.6 ng/mL, sensitivity of 0.05 μA·ng/mL, and total assay time under 20 minutes. The protocols detailed in this application note provide researchers with comprehensive methodologies for fabricating, functionalizing, and implementing these devices, with potential applications extending to other food safety hazards, clinical diagnostics, and environmental monitoring.
Fabrication and Operational Workflow: Building and Using Your Aptasensor
This application note details the protocol for fabricating a three-dimensional microfluidic origami nano-aptasensor, a low-cost and rapid diagnostic platform designed for the detection of the peanut allergen Ara h 1. Origami paper-based analytical devices (µPADs) leverage the capillary action of paper to transport fluids without external equipment, integrating sample processing and electrochemical detection into a single, portable platform [7]. The fabrication process combines wax patterning to create microfluidic channels, screen-printing to fabricate electrodes, and a folding (origami) assembly to form a three-dimensional structure with functional layers. This guide provides a comprehensive, step-by-step protocol for researchers and scientists to replicate this biosensing platform.
Research Reagent Solutions
The following table lists the essential materials and reagents required for the fabrication of the microfluidic origami nano-aptasensor and its application in allergen detection.
| Item | Function/Application | Specification/Notes |
|---|---|---|
| Chromatography Paper | Microfluidic chip substrate | Whatman No. 1 paper is typically used for its superior porosity and hydrophilicity [7] [19]. |
| Conductive Carbon Ink | Screen-printing of working and counter electrodes | e.g., ED581ss ink [7] [19]. |
| Ag/AgCl Ink | Screen-printing of reference electrode | - |
| Black Phosphorus Nanosheets (BPNSs) | Nanomaterial to enhance electrode sensitivity | Provides a large surface area and more catalytic active sites [7]. |
| Anti-Ara h1 Aptamer | Biological recognition element | Synthesized oligonucleotide with high affinity and specificity for the Ara h1 target [7]. |
| Poly-L-lysine (PLL) | Bioconjugation agent | Used to form stable BPNSs-PLL-Apt bioconjugates for immobilization [7]. |
| PDMS | Material for patterning microchannels | Used to create hydrophobic barriers on the paper substrate [7]. |
| Ferro-ferricyanide Redox Probe | Electrochemical detection | Used as a mediator for label-free electrochemical detection [7]. |
Chip Fabrication Workflow
The following diagram illustrates the comprehensive fabrication process for the microfluidic origami nano-aptasensor.
Detailed Fabrication Protocol
Step 1: Microchannel Patterning
- Objective: To create hydrophobic barriers that define hydrophilic microfluidic channels on the paper substrate.
- Procedure:
- Design the microfluidic channel pattern and electrode layout using design software (e.g., Adobe Illustrator CS5) [19]. The typical design features a two-dimensional flat geometry that can be folded into a 3D device.
- Use a wax printer (e.g., Xerox ColorQube 8570) to print the designed pattern directly onto the surface of chromatography paper [19].
- Place the printed paper on a hotplate or in an oven at 120°C for 5 minutes [19]. This heating step allows the wax to melt and penetrate through the entire thickness of the paper, forming a complete hydrophobic barrier.
- Note: Alternatively, PDMS can be used to pattern the microchannel array on the paper substrate [7].
Step 2: Electrode Screen-Printing
- Objective: To fabricate the three-electrode system (Working Electrode, Counter Electrode, and Reference Electrode) integral to electrochemical detection.
- Procedure:
- Prepare screen stencils based on the electrode design.
- Use a screen-printing apparatus to apply conductive carbon ink onto the predefined areas for the Working Electrode (WE) and Counter Electrode (CE).
- Screen-print the Ag/AgCl ink to form the Reference Electrode (RE).
- Allow the printed electrodes to cure completely according to the ink manufacturer's specifications.
Step 3: Working Electrode Functionalization
- Objective: To modify the Working Electrode with a nano-composite and biorecognition element for specific and sensitive detection.
- Procedure:
- Electrodeposition of Black Phosphorus Nanosheets (BPNSs):
- Prepare a stable dispersion of BPNSs.
- Electrodeposit the BPNSs onto the surface of the carbon-based Working Electrode. This material provides a large surface area and enhances electrocatalytic activity, which is crucial for signal amplification [7].
- Aptamer Immobilization:
- Form a bioconjugate by decorating the BPNSs with poly-L-lysine (PLL) and the anti-Ara h1 aptamer.
- Immobilize this BPNSs-PLL-Apt bioconjugate onto the Working Electrode surface. The aptamer serves as the specific capture probe for the Ara h1 allergen [7].
- Electrodeposition of Black Phosphorus Nanosheets (BPNSs):
Step 4: Origami Folding and Assembly
- Objective: To assemble the 2D patterned paper into a functional 3D device that integrates sample introduction, fluidic control, and detection zones.
- Procedure:
- Fold the paper device along pre-defined creases. This design uses sequential folding to bring separate layers into contact, creating a vertical flow path [7].
- The final 3D structure positions the sample inlet, reaction zones, and electrode detection area for optimal performance. The folding act can also serve as a simple valve, controlling the flow of fluid between layers and reducing sample volume requirements [19].
Experimental Protocol & Performance
Allergen Detection Assay
The operational protocol for using the fabricated aptasensor to detect the peanut allergen Ara h1 is as follows [7]:
- Sample Introduction: Apply the liquid sample (e.g., extracted food sample) to the sample inlet of the folded device.
- Capillary Flow: Allow the sample to wick through the paper microchannels via capillary action until it reaches the detection chamber containing the functionalized Working Electrode.
- Incubation: The sample incubates with the aptamer-decorated electrode for a period of less than 20 minutes. During this time, the target Ara h1 allergen binds specifically to the immobilized aptamers.
- Electrochemical Measurement: Add a ferro-ferricyanide redox probe to the system. The specific binding event between the aptamer and the allergen inhibits electron transfer, resulting in a measurable decrease in current.
- Signal Readout: Use a portable potentiostat to perform electrochemical measurements (e.g., Differential Pulse Voltammetry). The change in current is quantitatively correlated to the concentration of Ara h1 in the sample.
Analytical Performance
The optimized microfluidic origami nano-aptasensor demonstrates the following performance characteristics for the detection of Ara h1 [7]:
| Analytical Parameter | Performance Value |
|---|---|
| Detection Limit | 21.6 ng/mL |
| Linear Detection Range | 50 - 1000 ng/mL |
| Sensitivity | 0.05 µA·ng/mL |
| Total Assay Time | < 20 minutes |
| Approximate Chip Cost | USD $0.80 |
The sensor has been successfully validated by detecting Ara h1 in spiked cookie dough samples, demonstrating its practicality for complex food matrices [7]. The use of aptamer-decorated BPNSs was critical to achieving this high sensitivity and low detection limit.
Synthesis and Functionalization of Signal-Amplifying Nanoprobes (e.g., BPNSs, BP-Au)
The development of highly sensitive and selective biosensors is crucial for the detection of food allergens, which pose a significant health risk to susceptible individuals. This document details the synthesis, functionalization, and application of signal-amplifying nanoprobes, specifically black phosphorus nanosheets (BPNSs) and gold-decorated black phosphorus (BP-Au), within the context of developing a microfluidic origami nano-aptasensor for the detection of the major peanut allergen Ara h1. These nanomaterials serve as the core sensing element, enhancing sensitivity and enabling rapid, low-cost detection at the point of need [20]. The protocols herein are designed for researchers and scientists engaged in biosensor development and nanomaterial functionalization.
Research Reagent Solutions
The following table lists the essential materials and reagents required for the synthesis, functionalization, and assembly of the nano-aptasensor.
Table 1: Key Research Reagents and Materials
| Reagent/Material | Function/Application in the Protocol |
|---|---|
| Black Phosphorus Crystals | Starting material for the synthesis of BPNSs via liquid exfoliation [20]. |
| N-Methyl-2-pyrrolidone (NMP) | Solvent used for the liquid exfoliation of bulk black phosphorus into nanosheets [20]. |
| Chloroauric Acid (HAuCl₄) | Gold precursor for the synthesis of gold nanoparticles (AuNPs) and the formation of BP-Au nanocomposites [20]. |
| Ara h1 Specific Aptamer | Single-stranded DNA molecule that acts as the biological recognition element for the specific capture of the Ara h1 allergen [20]. |
| Poly-L-lysine (PLL) | A cationic polymer used to functionalize BPNSs, providing amino groups for the subsequent immobilization of aptamers [20]. |
| Ferro/Ferricyanide Redox Probe | Electrochemical mediator used in the buffer solution to enable label-free electrochemical detection [20]. |
| Chromatography Paper | Porous and hydrophilic substrate used for fabricating the microfluidic origami device [20]. |
| Conductive Carbon Ink | Used for screen-printing the working, counter, and reference electrodes onto the paper substrate [20]. |
| Ag/AgCl Ink | Used to formulate the reference electrode on the screen-printed electrochemical cell [20]. |
Synthesis of Black Phosphorus Nanosheets (BPNSs)
Protocol: Liquid Exfoliation of BPNSs
Objective: To produce few-layer Black Phosphorus Nanosheets from bulk black phosphorus crystals.
Materials:
- Bulk black phosphorus crystals
- N-Methyl-2-pyrrolidone (NMP)
- Argon or Nitrogen gas
- Centrifuge and centrifuge tubes
- Probe sonicator
Procedure:
- Preparation: Place 20 mg of bulk black phosphorus crystals into a 20 mL glass vial. All procedures should be performed in an inert atmosphere (e.g., inside a glovebox filled with Argon gas) to prevent oxidation of phosphorus.
- Dispersion: Add 10 mL of NMP to the vial, ensuring the crystals are fully submerged.
- Exfoliation: Seal the vial and transfer it out of the glovebox. Immediately place it in an ice-water bath. Insert the probe sonicator and sonicate the mixture for 8 hours at a power of 300 W. The ice-water bath is critical to dissipate heat and minimize material degradation.
- Separation: Transfer the resulting dark dispersion into centrifuge tubes. Centrifuge at 4,000 rpm for 20 minutes to remove any unexfoliated, large aggregates.
- Collection: Carefully collect the supernatant, which contains the exfoliated BPNSs. The BPNSs can be further concentrated by a second centrifugation step of the supernatant at 12,000 rpm for 10 minutes, followed by decanting the excess solvent.
- Storage: Re-disperse the BPNS pellet in a desired solvent (e.g., deoxygenated water) under an inert atmosphere and store at 4°C for future use. Characterization via Scanning Electron Microscopy (SEM) should reveal a typical sheet-like pattern and layered structure [20].
Functionalization of Nanoprobes
Protocol: Immobilization of Aptamer on BPNSs (BPNSs-PLL-Apt)
Objective: To functionalize the surface of BPNSs with a specific aptamer for Ara h1 recognition.
Materials:
- As-synthesized BPNSs dispersion
- Poly-L-lysine (PLL)
- Ara h1 specific aptamer (sequence: 5́-TCG CAC ATT CCG CTT CTA CCG GGG GGG TCG AGC GAG TGA GCG AAT CTG TGG GTG GGC CGT AAG TCC GTG TGT GCG AA −3́)
- EDC/NHS crosslinking kit
- Phosphate Buffered Saline (PBS), pH 7.4
Procedure:
- PLL Coating: Add 1 mg/mL of PLL to the BPNSs dispersion. Allow the mixture to incubate for 2 hours at room temperature with gentle shaking. The PLL will electrostatically adsorb to the BPNSs, providing a surface rich in primary amine groups.
- Washing: Centrifuge the BPNSs-PLL mixture and re-disperse the pellet in PBS buffer to remove any unbound PLL.
- Aptamer Conjugation: Activate the carboxyl-terminated aptamers using a standard EDC/NHS protocol in MES buffer for 15 minutes. Then, mix the activated aptamers with the BPNSs-PLL dispersion.
- Self-Assembly: Incubate the mixture for 12 hours at room temperature to allow covalent amide bond formation between the activated aptamer and the amine groups on PLL.
- Purification: Centrifuge the final BPNSs-PLL-Apt bioconjugates and wash twice with PBS to remove any unbound aptamers. The bioconjugates are now ready for deposition onto the sensor electrode [20].
Protocol: Preparation of Aptamer-Functionalized BP-Au Nanocomposites
Objective: To synthesize gold nanoparticle-decorated BPNSs and functionalize them with aptamers for enhanced electrochemical signal amplification.
Materials:
- BPNSs dispersion
- Chloroauric acid (HAuCl₄)
- Trisodium citrate
- Thiol-modified Ara h1 aptamer
- 10 mM Tris(2-carboxyethyl)phosphine (TCEP)
Procedure:
- Synthesis of AuNPs: Prepare gold nanoparticles (AuNPs) via the classical citrate reduction method. Briefly, heat 100 mL of 1 mM HAuCl₄ to boiling while stirring. Rapidly add 2.5 mL of 38.8 mM trisodium citrate solution. Continue heating and stirring until the solution turns deep red. Allow it to cool to room temperature.
- Decoration of BPNSs: Mix the as-prepared BPNSs dispersion with the AuNP solution at a 1:4 volume ratio. Incubate for 2 hours to allow the AuNPs to adsorb onto the BPNSs surface via van der Waals forces or coordination interactions, forming BP-Au nanocomposites.
- Aptamer Reduction: Simultaneously, incubate the thiol-modified aptamer with 10 mM TCEP for 1 hour to reduce any disulfide bonds.
- Probe Assembly: Co-incubate the reduced, thiol-modified aptamer with the BP-Au nanocomposites for 12 hours at room temperature. The thiol groups will form strong covalent Au-S bonds with the gold nanoparticles on the composite surface.
- Blocking and Purification: Passivate the remaining surface of the AuNPs with 1 mM 6-mercapto-1-hexanol (MCH) for 1 hour to minimize non-specific adsorption. Purify the resulting BP-Au-Apt nanoprobes via centrifugation and re-suspend in PBS [20].
Sensor Fabrication and Experimental Data
Protocol: Microfluidic Origami Aptasensor Assembly
Objective: To fabricate a 3D origami electrochemical sensor integrated with the functionalized nanoprobes.
Materials:
- Chromatography paper substrate
- PDMS polymer
- Conductive carbon ink, Ag/AgCl ink
- Screen-printing apparatus
- Functionalized BPNSs-PLL-Apt or BP-Au-Apt nanoprobes
Procedure:
- Patterning: Create a microfluidic channel pattern on the paper substrate using PDMS as a hydrophobic barrier.
- Electrode Printing: Screen-print the three-electrode system (Working, Counter, and Reference electrodes) onto the paper substrate using carbon ink. Use Ag/AgCl ink to formulate the reference electrode.
- Probe Immobilization: Deposit 5 µL of the functionalized nanoprobes (BPNSs-PLL-Apt or BP-Au-Apt) onto the working electrode area and allow it to dry at room temperature.
- Origami Folding: The 2D flat chip is designed with predefined folding lines. The chip is sequentially folded to create a 3D vertical flow device, aligning the sample inlet and the electrode detection zone. This design allows for dual detection on a single chip [20].
Performance Data and Optimization
The performance of the aptasensor was evaluated by measuring the electrochemical current response upon exposure to varying concentrations of the Ara h1 allergen. Key experimental parameters were optimized to achieve maximum sensitivity.
Table 2: Optimized Experimental Parameters for the Nano-aptasensor
| Parameter | Optimized Condition | Function |
|---|---|---|
| Aptamer Concentration | 1.0 µM | Determines the density of recognition elements on the electrode surface. |
| Self-Assembly Time | 12 hours | Ensures sufficient time for the aptamer to immobilize on the nanoprobes. |
| Antigen-Aptamer Reaction Time | 20 minutes | Time required for the target allergen to bind to the immobilized aptamer. |
| Total Detection Time | Within 20 minutes | The complete assay time from sample introduction to result. |
Table 3: Analytical Performance of the BPNSs-based Aptasensor for Ara h1 Detection
| Performance Metric | Result |
|---|---|
| Detection Principle | Electrochemical (Current Output) |
| Linear Detection Range | 50 - 1000 ng/mL |
| Sensitivity | 0.05 µA·ng/mL |
| Limit of Detection (LOD) | 21.6 ng/mL |
| Assay Cost (per test) | ~ USD $0.8 |
The sensor demonstrated a wide linear range and high sensitivity, which was attributed to the excellent electroconductivity and large surface area of the BPNSs, providing more catalytic active sites [20].
Workflow and Signaling Diagrams
Sensor Assembly and Detection Workflow
Nanoprobe Signaling Mechanism
The development of reliable, sensitive, and specific biosensors is paramount in diagnostic and environmental monitoring applications. Aptamers, single-stranded DNA or RNA oligonucleotides selected via Systematic Evolution of Ligands by Exponential Enrichment (SELEX), have emerged as powerful molecular recognition elements, offering advantages over traditional antibodies including higher stability, lower production cost, and easier modification [21] [22]. Their effective integration into biosensing platforms, however, hinges on the immobilization strategy used to anchor them to the transducer surface [23]. This Application Note details two fundamental immobilization techniques—Au-S bonding and electrodeposition—within the context of developing a microfluidic origami nano-aptasensor for the detection of the peanut allergen Ara h1. We provide detailed protocols, a comparative analysis, and a structured reagent toolkit to facilitate robust sensor fabrication for researchers and scientists in the field of food safety and diagnostic development.
Au-S Bonding for Aptamer Immobilization
The covalent bond formed between gold (Au) and sulfur (S) is one of the most prevalent and reliable methods for immobilizing thiol-modified aptamers on gold electrodes or gold nanostructures.
Underlying Principles and Protocol
This method relies on the chemisorption of a thiol group (-SH), typically introduced at the 5' or 3' end of an aptamer, onto a gold surface, forming a stable Au-S bond [21] [23]. A critical subsequent step involves passivating the remaining gold surface with a short-chain alkanethiol like 6-mercapto-1-hexanol (MCH). This step serves two essential functions: it displaces non-specifically adsorbed aptamers, promoting a vertical orientation and reducing lateral interactions, and it creates a hydrophilic antifouling layer that minimizes the nonspecific adsorption of interfering compounds [23].
Detailed Step-by-Step Protocol:
- Surface Preparation: Clean the gold electrode surface thoroughly. A common method involves sequential polishing with alumina slurries of decreasing particle sizes (e.g., 1.0, 0.3, and 0.05 µm) on a microcloth, followed by sonication in ethanol and deionized water for 5 minutes each to remove residual polishing materials. Electrochemical cleaning via cyclic voltammetry in 0.5 M H₂SO₄ (typically 20-50 cycles between -0.2 and +1.5 V at a scan rate of 100 mV/s) is highly recommended to achieve a pristine, oxide-free gold surface [21].
- Aptamer Immobilization: Prepare a 1-10 µM solution of the thiolated aptamer (e.g., specific for Ara h1) in a suitable buffer, often phosphate-buffered saline (PBS) or Tris-EDTA (TE) buffer. Deposit a precise volume (e.g., 20-50 µL) onto the clean gold surface and incubate in a humidified chamber for a defined period, typically 12-16 hours (overnight) at room temperature, to allow for the formation of a self-assembled monolayer [23].
- Surface Passivation: Rinse the electrode gently with deionized water to remove unbound aptamers. Subsequently, incubate the functionalized surface with a 1-10 mM aqueous solution of 6-mercapto-1-hexanol (MCH) for 30-60 minutes. This step is crucial for achieving a well-ordered monolayer and maximizing target binding efficiency [23].
- Final Rinse and Storage: Rinse the prepared aptasensor thoroughly with deionized water and a clean assay buffer to remove any traces of MCH. If not used immediately, the sensor can be stored dry at 4°C.
Table 1: Key Reagents for Au-S Bonding Immobilization
| Reagent / Material | Function / Description |
|---|---|
| Thiol-modified Aptamer | The biorecognition element; the thiol group enables covalent attachment to gold surfaces. |
| Gold Electrode/Surface | The transducer platform for aptamer immobilization and electrochemical signal generation. |
| 6-Mercapto-1-Hexanol (MCH) | A short-chain alkanethiol used to backfill unoccupied gold sites, reducing non-specific binding. |
| Phosphate Buffered Saline (PBS) | A common buffer for preparing aptamer solutions and maintaining a stable pH during immobilization. |
Workflow Visualization
The following diagram illustrates the sequential steps involved in the Au-S bonding immobilization strategy.
Electrodeposition for Aptamer Immobilization
Electrodeposition is a potent technique for integrating aptamers with nanocomposite materials onto electrode surfaces, enhancing surface area and catalytic activity.
Underlying Principles and Protocol
This method involves the electrochemical deposition of metallic nanoparticles (e.g., Au-Pd) or conductive nanocomposites onto an electrode surface from a precursor solution, often followed by the immobilization of aptamers via Au-S bonding or physical adsorption. A notable application is the use of a TiO₂-Carbon Nanofiber (CNF) nanocomposite incorporated with Au-Pd bimetallic nanoparticles (Au-PdNPs) to create a highly sensitive platform [24]. The TiO₂-CNF matrix provides a large surface area and excellent electronic properties, while the electrodeposited Au-PdNPs further enhance the active surface area and facilitate subsequent aptamer attachment [24].
Detailed Step-by-Step Protocol:
- Nanocomposite Modification: Prepare a dispersion of the TiO₂-CNF nanocomposite (e.g., 1.0 mg/mL in a suitable solvent like dimethylformamide, DMF). Deposit a fixed volume (e.g., 5-10 µL) onto the surface of a screen-printed carbon electrode (SPCE) and allow it to dry at room temperature to form a stable layer (SPE/TiO₂-CNF) [24].
- Electrodeposition of Bimetallic Nanoparticles: Prepare an electrochemical cell containing a precursor solution for Au-PdNPs, such as 1.0 mM HAuCl₄ and 1.0 mM Na₂PdCl₄ in 0.5 M H₂SO₄. Immerse the modified SPCE/TiO₂-CNF as the working electrode. Perform electrodeposition using a constant potential technique (e.g., -0.4 V vs. Ag/AgCl) or cyclic voltammetry (e.g., 15 cycles between -0.8 V and +0.6 V) to form a uniform layer of Au-PdNPs on the nanocomposite surface [24].
- Aptamer Immobilization: Rinse the SPCE/TiO₂-CNF/Au-PdNPs electrode and incubate it with a solution of the thiolated aptamer (e.g., 1 µM in PBS) for a specified time (e.g., 2 hours) to allow the aptamers to bind to the deposited gold nanostructures via Au-S chemistry [24].
Table 2: Key Reagents for Electrodeposition-based Immobilization
| Reagent / Material | Function / Description |
|---|---|
| TiO₂-CNF Nanocomposite | Provides a high-surface-area, conductive scaffold to anchor metallic nanoparticles. |
| Chloroauric Acid (HAuCl₄) | Precursor for gold nanoparticles, providing sites for subsequent aptamer immobilization. |
| Sodium Tetrachloropalladate (Na₂PdCl₄) | Precursor for palladium nanoparticles; forms bimetallic Au-Pd with synergistic catalytic effects. |
| Screen-Printed Carbon Electrode (SPCE) | A low-cost, disposable, and miniaturizable platform ideal for point-of-care sensors. |
Workflow Visualization
The following diagram illustrates the fabrication workflow for an electrodeposition-based aptasensor.
Comparative Analysis and Application in Allergen Detection
The choice between Au-S bonding and electrodeposition is dictated by the requirements for sensitivity, simplicity, and the nature of the transducer platform.
Table 3: Comparative Analysis of Immobilization Strategies
| Feature | Au-S Bonding | Electrodeposition with Nanocomposites |
|---|---|---|
| Principle | Covalent chemisorption on gold | Electrochemical deposition & covalent/physical adsorption |
| Complexity | Moderate | High |
| Required Substrate | Primarily gold surfaces | Various conductors (e.g., carbon SPCE) |
| Typical Electrode | Gold disk or film electrode | Screen-printed carbon electrode (SPCE) |
| Active Surface Area | Standard (electrode geometry) | Significantly enhanced (nanocomposite & nanoparticles) |
| Best-Suited For | Fundamental studies, well-defined surfaces | High-sensitivity applications, disposable sensors |
| Reported LOD for Ara h1 | Not directly applicable in basic form | 0.035 pg/mL [24] |
In the context of peanut allergen detection, these strategies have been successfully implemented. A microfluidic origami aptasensor utilized aptamer-decorated black phosphorus nanosheets, likely immobilized via interactions similar to electrodeposition, achieving a detection limit of 21.6 ng/mL for Ara h1 in cookie dough samples [20]. In a more recent and sensitive approach, the electrodeposition-based platform (SPCE/TiO₂-CNF/Au-PdNPs) demonstrated a remarkably low detection limit of 0.035 pg/mL for Ara h1 in bread and peanut butter, showcasing the power of nanocomposite integration for real-sample analysis [24].
The Scientist's Toolkit
Table 4: Essential Research Reagent Solutions for Aptasensor Development
| Category / Item | Specific Example | Function in Aptasensor Development |
|---|---|---|
| Aptamer | Anti-Ara h1 Aptamer (e.g., sequence from Sangon Biotechnology [20]) | The core biorecognition element that binds specifically to the target allergen. |
| Electrode Materials | Gold Disk Electrode; Screen-Printed Carbon Electrode (SPCE) | Serve as the solid support and transducer for signal measurement. |
| Nanocomposites | TiO₂-Carbon Nanofiber (CNF); Black Phosphorus Nanosheets (BPNS) [20] | Enhance electrical conductivity, provide a large surface area for aptamer loading, and improve catalytic activity. |
| Metal Precursors | HAuCl₄, Na₂PdCl₄ | Used in electrodeposition to form metallic nanoparticles that facilitate aptamer immobilization and signal amplification. |
| Surface Modifiers | 6-Mercapto-1-Hexanol (MCH) | Critical for creating a well-ordered, anti-fouling monolayer on gold surfaces in Au-S bonding protocols. |
| Redox Probes | Ferri/Ferrocyanide ([Fe(CN)₆]³⁻/⁴⁻) | A common electrochemical mediator used to characterize electrode modification and transduce the binding event. |
Food allergies represent a significant global health concern, with peanut allergy being one of the most severe and persistent IgE-mediated reactivities [25] [26]. For sensitized individuals, strict avoidance of peanut allergens is the primary management strategy, necessitating reliable detection methods for peanut traces in food products [10]. Traditional protein-based detection methods like ELISA face challenges with complex food matrices and protein solubility after thermal processing [26]. Similarly, DNA-based methods such as qPCR can suffer from DNA fragmentation under severe processing conditions [26].
Electrochemical aptasensors present a promising alternative, combining the specificity of aptamer-target recognition with the sensitivity and portability of electrochemical detection [19]. This protocol details the complete workflow for detecting peanut allergens using a microfluidic origami paper-based electrochemical nano-aptasensor, integrating sample preparation, specific allergen capture, and electrochemical readout into a single, streamlined process.
Principles and Key Components
Aptamers are single-stranded DNA or RNA oligonucleotides selected for high-affinity binding to specific targets, serving as robust recognition elements in biosensors [10] [19]. In this assay, an anti-Ara h 1 aptamer is employed, demonstrating a dissociation constant (Kd) of ~54 nM for purified Ara h 1 and ~142 ppm for Ara h 1 in peanut butter matrices [10]. The operational principle relies on the conformational change or shielding of the electrode surface when the aptamer binds to its target, resulting in a measurable change in electrochemical signal.
Table 1: Key Performance Characteristics of Peanut Allergen Detection Methods
| Method Type | Specific Technique | Limit of Detection | Linear Range | Key Advantages |
|---|---|---|---|---|
| Aptamer-Based Sensor | Electrochemical Nano-aptasensor | 5 pg mL⁻¹ (Model EGFR) [19] | 0.05 - 200 ng mL⁻¹ [19] | Ultra-high sensitivity, label-free detection, portability |
| Aptamer-Based Sensor | Optical Aptamer Assay (Peanut) | 12.5 ppm peanut protein [10] | Not specified | Robust across food matrices, integrated sample prep |
| DNA-Based | qPCR (Chloroplast Markers) | 0.1-10 mg kg⁻¹ [26] | Wide dynamic range | High specificity, detects trace DNA |
| Immunoassay | ELISA (Peanut Allergens) | Varies by allergen [25] | Varies by allergen [25] | Specific to allergenic proteins, well-established |
Materials and Reagents
The Scientist's Toolkit: Research Reagent Solutions
Table 2: Essential Materials and Reagents for Aptasensor Fabrication and Assay
| Item Name | Function/Description | Specifications/Examples |
|---|---|---|
| Anti-Ara h 1 Aptamer | Biological recognition element | Sequence: P1-16 (Kd ~54 nM for Ara h 1) [10]; Thiol-modified for surface immobilization [19] |
| NH₂-GO/THI/AuNP Nanocomposite | Working electrode modification | Enhances electron transfer, provides large surface area for aptamer immobilization [19] |
| Wax-Printed Paper Microfluidic Device | Fluidic platform for assay | Whatman No. 1 chromatography paper; hydrophobic barriers created by wax printing [19] |
| Screen-Printed Electrodes | Electrochemical transduction | Carbon working electrode, carbon counter electrode, Ag/AgCl reference electrode [19] |
| Homogenization Buffer | Sample preparation | Extracts peanut protein from food matrices; composition optimized for protein solubility [10] |
| Electrochemical Workstation | Signal measurement and analysis | Performs CV and DPV measurements; e.g., Autolab PGSTAT302N [19] |
| Food Sample Capsule | Integrated sample preparation | Contains blender and PET mesh filter for homogenization and clarification [10] |
Detailed Experimental Protocol
Aptasensor Fabrication
Step 1: Microfluidic Device Fabrication
- Design the origami paper-based device using graphic design software (e.g., Adobe Illustrator).
- Print the design onto Whatman No. 1 chromatography paper using a wax printer.
- Heat the patterned paper at 120°C for 5 minutes to allow wax to penetrate through the paper thickness, creating hydrophobic barriers.
- Screen-print carbon ink working electrode on the front side.
- Screen-print carbon counter electrode and Ag/AgCl reference electrode on the back side.
Step 2: Working Electrode Modification
- Synthesize NH₂-GO/THI/AuNP nanocomposite:
- Disperse 2.0 mg NH₂-GO in 2.0 mL ultrapure water via ultrasonication for 30 minutes.
- Add 2.0 mL of thionine solution (2.0 mg mL⁻¹) and stir vigorously for 24 hours at room temperature.
- Mix with 1.0 mL of AuNP solution to form the final nanocomposite.
- Deposit 8.0 μL of the nanocomposite onto the working electrode surface.
- Incubate the modified electrode in 20 μL of thiol-modified anti-Ara h 1 aptamer (1.0 μM) for 14 hours at 4°C to form Au-S bonds.
- Rinse with Tris-EDTA buffer to remove unbound aptamers.
Step 3: Food Sample Processing
- Obtain 0.1 g of food sample and place it into the dedicated capsule containing homogenization buffer.
- Homogenize the sample using the integrated blender mechanism.
- Filter the homogenate through a polyethylene terephthalate mesh to remove large particulates.
- The clarified homogenate is now ready for analysis.
Assay Execution and Electrochemical Readout
Step 4: Target Capture and Detection
- Fold the origami paper device to bring the sample introduction zone in contact with the detection zone.
- Apply 50-100 μL of the filtered food homogenate to the sample zone.
- Allow capillary flow to transport the sample to the aptamer-functionalized working electrode.
- Incubate for 45-90 seconds to facilitate aptamer-allergen binding.
- Wash with buffer to remove unbound components.
Step 5: Electrochemical Measurement
- Perform differential pulse voltammetry with the following parameters:
- Potential range: -0.6 V to 0 V
- Modulation amplitude: 50 mV
- Step potential: 10 mV
- Scan rate: 50 mV s⁻¹
- Measure the reduction in current signal resulting from the formation of aptamer-allergen complexes, which hinders electron transfer.
- Quantify allergen concentration based on the signal decrease relative to a negative control.
Data Analysis and Interpretation
The detection mechanism relies on the decrease in electrochemical current resulting from the formation of aptamer-allergen immunocomplexes on the electrode surface. These complexes act as an insulating layer, hindering electron transfer from the sample medium to the working electrode [19]. The magnitude of current reduction is proportional to the allergen concentration in the sample.
Calculate the signal reduction using the formula: Signal Reduction (%) = [(I₀ - I)/I₀] × 100 Where I₀ is the current from the negative control and I is the current from the test sample.
Compare the signal reduction to a calibration curve generated with known concentrations of peanut allergen standards to quantify allergen levels in unknown samples.
Troubleshooting and Optimization
- Low Signal Response: Ensure proper electrode modification and aptamer immobilization. Verify nanocomposite synthesis procedure and aptamer concentration.
- High Background Signal: Increase washing stringency and duration. Check for non-specific binding on electrode surface.
- Poor Reproducibility: Standardize homogenization procedure across samples. Ensure consistent sample volume application.
- Matrix Interference: Dilute complex food matrices or incorporate additional filtration steps. Validate with spiked recovery experiments.
Applications and Performance
This protocol enables sensitive detection of peanut allergens across diverse food matrices, achieving detection limits as low as 12.5 ppm peanut protein [10]. The method is particularly valuable for detecting allergens in processed foods where traditional ELISA may suffer from reduced protein solubility and immunoreactivity [26]. The integrated sample preparation and point-of-care format makes it suitable for food industry quality control and consumer protection applications.
Differential Pulse Voltammetry (DPV) is a highly sensitive electrochemical technique renowned for its ability to minimize non-Faradaic (charging) background currents, thereby enabling the detection of analytes at very low concentrations, often in the picomolar to nanomolar range [27]. This technique is particularly valuable in the development of biosensors, including the microfluidic origami nano-aptasensor for peanut allergen detection, where quantifying trace amounts of a specific target with high precision is paramount.
The core principle of DPV involves applying a series of small, constant-amplitude voltage pulses (typically 10–100 mV) superimposed on a linearly increasing staircase potential ramp [28] [27]. The current is sampled twice for each pulse: just before the pulse is applied (i1) and at the end of the pulse (i2). The plotted signal is the difference between these two currents (Δi = i2 - i1) versus the applied baseline potential [28]. This differential current measurement is key to the technique's sensitivity, as the charging current decays rapidly and contributes almost equally to both i1 and i2, effectively canceling out this non-Faradaic background. In contrast, the Faradaic current, which arises from redox reactions and is directly dependent on analyte concentration, changes significantly during the pulse, resulting in a characteristic peak-shaped voltammogram [27]. The height of this peak is proportional to the concentration of the electroactive species, while its position (peak potential, Ep) is characteristic of the specific redox reaction, allowing for qualitative identification [27].
Principles of DPV Signal Interpretation in Aptasensors
In the context of an aptasensor, the DPV signal reports on a binding-induced change in the electrochemical properties at the electrode interface. The aptamer, immobilized on the sensor surface, undergoes a conformational change upon binding its target allergen (e.g., Ara h 1). This structural shift can alter the electron transfer kinetics of a redox probe (e.g., [Fe(CN)6]^{3-/4-} or methylene blue) present in the solution, leading to a measurable change in the DPV signal [29].
Two primary signal transduction strategies are commonly employed:
- Signal-Off Strategy: The binding event causes the aptamer to fold in a way that hinders the access of the redox probe to the electrode surface or impedes electron transfer. This results in a decrease in the Faradaic current [29].
- Signal-On Strategy: Conversely, the binding event may displace a molecule that was previously blocking electron transfer or pull a redox tag closer to the electrode surface, leading to an increase in the Faradaic current [29].
The relationship between peak current and analyte concentration is the foundation for quantitative analysis. A standard curve is constructed by measuring the DPV peak current (or the change in peak current, Δip) at varying, known concentrations of the target. This curve is then used to interpolate the concentration of the target in unknown samples. The limit of detection (LOD) is determined as the concentration corresponding to a signal three times the standard deviation of the blank (background) signal.
Table 1: Key DPV Parameters and Their Influence on Sensor Performance
| Parameter | Description | Typical Range/Value | Effect on Measurement |
|---|---|---|---|
| Pulse Amplitude | Height of the potential pulse. | 10 - 100 mV | Larger amplitude increases sensitivity but may decrease peak resolution [27]. |
| Pulse Width | Duration of the potential pulse. | ~50 ms | Affects the decay time of the charging current; optimization is required to maximize Faradaic contribution [27]. |
| Pulse Increment | Step size of the staircase potential between pulses. | 2 - 10 mV | Influences the effective scan rate and the number of data points across the peak [28]. |
| Sample Period | Time when the second current (i2) is sampled. |
Near end of pulse | Crucial for measuring after charging current has decayed [27]. |
| Initial/Final Potential | The potential window for the scan. | Dependent on redox probe | Must be set to encompass the reduction or oxidation potential of the redox marker used. |
The following diagram illustrates the core DPV waveform and signal generation logic, which underpins the quantitative interpretation of aptasensor data:
Diagram 1: DPV Signal Generation Logic
Research Reagent Solutions for DPV-based Aptasensing
The fabrication of a high-performance DPV-based aptasensor requires a suite of specialized materials and reagents. The following table details key components essential for constructing a nano-aptasensor for peanut allergen detection, as evidenced by recent literature.
Table 2: Essential Research Reagents for DPV-based Nano-Aptasensor Development
| Reagent / Material | Function / Role | Specific Example & Rationale |
|---|---|---|
| Aptamer (Biorecognition Element) | Binds the target allergen with high specificity and affinity. | SH-/NH2-terminated ssDNA aptamer for Ara h 1 [24]. Terminal functional groups enable covalent immobilization on electrode surfaces via gold-thiol bonds or EDC/NHS chemistry [30] [31]. |
| Electrode Material & Nanocomposites | Provides the transduction platform; nanomaterials enhance surface area and electron transfer. | Screen-printed carbon electrodes (SPCEs) for portability and disposability [32] [31]. TiO2-Carbon Nanofiber (CNF) and Au-Pd nanoparticles create a corrugated, high-surface-area platform for efficient aptamer loading and signal amplification [24]. CoNi-MOFs offer large surface areas and tunable porosity [31]. |
| Redox Probe | Generates the measurable Faradaic current. | Ferri/Ferrocyanide ([Fe(CN)6]^{3-/4-}) is a common solution-phase probe for label-free detection, where binding alters electron transfer resistance [29]. Methylene Blue can be used as an intercalating tag that reports conformational changes in the aptamer [29]. |
| Immobilization Chemistry | Anchors the aptamer to the sensor surface. | EDC/NHS crosslinking activates carboxyl groups on nanomaterials for coupling with amine-modified aptamers [30] [31]. Thiol-Gold chemistry for direct self-assembly of thiolated aptamers on gold nanostructures [29] [24]. |
| Blocking Agents | Minimizes non-specific adsorption to reduce background signal. | Bovine Serum Albumin (BSA) or casein are used to passivate unmodified sites on the electrode surface, ensuring signal originates only from specific binding [32] [24]. |
Experimental Protocol: DPV-based Detection of Ara h 1 Allergen
This protocol integrates methodologies from recent studies on peanut allergen detection [32] [24] and is tailored for a microfluidic origami aptasensor platform.
Sensor Fabrication and Surface Modification
- Electrode Pretreatment: Clean the working area of the SPCE by applying a fixed potential or performing cyclic voltammetry (CV) scans in a suitable electrolyte (e.g., 0.1 M H2SO4 or PBS) until a stable CV is obtained.
- Nanocomposite Modification:
- Prepare a dispersion of the nanocomposite material (e.g., 2 mg/mL TiO2-CNF in DMF) [24].
- Drop-cast a precise volume (e.g., 5-10 µL) onto the SPCE working electrode and allow it to dry under an infrared lamp or at room temperature.
- Metallic Nanostructure Electrodeposition:
- Aptamer Immobilization:
- Activate the nanostructured surface with a mixture of 4 mM EDC and 10 mM NHS in water for 20 minutes to form amine-reactive esters [31].
- Rinse gently with deionized water.
- Incubate the electrode with the amine-terminated Ara h 1 aptamer solution (e.g., 1 µM in Tris-HCl buffer, pH 7.4) for 60 minutes at room temperature to form stable amide bonds.
- Surface Blocking: Incubate the aptamer-functionalized electrode with 1% (w/v) BSA solution for 30 minutes to block any remaining active sites. Rinse thoroughly with Tris-Tween washing buffer (pH 7.4) to remove unbound reagents.
DPV Measurement and Quantification
- Instrument Setup: Configure the potentiostat with the following typical DPV parameters [28] [27]:
- Initial/Final Potential: Set to encompass the redox probe's reaction (e.g., -0.2 V to +0.6 V for
[Fe(CN)6]^{3-/4-}). - Pulse Amplitude: 50 mV
- Pulse Width: 50 ms
- Pulse Period: 200 ms
- Pulse Increment: 4 mV
- Initial/Final Potential: Set to encompass the redox probe's reaction (e.g., -0.2 V to +0.6 V for
- Baseline Measurement: Place a drop of electrolyte solution containing the redox probe (e.g., 5 mM
[Fe(CN)6]^{3-/4-}in 0.1 M PBS, pH 7.4) onto the sensor. Record the DPV voltammogram. This serves as the baseline signal (i0). - Sample Incubation and Detection:
- Incubate the sensor with the sample (containing Ara h 1) for a defined period (e.g., 15-30 minutes) to allow for specific binding.
- Rinse the sensor to remove unbound material.
- Record the DPV signal again in the same redox probe solution. This is the sample signal (
i).
- Data Analysis: The change in peak current (Δip =
i-i0for a signal-on sensor, ori0-ifor a signal-off sensor) is calculated. The magnitude of Δip is correlated with the concentration of Ara h 1.
The following diagram outlines the experimental workflow from sensor preparation to final signal interpretation:
Diagram 2: Aptasensor Experimental Workflow
Performance Metrics and Data Analysis
The analytical performance of DPV-based aptasensors for allergen detection is evaluated using several key metrics. The following table compiles representative data from recent studies to illustrate achievable performance.
Table 3: Analytical Performance of DPV-based Aptasensors for Allergen/Biomarker Detection
| Target Analyte | Sensor Platform | Linear Range | Limit of Detection (LOD) | Detection Protocol |
|---|---|---|---|---|
| Peanut Allergen (Ara h 1) | SPE/TiO2-CNF/Au-PdNPs/Aptamer [24] | 0.25 – 1000 pg/mL | 0.035 pg/mL | Label-free DPV with [Fe(CN)6]^{3-/4-} probe. |
| Peanut Allergen (Ara h 1) | SPCE/Immunosensor with CdSe@ZnS QDs [32] | 25 – 1000 ng/mL | 3.5 ng/mL | Differential Pulse Anodic Stripping Voltammetry (DPASV) of dissolved Cd²⁺. |
| Cancer Biomarker (VEGF₁₆₅) | Nanoporous Gold / SH-Aptamer [29] | 2.5 – 140 pM | 0.25 pM | Label-free DPV with methylene blue. |
| Cardiac Troponin I (cTnI) | SPCE/CoNi-MOF/Aptamer [31] | 5 – 75 pg/mL | 13.2 pM | Label-free DPV with [Fe(CN)6]^{3-/4-} probe. |
To ensure reliability, the following validation procedures must be performed:
- Selectivity: Test the sensor against potential interferents (e.g., other proteins like BSA, casein, or myoglobin) at high concentrations to confirm the signal response is specific to the target allergen [24].
- Reproducibility: Fabricate and measure multiple sensors (n ≥ 3) at the same target concentration. The relative standard deviation (RSD) of the signals should typically be below 5-10% [24] [31].
- Stability: Store the fabricated sensors under defined conditions (e.g., at 4°C) and measure their response periodically over days or weeks. A robust sensor should retain over 90% of its initial signal after one week [29] [31].
- Real Sample Analysis: Validate the sensor's performance by spiking known concentrations of the target allergen into complex food matrices (e.g., bread, peanut butter extracts) and calculating the recovery rate [32] [24]. Recovery rates between 90-110% are generally considered excellent.
Enhancing Performance: Critical Parameters, Stability, and Problem Solving
The development of a microfluidic origami nano-aptasensor for peanut allergen detection represents a significant advancement in point-of-need food safety analysis. This innovative biosensing platform integrates the specificity of aptamer biorecognition with the portability and efficiency of paper-based microfluidic technology. A critical factor in achieving optimal sensor performance lies in the precise optimization of key fabrication and operational parameters, specifically aptamer concentration, self-assembly time of the aptamer on the sensing interface, and the antigen-aptamer reaction time. This protocol details a systematic approach to optimizing these parameters, drawing from established methodologies in electrochemical aptasensor development to ensure high sensitivity and specificity for detecting the peanut allergen Ara h 1 [14] [10].
The performance of an electrochemical aptasensor is fundamentally governed by the density of the biorecognition element on the transducer surface and the kinetics of the binding event. Optimizing these parameters directly influences the sensor's linear range, limit of detection, and overall assay time, bridging the gap between complex laboratory testing and rapid food allergen analysis [14] [19]. The following sections provide a detailed, step-by-step protocol for determining these critical parameters, complete with experimental data and reagent specifications.
Key Parameter Optimization
The optimization process involves evaluating how variations in aptamer concentration, self-assembly time, and reaction time affect the sensor's electrochemical signal. The resulting data should be used to identify the values that provide the optimal signal-to-noise ratio for the target application. A summary of optimized parameters from a representative study for Ara h 1 detection is provided in Table 1.
Table 1: Summary of Optimized Parameters for a Microfluidic Origami Nano-Aptasensor
| Parameter | Optimized Value | Analytical Performance Metric | Observed Effect |
|---|---|---|---|
| Aptamer Concentration | 1-3 µM | Signal intensity and saturation | Higher density improves signal until saturation is reached; non-specific binding may increase [14] [19]. |
| Self-Assembly Time | 12-24 hours | Aptamer surface density and stability | Longer durations ensure stable and oriented monolayer formation on the electrode [14] [19]. |
| Reaction Time (Ara h 1) | 20 minutes | Assay speed and signal response | Enables complete target binding, achieving a linear range of 50–1000 ng/mL and a LOD of 21.6 ng/mL [14]. |
The following experimental workflow outlines the key stages for fabricating and optimizing the aptasensor, from surface functionalization to data analysis.
Experimental Protocols
Protocol 1: Optimizing Aptamer Probe Concentration
Objective: To determine the optimal concentration of thiol-modified anti-Ara h 1 aptamer for immobilization on a gold nanoparticle (AuNP)-modified paper electrode, maximizing binding site availability while minimizing steric hindrance and non-specific adsorption [19].
Materials:
- Thiolated anti-Ara h 1 aptamer stock solution (100 µM in TE buffer)
- Tris-EDTA (TE) buffer (pH 8.0)
- Gold nanoparticle-modified screen-printed paper electrode
- Incubation chamber (humidified)
Procedure:
- Dilution Series Preparation: Prepare a dilution series of the thiolated aptamer in TE buffer, spanning concentrations from 0.1 µM to 5 µM.
- Aptamer Immobilization: Apply a 5 µL droplet of each aptamer solution onto the working electrode area of separate, identical AuNP-modified paper electrodes.
- Self-Assembly: Incubate the electrodes in a humidified chamber at room temperature for 12 hours to allow for the formation of a self-assembled monolayer via Au-S bonds.
- Washing: Gently rinse each electrode with TE buffer to remove any unbound or loosely adsorbed aptamer strands.
- Electrochemical Measurement: Perform electrochemical measurements (e.g., Differential Pulse Voltammetry (DPV) or Electrochemical Impedance Spectroscopy (EIS)) in a standard redox probe solution (e.g., [Fe(CN)₆]³⁻/⁴⁻) for each electrode.
- Data Analysis: Plot the measured electrochemical signal (e.g., current from DPV or charge transfer resistance from EIS) against the aptamer concentration used. The optimal concentration is identified at the point where the signal begins to plateau, indicating near-saturation of available binding sites on the electrode surface.
Protocol 2: Optimizing Self-Assembly Time
Objective: To establish the incubation time required for the thiolated aptamer to form a stable, oriented, and dense monolayer on the AuNP surface, which is crucial for consistent sensor performance [14] [19].
Materials:
- Thiolated anti-Ara h 1 aptamer at the optimized concentration from Protocol 1
- Gold nanoparticle-modified screen-printed paper electrode
- Incubation chamber (humidified)
Procedure:
- Aptamer Application: Apply the optimized aptamer solution to multiple identical AuNP-modified electrodes.
- Time-Course Immobilization: Incubate these electrodes for varying time periods (e.g., 2, 4, 8, 12, 16, 20, and 24 hours) in a humidified chamber at room temperature.
- Washing and Blocking: After each time point, rinse the electrode thoroughly with TE buffer. Subsequently, block the electrode with a 1 mM 6-mercapto-1-hexanol (MCH) solution for 30 minutes to passivate any uncovered gold surfaces and displace non-specifically adsorbed aptamers.
- Signal Measurement: Perform DPV measurements in a standard redox probe solution for each electrode.
- Data Analysis: Plot the electrochemical signal versus self-assembly time. The signal will typically increase with time before stabilizing. The minimal time required to achieve a stable, maximum signal is considered the optimal self-assembly time.
Protocol 3: Optimizing Antigen-Aptamer Reaction Time
Objective: To determine the incubation time required for the target allergen (Ara h 1) to efficiently bind to the surface-immobilized aptamers, balancing assay speed and detection sensitivity [14] [10].
Materials:
- Optimized aptasensor from previous protocols
- Ara h 1 antigen standard solutions in a suitable buffer (e.g., PBS) or spiked food extract
- Microfluidic origami chip assembly
Procedure:
- Sample Introduction: Apply a fixed volume (e.g., 20-50 µL) of an Ara h 1 standard solution at a concentration within the middle of the expected dynamic range (e.g., 500 ng/mL) to the sample inlet of the folded origami device.
- Time-Course Reaction: Allow the sample to react with the aptamer-functionalized electrode for varying time intervals (e.g., 5, 10, 15, 20, 25, and 30 minutes) at room temperature.
- Washing: After each reaction time, unfold the device (if necessary) and perform a gentle washing step with buffer to remove unbound antigens.
- Signal Measurement: Record the DPV signal for each device. The formation of the aptamer-antigen complex insulates the electrode surface, leading to a measurable decrease in current.
- Data Analysis: Plot the normalized signal suppression (e.g., (I₀ - I)/I₀, where I₀ is the initial current and I is the current after binding) against the reaction time. The optimal reaction time is the shortest duration that yields a maximal and stable signal change, indicating binding equilibrium.
The Scientist's Toolkit: Research Reagent Solutions
The successful development of a high-performance aptasensor relies on a set of key materials and reagents. Their specific functions are outlined in Table 2.
Table 2: Essential Research Reagents for Aptasensor Development
| Reagent / Material | Function / Explanation |
|---|---|
| Thiol-Modified Aptamer | The core biorecognition element. The thiol group (-SH) enables covalent immobilization onto gold surfaces (e.g., from AuNPs) via stable Au-S bonds, ensuring proper orientation and stability [19]. |
| Gold Nanoparticles (AuNPs) | A key nanomaterial used to modify the working electrode. AuNPs provide a high-surface-area platform for aptamer immobilization and enhance electrochemical signal transduction by facilitating electron transfer [33] [19]. |
| Black Phosphorus Nanosheets (BPNSs) | A nanomaterial used as a sensing probe. BPNSs can be decorated with aptamers and electrodeposited onto the electrode to enhance electrochemical detection signals and improve specificity [14]. |
| Paper-Based Substrate (e.g., Chromatography Paper) | Serves as the platform for the microfluidic device. It enables fluid transport via capillary action without external pumps, making the device low-cost, portable, and disposable [14] [34]. |
| Electrochemical Redox Probe (e.g., [Fe(CN)₆]³⁻/⁴⁻) | A benchmark molecule used in solution during electrochemical characterization. Changes in its electron transfer kinetics (measured by EIS or DPV) upon aptamer binding or target capture are used to quantify the analyte [33] [19]. |
| Blocking Agent (e.g., MCH, BSA) | Used to passivate the sensor surface after aptamer immobilization. It blocks uncovered active sites on the electrode to minimize non-specific binding of non-target molecules, thereby reducing background noise and improving specificity [19]. |
Addressing the Stability Challenge of Black Phosphorus in Sensing Environments
The integration of black phosphorus nanosheets (BPNSs) into electrochemical biosensors represents a significant advancement in the field of food allergen detection, particularly for microfluidic origami aptasensors targeting peanut allergens like Ara h1. BPNSs offer exceptional properties, including a tunable bandgap, high carrier mobility, and a large specific surface area, which enhance sensor sensitivity [7] [35]. However, the Achilles' heel of this promising material is its inherent instability upon exposure to ambient conditions; BPNSs are susceptible to oxidative degradation, leading to a rapid decline in their electrochemical performance and hindering their practical application [36] [37]. This Application Note details the primary strategies for stabilizing BPNSs and provides a validated protocol for incorporating stabilized BPNSs into a microfluidic origami nano-aptasensor, specifically within the context of peanut allergen research.
Stabilization Strategies for Black Phosphorus
The degradation of BPNSs is primarily caused by reaction with oxygen and water in the air. Effective stabilization strategies focus on forming protective composites that shield BPNSs from these elements while preserving, or even enhancing, their electrochemical advantages. The following table summarizes the most effective approaches.
Table 1: Strategies for Stabilizing Black Phosphorus in Sensing Environments
| Strategy | Mechanism | Key Advantages | Reported Performance in Sensors |
|---|---|---|---|
| Covalent Functionalization with Polymers | Coating with poly-L-lysine (PLL) or similar polymers to create a protective barrier. | Improves dispersion and provides a matrix for biomolecule immobilization. | Used in an Ara h1 aptasensor, contributing to a LOD of 21.6 ng/mL [7]. |
| Formation of Nanocomposites with Carbon Nanotubes | Combining BPNSs with carboxylated multi-walled carbon nanotubes (MWCNTs-COOH) via strong van der Waals forces. | MWCNTs-COOH act as a physical barrier against O2/H2O and significantly enhance electrical conductivity. | A β-lactoglobulin sensor achieved a LOD of 0.12 ng/mL and demonstrated high stability [36]. |
| Synthesis of Graphene Hybrids | In-situ growth of BP on graphene nanosheets, forming C–P and C–O–P covalent bonds. | Cost-effective (can use red P precursor); drastically improves electrical conductivity and photoelectrochemical stability. | Enabled a stable photoelectrochemical aptasensor for bisphenol A [37]. |
The workflow below illustrates the decision path for selecting and implementing these stabilization strategies.
The Scientist's Toolkit: Research Reagent Solutions
The successful development of a stable BP-based aptasensor requires a specific set of materials and reagents. The following table catalogs the essential components and their functions.
Table 2: Essential Research Reagents for a BP-Based Microfluidic Origami Aptasensor
| Category | Reagent/Material | Specification/Function |
|---|---|---|
| Core Sensing Materials | Black Phosphorus Crystals | Precursor for synthesizing BPNSs via liquid exfoliation [7] [36]. |
| Allergen-Specific Aptamer | The biorecognition element (e.g., anti-Ara h1 aptamer); must be amino-modified for covalent immobilization [7] [10]. | |
| Stabilization Composites | Carboxylated Multi-Walled Carbon Nanotubes (MWCNTs-COOH) | Forms a stable, conductive nanocomposite with BPNSs to prevent oxidation [36]. |
| Poly-L-Lysine (PLL) | A polymer used to coat BPNSs, providing a protective layer and functional groups for aptamer conjugation [7]. | |
| Sensor Fabrication Substrates | Chromatography Paper | Porous, hydrophilic substrate for creating microfluidic channels via patterning; enables capillary-driven flow [7] [38]. |
| Conductive Inks (Carbon, Ag/AgCl) | For screen-printing working, counter, and reference electrodes onto the paper substrate [7]. | |
| Buffer & Chemical Reagents | N-Ethyl-N′-(3-dimethylaminopropyl) carbodiimide (EDC) / N-Hydroxysuccinimide (NHS) | Crosslinking agents for covalent immobilization of amino-modified aptamers onto functionalized BPNSs composites [36]. |
| Ferro/Ferricyanide Redox Probe ([Fe(CN)₆]³⁻/⁴⁻) | Used in the electrochemical cell to generate a measurable current signal in label-free detection [7]. |
Quantitative Performance of Stabilized BP-Based Sensors
Implementing the stabilization strategies outlined above yields tangible, superior performance in biosensors. The following table compares the analytical outcomes of two different stabilized BP configurations for food allergen detection.
Table 3: Performance Comparison of Stabilized BP-Based Aptasensors for Food Allergens
| Parameter | Microfluidic Origami Aptasensor (BPNSs-PLL) [7] | μ-PAD (BPNSs@MWCNTs-COOH) [36] |
|---|---|---|
| Target Allergen | Peanut Ara h1 | Milk β-Lactoglobulin (β-LG) |
| Linear Detection Range | 50 – 1000 ng/mL | 10 – 1000 ng/mL |
| Limit of Detection (LOD) | 21.6 ng/mL | 0.12 ng/mL |
| Sensitivity | 0.05 µA·ng⁻¹·mL | Not Specified |
| Key Stabilization Method | Polymer Coating (Poly-L-lysine) | Nanocomposite (MWCNTs-COOH) |
| Assay Time | ~20 minutes | Highly Rapid (implied) |
| Application in Real Samples | Cookie dough (spiked sample) | Various dairy products (high correlation with HPLC) |
Experimental Protocol: Fabrication of a Stable BPNSs@MWCNTs-COOH-based Microfluidic Origami Aptasensor
This protocol provides a step-by-step methodology for constructing a highly stable and sensitive microfluidic origami electrochemical aptasensor for the detection of peanut allergen Ara h1, utilizing the BPNSs@MWCNTs-COOH nanocomposite.
Materials Preparation
- BPNSs Synthesis: Prepare BPNSs via a liquid-phase exfoliation method. Begin by sealing bulk black phosphorus crystals in a vial within a nitrogen-filled glovebox. Add an appropriate solvent (e.g., N-methyl-2-pyrrolidone, NMP) and perform probe sonication on an ice bath to prevent thermal degradation. Centrifuge the resulting dispersion to remove unexfoliated bulk material and collect the supernatant containing BPNSs [7] [36].
- BPNSs@MWCNTs-COOH Nanocomposite Preparation: Mix the as-prepared BPNSs dispersion with an aqueous solution of carboxylated multi-walled carbon nanotubes (MWCNTs-COOH) at an optimal mass ratio (e.g., 1:1). Subject the mixture to vigorous stirring and/or bath sonication to achieve a homogeneous composite. The MWCNTs-COOH will physically adsorb onto the BPNSs surfaces via strong van der Waals interactions, forming a stable hybrid material [36].
Sensor Fabrication and Functionalization
The fabrication process involves creating a 3D paper-based device through folding, as illustrated in the workflow below.
- Device Patterning: Use a craft-cutter or PDMS patterning to create defined microfluidic channels on a piece of chromatography paper. Simultaneously, screen-print conductive carbon ink to form the working (WE), counter (CE), and reference (RE) electrodes. The reference electrode can be further modified with Ag/AgCl ink [7] [38].
- Working Electrode Modification:
- Deposit 5-10 µL of the prepared BPNSs@MWCNTs-COOH nanocomposite suspension onto the surface of the working electrode and allow it to dry at room temperature.
- Activate the carboxyl groups on the nanocomposite by treating the electrode with a mixture of EDC and NHS (e.g., 40 mM EDC and 10 mM NHS) for 30-60 minutes. This step creates amine-reactive esters.
- Rinse the electrode gently with deionized water to remove excess EDC/NHS.
- Incubate the electrode with the amino-modified anti-Ara h1 aptamer solution (e.g., 1.0 µM concentration) for 2 hours at room temperature, facilitating covalent amide bond formation. The resulting surface is a stable, aptamer-functionalized sensing interface [36].
- Device Assembly: Fold the paper-based device along pre-defined creases into a three-dimensional "origami" configuration. This design creates a compact, self-contained analytical device with separate layers for sample introduction, reaction, and detection [7].
Electrochemical Measurement and Analysis
- Introduce the extracted food sample (e.g., cookie dough extract) into the sample inlet of the folded μPAD. Capillary action will drive the fluid through the microchannel to the functionalized working electrode.
- Incubate for a specified time (e.g., 10-15 minutes) to allow for the specific binding between the Ara h1 allergen and the immobilized aptamer.
- Perform electrochemical measurements, such as Differential Pulse Voltammetry (DPV), in the presence of a ferro/ferricyanide redox probe. The binding event causes a measurable decrease in the peak current, which is proportional to the concentration of Ara h1 in the sample.
- Quantify the Ara h1 concentration by comparing the obtained current signal to a calibration curve constructed from standards of known concentration [7] [36].
The instability of black phosphorus in sensing environments is a critical challenge that can be effectively overcome through strategic material science. The formation of nanocomposites, particularly with carbon nanomaterials like MWCNTs-COOH, has proven to be a superior method for enhancing both the stability and the electrochemical performance of BPNSs. The detailed protocol provided herein enables researchers to reliably fabricate a robust microfluidic origami nano-aptasensor. This approach paves the way for the development of highly sensitive, portable, and stable diagnostic devices for food safety monitoring, ultimately contributing to the protection of consumers with food allergies.
Strategies for Mitigating Non-Specific Binding in Complex Matrices
Non-specific binding (NSB) represents a significant challenge in the development of sensitive and reliable biosensors, particularly in complex matrices such as food homogenates. NSB occurs through non-covalent bonding forces, where analytes or detection reagents adsorb to solid surfaces due to electrostatic interactions or hydrophobic effects [39]. In the context of microfluidic origami nano-aptasensors for peanut allergen detection, NSB can severely compromise assay accuracy by increasing background noise, reducing signal-to-noise ratios, and leading to false positive or false negative results. The impact of NSB extends throughout the entire experimental process, from sample preparation and storage to analytical testing, ultimately affecting detection limits and the reliability of quantitative measurements [39]. Addressing NSB is therefore not merely an optimization step but a fundamental requirement for developing robust biosensing platforms suitable for point-of-need testing environments.
The challenges of NSB are particularly pronounced in microfluidic origami devices that utilize paper-based substrates and intricate fluidic pathways. These systems present multiple interfaces where NSB can occur, including the paper fibers themselves, printed electrodes, and any polymeric coatings or modifications. When detecting trace levels of peanut allergens such as Ara h 1 in complex food matrices, even minimal NSB can significantly impact the clinical utility of the detection system. This application note outlines targeted strategies for mitigating NSB, with specific emphasis on protocols and methodologies relevant to peanut allergen detection using nano-aptasensor technology [20].
Key Factors Contributing to Non-Specific Binding
Understanding the fundamental factors that drive NSB is essential for developing effective mitigation strategies. The occurrence and extent of NSB are governed by three primary factors: the properties of the solid surfaces, the composition of the solution, and the characteristics of the analytes and detection reagents [39].
Solid Surface Properties
Different material surfaces exhibit distinct adsorption principles, which directly influence their propensity for NSB. In a typical microfluidic origami biosensor, multiple solid surfaces come into contact with the solution, each with different interaction mechanisms. Glass surfaces, often used in detection chambers or as support materials, primarily facilitate NSB through ion-exchange or bond-breaking reactions with silica-oxygen bonds [39]. Polymeric consumables, including polypropylene and polystyrene, promote NSB through electrostatic and hydrophobic effects. Metal surfaces in liquid phase lines and columns predominantly contribute through electrostatic interactions. The extensive surface area presented by paper-based microfluidic substrates further compounds these challenges, as the porous cellulose structure provides numerous binding sites for non-specific interactions.
Solution Composition
The composition of the solution matrix significantly influences NSB. Simple solvents such as aqueous buffers generally exhibit relatively weak NSB, but complex biological matrices introduce numerous complicating factors. Food homogenates, particularly those derived from baked goods or processed foods, contain various proteins, lipids, carbohydrates, and other compounds that can interfere with specific binding interactions [39]. While certain matrix components such as plasma proteins and lipids can sometimes attenuate analyte adsorption, simpler fluids like extracted food samples typically demonstrate higher possibilities for NSB due to the absence of these competing elements [39]. The pH, ionic strength, and viscosity of the solution further modulate NSB by affecting the charge state and hydration of interacting molecules.
Analyte and Reagent Properties
The physicochemical characteristics of detection reagents and target analytes play a crucial role in NSB. In aptamer-based biosensors, the oligonucleotide aptamers themselves can be susceptible to NSB, particularly those with pronounced hydrophobic regions or charged bases. Peptides, proteins, and peptide-drug conjugates primarily consist of amino acids that are amphoteric compounds with both positively charged amino groups and negatively charged carboxyl groups, resulting in strong electrostatic effects [39]. The Ara h 1 allergen, as a protein, contains multiple amino acid residues with additional positively charged groups (e.g., lysine with amino groups, arginine with guanidinyl groups, and histidine with imidazolyl groups) that generate significant electrostatic interaction potential [39]. These characteristics make peanut allergens particularly prone to NSB in microfluidic systems.
Table 1: Factors Influencing Non-Specific Binding in Microfluidic Aptasensors
| Factor Category | Specific Elements | Impact on NSB |
|---|---|---|
| Solid Surfaces | Glass surfaces | Ion-exchange, bond-breaking with silica-oxygen |
| Polypropylene/polystyrene consumables | Electrostatic effect, hydrophobic effect | |
| Metal liquid phase lines and columns | Electrostatic effect | |
| Paper-based microfluidic substrates | High surface area, capillary action enhances binding | |
| Solution Composition | Simple aqueous buffers | Relatively weak NSB |
| Complex food homogenates | High potential for NSB due to interfering compounds | |
| Low protein/lipid content matrices | Increased NSB compared to protein-rich matrices | |
| Analyte/Reagent Properties | Oligonucleotide aptamers | Electrostatic interactions with charged bases |
| Protein allergens (Ara h 1) | Amphoteric nature with charged amino acid residues | |
| Cationic detection reagents | Strong electrostatic attraction to surfaces |
Material and Reagent Solutions for NSB Mitigation
Selecting appropriate reagents and materials is the first line of defense against NSB in microfluidic aptasensor development. The research reagents listed below have been specifically evaluated for their utility in mitigating NSB in allergen detection systems.
Table 2: Research Reagent Solutions for NSB Mitigation
| Reagent/Material | Function | NSB Mitigation Mechanism |
|---|---|---|
| Low-adsorption consumables | Sample tubes, 96-well plates | Surface passivation to reduce adsorption of proteins and nucleic acids |
| Surfactants (e.g., Tween, CHAPS) | Addition to buffers and samples | Disrupt hydrophobic interactions; form uniform dispersion of analytes |
| Bovine serum albumin (BSA) | Blocking agent; matrix additive | Competes with analyte for binding sites on surfaces |
| Chelating agents (e.g., EDTA) | Mobile phase additive | Reduce metal ion-mediated binding to metallic surfaces |
| Organic solvents | Solvent modification | Increase solubility of hydrophobic analytes |
| Black phosphorus nanosheets (BPNSs) | Sensing probe substrate | High carrier mobility and catalytic activity enhance specific signal |
| Poly-L-lysine (PLL) | Bioconjugation linker | Facilitates controlled immobilization of aptamers to reduce NSB |
The strategic implementation of these reagents addresses specific NSB mechanisms. Surfactants function by possessing a hydrophilic group at one end and a hydrophobic group at the other, leading to more uniform dispersion of analytes in the solution, thereby improving the dissolution state and weakening the hydrophobic effects that produce NSB [39]. Black phosphorus nanosheets, utilized in microfluidic origami aptasensors, provide exceptional electrochemical properties that enhance specific detection signals while minimizing background interference [20]. The selection of appropriate surfactants must be carefully considered based on the specific detection system, as they can cause varying degrees of signal suppression or interference during mass spectrometry or electrochemical detection of analytes [39].
Experimental Protocols for NSB Assessment and Mitigation
Protocol 1: Assessment of NSB in Microfluidic Systems
Objective: Quantify and characterize NSB in microfluidic origami aptasensors under various conditions.
Materials:
- Low-adsorption microcentrifuge tubes
- Phosphate-buffered saline (PBS), pH 7.4
- PBS with 0.05% Tween 20 (PBST)
- Blocking solution (1% BSA in PBST)
- Fluorescently labeled aptamer (AF647-P1-16, 100 nM stock)
- Purified Ara h 1 antigen
- Food matrix samples (cookie dough, bread, etc.)
- Microfluidic origami devices [20]
- Fluorescence imaging system
Procedure:
- Device Preparation: Fabricate microfluidic origami chips by patterning PDMS microchannels on chromatography paper substrate with screen-printed electrodes as described by Jiang et al. [20].
- Surface Blocking: Apply blocking solution to the microfluidic channels and incubate for 1 hour at room temperature.
- Sample Preparation: Homogenize food samples (0.1 g) in 1 mL extraction buffer (PBST) using capsule-based homogenization with a small blender to remove large particulates through a PET mesh filter [10].
- Aptamer Incubation: Incubate AF647-labeled P1-16 aptamer (final concentration 10 nM) with either:
- Purified Ara h 1 (0-1000 ng/mL) in buffer
- Food homogenate samples spiked with Ara h 1
- Unspiked food homogenate samples (negative control)
- Fluidics Operation: Introduce samples into the microfluidic device and allow capillary flow through the reaction chamber containing anchored complementary sequences.
- Washing: After 45-90 seconds incubation, wash with PBST (3 × 200 μL).
- Imaging and Quantification: Image the reaction chamber using a camera in the instrument and quantify fluorescence using an image analysis algorithm [10].
- Data Analysis: Calculate NSB as the percentage of fluorescence signal retained in negative controls relative to the maximum signal in positive controls.
Protocol 2: Optimization of Surface Passivation
Objective: Identify optimal surface passivation conditions to minimize NSB while maintaining specific signal.
Materials:
- Blocking agents: BSA, casein, fish skin gelatin, synthetic blocking peptides
- Surfactants: Tween 20, Triton X-100, CHAPS, sodium dodecylbenzene sulfonate (SDBS)
- Microfluidic devices with test and control anchors spotted on the same surface [10]
Procedure:
- Surface Preparation: Divide microfluidic devices into sections for testing different blocking conditions.
- Blocking Application: Apply different blocking solutions (1% concentration in PBST) to respective sections and incubate for 1 hour.
- Washing: Remove blocking solutions and wash with PBST (3 × 200 μL).
- Aptamer Binding Assay: Apply AF647-P1-16 aptamer (10 nM) in both the presence and absence of peanut flour homogenate (50-1000 ppm).
- Signal Measurement: Quantify fluorescence after washing, comparing test and control anchors.
- Optimization: Select blocking conditions that maximize the difference between specific binding (decreased fluorescence with antigen present) and non-specific retention (minimal background fluorescence).
Protocol 3: Evaluation of Desorption Agents
Objective: Systematically evaluate desorption agents for their ability to reduce NSB in complex food matrices.
Materials:
- Desorption agents: organic solvents (acetonitrile, methanol), surfactants (various classes), proteins (BSA, serum albumin)
- Low-adsorption liquid phase systems and columns [39]
- EDTA solution (50 mM, pH 8.0)
Procedure:
- Sample Preparation: Prepare challenging food matrices (high-fat, high-protein, or high-carbohydrate) spiked with Ara h 1 (50 ng/mL).
- Desorption Agent Screening: Add candidate desorption agents to the sample buffer at varying concentrations (0.001-0.1% for surfactants, 0.1-1% for proteins, 1-5% for organic solvents).
- Aptamer Assay: Perform the standard aptamer assay as described in Protocol 1.
- Signal Assessment: Compare the signal-to-noise ratios across conditions, identifying desorption agents that minimize NSB without compromising specific binding.
- Chelator Evaluation: For nucleic acid-based aptasensors, add EDTA (1-5 mM) to the mobile phase to attenuate adsorption of nucleic acid drugs on the metallic path and column [39].
Data Analysis and Interpretation
The accurate interpretation of experimental data requires careful discrimination between specific and non-specific binding events. Mathematical approaches have been developed to separate specific from non-specific binding in non-ensemble studies, providing a way to determine the distribution of specific binding stoichiometries at any ligand concentration [40]. For a system with known specific binding sites (Ns), the nonspecific association binding constant (Kn) can be extracted from intensity ratios corresponding to binding numbers larger than Ns [40].
The ratio of intensities for populations with different numbers of bound ligand molecules provides a quantitative measure of NSB. For example, the ratio I4/I3 for a dimer with two specific binding sites can be expressed as:
Where [S] is the free ligand concentration [40]. This relationship allows for the determination of the nonspecific binding constant from experimental data, enabling subsequent correction of specific binding parameters.
When applying these principles to microfluidic aptasensor data, the following analytical workflow is recommended:
- Quantify fluorescence signals for both test and control anchors across a range of antigen concentrations.
- Calculate normalized signals by dividing test anchor fluorescence by control anchor fluorescence to account for matrix effects.
- Plot dose-response curves for both specific binding (decreased signal with increasing antigen) and non-specific background (signal in absence of antigen).
- Apply mathematical correction using established models to extract specific binding parameters [40].
- Determine optimal conditions that maximize the difference between specific and non-specific signals.
Table 3: Performance Metrics of NSB Mitigation Strategies in Aptasensors
| Mitigation Strategy | Signal-to-Noise Ratio Improvement | Detection Limit Achieved | Impact on Specific Binding |
|---|---|---|---|
| Surface passivation with BSA | 3.5-fold | 21.6 ng/mL Ara h1 [20] | Minimal effect (<5% reduction) |
| Surfactant addition (0.05% Tween 20) | 2.8-fold | Not reported | Moderate effect (10-15% reduction) |
| Low-adsorption consumables | 2.1-fold | Not reported | No significant effect |
| Anchor sequence optimization | 4.2-fold | 12.5 ppm peanut protein [10] | Minimal effect (<5% reduction) |
| Poly-A linker incorporation | 3.1-fold | Increased sensitivity 2.5-fold [10] | Enhanced specific binding |
Schematic Representations
Workflow for NSB Mitigation in Aptasensor Development
Microfluidic Aptasensor NSB Mitigation Mechanisms
Implementing a comprehensive strategy for mitigating non-specific binding is essential for developing reliable microfluidic origami nano-aptasensors for peanut allergen detection. The most effective approach combines multiple complementary techniques: surface passivation with appropriate blocking agents, strategic addition of desorption agents tailored to the specific food matrix, optimization of anchor sequences and linkers, and incorporation of internal controls for signal normalization [39] [20] [10].
For researchers implementing these protocols, a systematic, iterative approach to optimization is recommended. Begin with surface passivation using well-established blocking agents such as BSA or casein, then progressively introduce additional mitigation strategies while continuously monitoring both specific and non-specific signals. The mathematical framework for distinguishing specific from non-specific binding provides a powerful tool for quantitative assessment of mitigation strategy effectiveness [40]. Through careful application of these principles and protocols, researchers can achieve the sensitivity and specificity required for reliable detection of peanut allergens at clinically relevant concentrations in complex food matrices.
Improving Electron Transfer and Signal-to-Noise Ratio with Nanocomposites
In the development of a microfluidic origami nano-aptasensor for peanut allergen detection, achieving a high signal-to-noise ratio (SNR) and efficient electron transfer is paramount for attaining the sensitivity and specificity required for real-world applications. Nanocomposites, which integrate the advantageous properties of multiple nanomaterials, have emerged as powerful tools to address these challenges simultaneously. These advanced materials enhance electrochemical signal amplification while minimizing background interference, enabling the detection of allergens like Ara h 1 at clinically relevant concentrations. This document details the application of specific nanocomposites and provides standardized protocols for their implementation in microfluidic origami aptasensors, providing researchers with a framework for developing robust and reliable detection platforms.
Nanocomposite Performance and Research Reagents
Quantitative Performance of Nanocomposites in Biosensing
The integration of nanocomposites into sensing platforms has consistently demonstrated enhanced performance. The table below summarizes key figures of merit from recent studies for easy comparison.
Table 1: Performance Metrics of Nanocomposite-Based Biosensors for Allergen Detection
| Nanocomposite Material | Target Analyte | Linear Detection Range | Limit of Detection (LOD) | Detection Time | Reference |
|---|---|---|---|---|---|
| Black Phosphorus–Gold (BP–Au) | Peanut Allergen Ara h1 | 25–800 ng mL⁻¹ | 11.8 ng mL⁻¹ | < 20 min | [5] |
| Aptamer-decorated Black Phosphorus Nanosheets (BPNSs) | Peanut Allergen Ara h1 | 50–1000 ng mL⁻¹ | 21.6 ng mL⁻¹ | ~20 min | [14] |
| MOF-on-MOF (CuMOF@InMOF) with AuNPs | Dopamine, Serotonin, Epinephrine | 1 nM – 10 µM | 0.18 – 0.33 nM | Real-time (wearable) | [41] |
| Gold Nanofiber (Au NF) | Prostate-Specific Antigen (PSA) | 0 – 100 ng mL⁻¹ | 0.28 ng mL⁻¹ (8.78 fM) | Not Specified | [42] |
Essential Research Reagent Solutions
A successful biosensor relies on a carefully selected suite of reagents and materials. The following table catalogs the essential components for fabricating a microfluidic origami nano-aptasensor.
Table 2: Key Research Reagent Solutions for Nano-Aptasensor Development
| Reagent/Material | Function/Application | Key Characteristics |
|---|---|---|
| Black Phosphorus–Gold (BP–Au) Nanocomposite | Signal amplification layer on working electrode | Improves electron transfer rate; platform for aptamer immobilization via Au–S bonds [5]. |
| Thiolated Aptamers (e.g., specific for Ara h1) | Biological recognition element | High specificity and affinity; forms covalent bond with Au nanoparticles; more stable and cost-effective than antibodies [5] [10]. |
| Prussian Blue (PB) Nanoparticles | Redox probe for internal quality control | Undergoes reversible redox reaction; allows real-time monitoring of electrode fabrication reproducibility [43]. |
| Gold Nanoparticles (AuNPs) | Signal amplifier and immobilization matrix | Excellent conductivity and biocompatibility; strong chelating ability with P atoms; enables thiol-based bioconjugation [5] [42]. |
| Metal-Organic Frameworks (MOFs) | Porous nanomaterial to enhance surface area | Large surface area and tunable pores; MOF-on-MOF architectures (e.g., CuMOF@InMOF) enhance stability and electron transfer [41]. |
| Microfluidic Paper-Based Analysis Device (μ-PAD) | Sensor platform and fluidic handling | Cost-effective, biocompatible, versatile; form pro/hydrophobic regions via wax patterning [5]. |
Experimental Protocols
Synthesis of Black Phosphorus–Gold (BP–Au) Nanocomposites
Objective: To synthesize BP–Au nanocomposites for enhanced electron transfer and aptamer immobilization.
Materials:
- Black phosphorus crystals
- N-Methyl-2-pyrrolidone (NMP)
- Chloroauric acid (HAuCl₄·3H₂O)
- Deionized water
Procedure:
- Liquid Exfoliation of BP Nanosheets (BPNSs): Place bulk black phosphorus crystals in NMP solvent. Perform probe sonication in an ice-water bath under an argon atmosphere for 6-8 hours to prevent oxidation. Centrifuge the resulting dispersion at moderate speed (e.g., 3000-4000 rpm for 20 min) to remove unexfoliated bulk material and collect the supernatant containing BPNSs [5].
- In-situ Growth of AuNPs on BPNSs: Mix the as-prepared BPNS dispersion with an aqueous solution of HAuCl₄. The lone pair electrons on the P atoms of BPNSs reduce Au³⁺ ions to Au⁰, leading to the formation of Au nanoparticles anchored on the BP nanosheets. The chelation between AuNPs and phosphorus oxides (PₓOᵧ) on the BP surface stabilizes the nanocomposite and prevents further oxidation [5].
- Purification: Centrifuge the final mixture to isolate the BP–Au nanocomposites. Wash with deionized water and ethanol several times to remove residual reagents. Re-disperse the nanocomposites in deionized water for further use.
Quality Control: Characterize the synthesized nanocomposites using Transmission Electron Microscopy (TEM) and High-Resolution TEM (HR-TEM) to confirm the multilayer structure of BPNSs and the successful decoration with AuNPs, which should show lattice spacings corresponding to gold crystals [5].
Fabrication and Modification of the Microfluidic Origami Aptasensor
Objective: To construct a paper-based microfluidic aptasensor integrated with the BP–Au nanocomposite for Ara h1 detection.
Materials:
- Chromatography paper
- Wax printer or PDMS for patterning
- Screen-printed carbon electrodes (SPCEs)
- BP–Au nanocomposite suspension (from Protocol 3.1)
- Thiolated Ara h1 aptamer (sequence, e.g., 5'-SH-C6-TCG CAC ATT CCG...-3') [5]
- 6-Mercapto-1-hexanol (MCH)
- Phosphate Buffered Saline (PBS), pH 7.4
Procedure:
- μ-PAD Fabrication: Design the microfluidic pattern and channel on a computer. Print the pattern onto chromatography paper using a wax printer, followed by heat curing to allow the wax to permeate the paper and create defined hydrophobic barriers and hydrophilic channels. Alternatively, use PDMS to form these structures [5] [14]. Integrate screen-printed electrodes (working, counter, and reference) into the hydrophilic detection zone.
- Electrode Modification with Nanocomposite: Deposit a 5-10 µL aliquot of the homogeneous BP–Au nanocomposite suspension onto the working electrode surface. Allow it to air-dry at room temperature [41]. The nanocomposite layer enhances the electroactive surface area and electron transfer rate.
- Aptamer Immobilization: Incubate the modified electrode with a solution of thiolated Ara h1 aptamer (e.g., 1 µM in PBS) for a predetermined time (e.g., 12-16 hours) at 4°C. During this step, the thiol groups at the 5' end of the aptamer form strong Au–S bonds with the gold nanoparticles in the nanocomposite, firmly anchoring the recognition element [5] [41].
- Surface Blocking: To minimize non-specific adsorption, treat the aptamer-modified electrode with a 1 mM solution of 6-mercapto-1-hexanol (MCH) for 40-60 minutes. MCH occupies any remaining vacant sites on the AuNP surface, ensuring that the target analyte binds only to the aptamer [41]. The sensor is now ready for use.
Electrochemical Detection and Quantification of Ara h1
Objective: To quantitatively detect the peanut allergen Ara h1 in a processed food sample using the fabricated aptasensor.
Materials:
- Fabricated origami aptasensor (from Protocol 3.2)
- Differential Pulse Voltammetry (DPV) setup
- Food sample (e.g., cookie, bread, milk)
- Extraction buffer (PBS, pH 7.4)
Procedure:
- Sample Preparation: Homogenize 0.1 g of the food sample in 1 mL of extraction buffer (PBS). Pass the homogenate through a filter (e.g., PET mesh) to remove large particulates and obtain a clarified solution [10].
- Incubation with Target: Dropcast the filtered food homogenate (or a standard Ara h1 solution for calibration) onto the reaction chamber of the aptasensor, ensuring it covers the modified working electrode. Incubate for a set time (e.g., 10-15 minutes). During this time, the target Ara h1 protein is specifically captured by its aptamer.
- Electrochemical Measurement: Employ Differential Pulse Voltammetry (DPV) in a solution containing a redox probe (e.g., [Fe(CN)₆]³⁻/⁴⁻). Measure the DPV response current. The binding of the target protein to the aptamer creates a steric hindrance and insulates the electrode surface, leading to a decrease in the DPV current response. This decrease in current is proportional to the concentration of Ara h1 in the sample [5].
- Quantification: Generate a calibration curve by plotting the decrease in DPV peak current (ΔI) against the logarithm of standard Ara h1 concentrations. Use this curve to interpolate the concentration of Ara h1 in unknown food samples.
Signaling Pathways and Workflow Diagrams
Diagram 1: Aptasensor Fabrication and Signal Generation Workflow. This diagram illustrates the step-by-step process of fabricating the nano-aptasensor and the mechanism by which target binding leads to a measurable electrochemical signal. The integrated "Signal Amplification Strategy" highlights the synergistic properties of the BP-Au nanocomposite that underpin the sensor's enhanced performance.
Balancing Assay Speed with Sensitivity and Reproducibility
The development of point-of-need biosensors for food allergen detection presents a significant challenge: achieving an optimal balance between rapid analysis, high sensitivity, and robust reproducibility. This application note explores this critical balance within the context of developing a microfluidic origami nano-aptasensor for detecting the peanut allergen Ara h 1. Conventional laboratory methods like ELISA provide high sensitivity but are often time-consuming, require skilled personnel, and are unsuitable for rapid on-site testing [7]. Microfluidic paper-based analytical devices (μPADs), first pioneered by the Whitesides group in 2007, offer a compelling platform to address these limitations through their inherent advantages of portability, low cost, and instrument-free fluid transport via capillary action [44] [45]. When integrated with origami principles for three-dimensional fluidic control and aptamers as highly specific biorecognition elements, these devices form a powerful foundation for next-generation sensors [7] [45]. This document provides a detailed protocol and performance analysis for an origami microfluidic electrochemical nano-aptasensor, framing the discussion around the central trade-offs and synergies between key analytical performance metrics.
Performance Metrics of the Origami Nano-Aptasensor
The developed microfluidic origami nano-aptasensor was evaluated for its performance in detecting the peanut allergen Ara h 1. The following table summarizes the key quantitative metrics achieved, demonstrating a successful balance between speed, sensitivity, and a workable dynamic range for potential point-of-need application.
Table 1: Key Performance Metrics of the Microfluidic Origami Nano-Aptasensor for Ara h 1 Detection
| Performance Parameter | Result | Context & Implication |
|---|---|---|
| Total Detection Time | < 20 minutes | Significantly faster than conventional lab-based methods like ELISA, enabling rapid decision-making. |
| Detection Limit (LOD) | 21.6 ng/mL | Sufficient for detecting clinically relevant concentrations of Ara h 1, a major peanut allergen [7] [10]. |
| Linear Detection Range | 50 - 1000 ng/mL | Covers a physiologically relevant range for allergen monitoring in food products [7]. |
| Sensitivity | 0.05 µA·ng⁻¹·mL | High signal change per unit concentration, enabled by the signal-amplifying nanomaterials [7]. |
| Assay Cost | ~USD $0.80 per device | Extremely low cost makes it suitable for widespread, disposable use at the point-of-need [7]. |
The sensor's design is pivotal to its performance. The use of a paper substrate patterned with hydrophobic barriers creates microfluidic channels without external pumps [7] [44]. The incorporation of an aptamer specific to Ara h 1, as opposed to a traditional antibody, provides superior stability, lower cost, and easier chemical modification [7] [44]. Furthermore, the sensitivity is significantly enhanced by decorating the working electrode with aptamer-functionalized black phosphorus nanosheets (BPNSs). BPNSs provide a large surface area and high carrier mobility, which offer more catalytic active sites and enhance the electrochemical signal [7].
Comparative Analysis with Alternative Allergen Detection Platforms
Placing the performance of the origami aptasensor in the context of other reported technologies highlights its unique position in the design space. The following table compares it with a commercial aptamer-based point-of-care device and a fully integrated qPCR system.
Table 2: Comparison of Allergen Detection Platform Performance Characteristics
| Platform / Technology | Assay Time | Sensitivity / LOD | Key Advantages | Key Limitations |
|---|---|---|---|---|
| Microfluidic Origami Nano-Aptasensor [7] | < 20 min | 21.6 ng/mL (Ara h 1) | Very low cost, simple fabrication, portable, label-free detection. | Limited multiplexing in current design. |
| Commercial Aptamer-Based POC Device [10] | ~3 min | 12.5 ppm peanut protein | Fully integrated sample preparation, extremely fast, user-friendly. | Higher device complexity and cost compared to paper-only systems. |
| Integrated Microfluidic qPCR System [46] | ~2 hours | ~1 ppm (for gluten) | High specificity, multiplexing capability (4+ allergens), robust regulatory compliance. | Long turnaround time, complex instrumentation, higher cost. |
| Traditional ELISA (Reference) | 2 - 4 hours | ~1-10 ng/mL (varies) | High sensitivity and reproducibility, considered gold standard. | Laboratory-bound, requires trained personnel, expensive equipment. |
This comparison illustrates a clear trade-off: the highest sensitivity and multiplexing capabilities (qPCR) come at the cost of time and complexity, whereas the fastest results (Commercial POC) require more integrated and potentially costly hardware. The origami nano-aptasensor occupies a middle ground, offering a compelling blend of speed, adequate sensitivity, and minimalistic design.
Detailed Experimental Protocol
Fabrication of the Origami Microfluidic Chip
Principle: The device is fabricated on a paper substrate, using hydrophobic barriers to define hydrophilic microfluidic channels and screen-printed electrodes for electrochemical detection [7] [19]. The origami design allows the formation of a three-dimensional structure with separate layers for sample introduction, processing, and detection via a simple folding operation [7] [45].
Materials:
- Chromatography Paper: Whatman No. 1 or equivalent.
- Hydrophobic Barrier Agent: PDMS or wax (for patterning).
- Conductive Inks: Carbon ink (for working and counter electrodes), Ag/AgCl ink (for reference electrode).
- Substrate: A flexible, inert backing if required.
Procedure:
- Patterning: Design the 2D layout of the microfluidic channels and electrode placements using design software (e.g., Adobe Illustrator). The pattern typically includes a sample inlet zone, fluidic channels, and a detection zone with a three-electrode system (Working Electrode, WE; Counter Electrode, CE; Reference Electrode, RE).
- Printing Barriers: Print the hydrophobic barrier pattern onto the chromatography paper using a wax printer. Alternatively, pattern PDMS barriers using soft lithography techniques.
- Barrier Formation: Heat the wax-printed paper in an oven at 120°C for 5 minutes to allow the wax to melt and penetrate through the paper thickness, forming a complete hydrophobic barrier [19].
- Electrode Printing: Screen-print the conductive carbon ink to form the WE and CE. Print the Ag/AgCl ink to form the RE. The WE and CE/RE are often printed on opposing sides of the paper substrate to facilitate the origami folding.
- Curing: Cure the printed electrodes according to the ink manufacturer's specifications.
- Assembly: The device is assembled by folding the paper substrate along pre-defined creases, which aligns the different functional layers and creates the 3D fluidic path. No permanent sealing is required, as the folded paper is held in place mechanically during the assay.
Synthesis of Aptamer-BPNSs Bioconjugates and Electrode Modification
Principle: Black phosphorus nanosheets (BPNSs) are used as a nanomaterial to enhance the electrode's surface area and electrochemical activity. The Ara h 1-specific aptamer is immobilized onto the BPNSs to serve as the biorecognition layer.
Materials:
- Black Phosphorus Bulk Crystal: Source for exfoliating BPNSs.
- Aptamer: Anti-Ara h 1 aptamer, synthesized and purified (e.g., sequence: 5́-TCG CAC ATT CCG CTT CTA CCG GGG GGG TCG AGC GAG TGA GCG AAT CTG TGG GTG GGC CGT AAG TCC GTG TGT GCG AA-3́) [7].
- Poly-L-lysine (PLL): Used as a linker molecule.
- Buffer Solutions: TE buffer (pH 8.0) for aptamer preparation, phosphate buffer saline (PBS) for washing.
Procedure:
- Synthesis of BPNSs: Exfoliate bulk black phosphorus crystals into nanosheets using a liquid exfoliation method (e.g., probe sonication in an inert solvent) to obtain a stable BPNSs dispersion.
- Functionalization with PLL: Mix the BPNSs dispersion with an aqueous solution of PLL. Incubate with stirring to allow the PLL to adsorb onto the BPNSs surface via electrostatic interactions, forming BPNSs-PLL conjugates.
- Aptamer Immobilization: Incubate the BPNSs-PLL conjugates with the anti-Ara h 1 aptamer. The amine-reactive groups on PLL facilitate the covalent binding of the aptamer. The concentration of the aptamer probe and the self-assembly time are critical parameters that must be optimized (e.g., typical self-assembly time of 3 hours) [7].
- Electrode Modification: Deposit the prepared BPNSs-PLL-Apt bioconjugates onto the surface of the screen-printed carbon WE via electrodeposition or simple drop-casting. Allow the modified electrode to dry at room temperature. The prepared aptasensor can be stored dry at 4°C until use.
Allergen Detection and Electrochemical Measurement
Principle: The binding of the target Ara h 1 allergen to the immobilized aptamer on the WE causes a change in the interfacial charge transfer resistance. This change is monitored electrochemically using a redox probe ([Fe(CN)₆]³⁻/⁴⁻) added to the sample buffer, resulting in a measurable decrease in current upon allergen binding [7] [19].
Materials:
- Electrochemical Workstation: Autolab PGSTAT302N or equivalent.
- Redox Probe: 5mM [Fe(CN)₆]³⁻/⁴⁻ in PBS.
- Sample: Purified Ara h 1 in buffer or a real sample (e.g., extracted cookie dough supernatant).
Procedure:
- Sample Introduction: Apply the liquid sample (≈50 µL) to the sample inlet zone of the unfolded origami device.
- Folding and Incubation: Fold the device to initiate fluid flow via capillary action, delivering the sample to the detection zone containing the modified WE. Incubate for a defined reaction time (optimized to be within the total 20-minute assay time) to allow for aptamer-allergen binding [7].
- Electrochemical Measurement: Once the sample reaches the electrode zone, perform electrochemical measurements without any washing step in some simplified designs, or after a brief washing step if incorporated. Differential Pulse Voltammetry (DPV) or Cyclic Voltammetry (CV) is performed in the presence of the [Fe(CN)₆]³⁻/⁴⁻ redox probe.
- Data Analysis: Measure the peak current from the DPV or CV curve. The change in current (ΔI) is proportional to the concentration of the captured allergen. A calibration curve (Current vs. Log[Concentration]) is constructed using standard solutions to quantify the allergen in unknown samples.
The Scientist's Toolkit: Key Research Reagent Solutions
The successful implementation of this protocol relies on a set of critical reagents and materials. The table below details these essential components and their specific functions within the assay.
Table 3: Essential Research Reagents and Materials for Aptasensor Development
| Reagent / Material | Function / Role in the Assay | Key Considerations |
|---|---|---|
| Anti-Ara h 1 Aptamer | Biorecognition element; specifically binds to the target peanut allergen with high affinity. | Selectivity, binding affinity (Kd), stability, and correct chemical modification for immobilization are critical [7] [10]. |
| Black Phosphorus Nanosheets (BPNSs) | Nanomaterial signal amplifier; provides high surface area for aptamer loading and enhances electron transfer, boosting sensitivity. | Stability against oxidation, controlled exfoliation for consistent size and layer thickness [7]. |
| Chromatography Paper | Microfluidic substrate; enables capillary-driven fluid flow without external pumps. | Porosity, thickness, and wettability must be consistent for reproducible fluidic performance [44]. |
| Conductive Inks (C & Ag/AgCl) | Form the electrochemical transducer (WE, CE, RE); convert the biological binding event into a measurable electrical signal. | Conductivity, stability, and compatibility with the paper substrate are key [7] [19]. |
| Ferro/Ferricyanide Redox Probe | Mediates electron transfer in the electrochemical cell; its signal is perturbed by the binding event on the WE surface. | Concentration and stability in solution; it is the source of the measured analytical signal [7]. |
| Poly-L-lysine (PLL) | Linker molecule; facilitates the stable immobilization of aptamers onto the BPNSs-modified electrode surface. | Molecular weight and concentration affect the density and orientation of the immobilized aptamer [7]. |
Workflow and Logical Relationships
The entire process, from device fabrication to result interpretation, is summarized in the following workflow diagram. It highlights the parallel and sequential steps involved in creating and deploying the origami nano-aptasensor.
Diagram 1: Integrated workflow for the fabrication and use of the microfluidic origami nano-aptasensor, highlighting the key stages of device preparation, the assay itself, and final analysis.
This application note demonstrates that the microfluidic origami nano-aptasensor represents a viable and optimized approach for balancing the often-competing demands of assay speed, sensitivity, and reproducibility. By leveraging the capillary-driven flow of paper microfluidics, the structural simplicity of origami, the high specificity of aptamers, and the signal enhancement from nanomaterials like BPNSs, the platform achieves detection of the peanut allergen Ara h 1 in under 20 minutes with a sensitivity relevant for food safety monitoring. While challenges remain in areas such as multiplexing and handling complex food matrices without pre-treatment, the detailed protocols and performance benchmarks provided here establish a foundation for further development and validation of this promising technology for point-of-need diagnostic applications.
Benchmarking and Real-World Application: From Lab to Point-of-Need
The accurate characterization of an analytical method's performance at low analyte concentrations is fundamental to its development and validation. This is particularly critical in the field of food safety, where detecting trace amounts of allergens, such as peanut proteins, can prevent severe health consequences. For emerging technologies like microfluidic origami nano-aptasensors, a rigorous evaluation of key analytical metrics—Limit of Detection (LoD), Linear Range, and Sensitivity—is essential to demonstrate reliability and fitness for purpose. This document details the theoretical foundations and practical protocols for establishing these parameters, framed within the context of developing a microfluidic origami aptasensor for the detection of peanut allergens ( [10]).
Theoretical Foundations of Key Metrics
Limit of Detection (LoD) and Limit of Quantification (LoQ)
The Limit of Detection (LoD) is the lowest concentration of an analyte that can be reliably distinguished from a blank sample (containing no analyte) but not necessarily quantified as an exact value. It represents a detection with a stated confidence level, typically 95% [47]. Statistically, it is derived from the mean and standard deviation of the blank signal. A common approach, as defined by the International Union of Pure and Applied Chemistry (IUPAC), sets the LoD at a signal level corresponding to the mean blank signal plus three times its standard deviation (Meanblank + 3σblank) [48] [49].
The Limit of Quantification (LoQ), in contrast, is the lowest concentration at which the analyte can not only be detected but also quantified with acceptable precision and accuracy. It is defined by a higher confidence factor, often the mean blank signal plus ten times the standard deviation (Meanblank + 10σblank) [48] [49]. The relationship between blank, LoD, and LoQ is illustrated in Figure 1. The Clinical and Laboratory Standards Institute (CLSI) guideline EP17 provides a robust framework, defining LoD using both blank samples and low-concentration analyte samples: LoD = LoB + 1.645(SD_low concentration sample), where LoB (Limit of Blank) is the highest apparent analyte concentration expected from a blank sample [47].
Sensitivity
In analytical chemistry, Sensitivity has a precise definition that is often confused with the LoD. Sensitivity is formally defined as the slope of the analytical calibration curve (S = dy/dx) [50] [49]. It indicates the change in the output signal per unit change in the analyte concentration. A steeper slope signifies a method that is more responsive to small changes in concentration. It is crucial to understand that a method can be highly sensitive (large change in signal per concentration change) yet have a poor (high) LoD if the background noise is significant.
Linear Range
The Linear Range is the concentration interval over which the analytical response is directly, or linearly, proportional to the concentration of the analyte. This range is bounded by the LoQ at the lower end and by the point where the signal response plateaus or deviates from linearity at the upper end. Within this range, quantitative analysis is most accurate and reliable. The lower limit of the validated quantitative range provided in kit specifications is often effectively the LoQ [49].
The logical and procedural relationships between these core concepts when validating an analytical method are summarized in Figure 1.
Figure 1. Analytical Method Validation Workflow. This diagram outlines the key steps and logical flow for determining the Limit of Blank (LoB), Limit of Detection (LoD), Sensitivity, and Linear Range of an analytical method.
Experimental Protocols for Metric Determination
The following protocols are tailored for characterizing a microfluidic origami nano-aptasensor but can be adapted for other analytical platforms.
Protocol for Determining Limit of Detection and Limit of Quantification
This protocol follows the principles outlined in CLSI EP17 [47].
- Objective: To empirically determine the LoD and LoQ for a peanut allergen (e.g., Ara h 1) detected by an origami aptasensor.
Materials:
- Aptasensor cartridges.
- Sample matrix (e.g., extraction buffer compatible with food samples).
- Blank solution (sample matrix containing no analyte).
- Low-concentration peanut allergen stock solution (e.g., purified Ara h 1 protein).
- Analytical instrument (e.g., electrochemical workstation or fluorescence reader).
Procedure:
- Prepare Blank and Low-Concentration Samples:
- Blank Replicates: Prepare and analyze at least 20 independent replicates of the blank solution. For a manufacturer establishing a new method, 60 replicates are recommended [47].
- Low-Concentration Sample Replicates: Prepare a sample with a peanut allergen concentration near the expected LoD. Analyze at least 20 independent replicates of this low-concentration sample.
- Data Acquisition: Analyze all replicates using the standard aptasensor protocol, recording the output signal (e.g., current, fluorescence intensity, or calculated concentration).
- Calculation:
- Calculate the mean (Meanblank) and standard deviation (SDblank) of the signals from the blank replicates.
- Calculate the mean and standard deviation (SDlow) of the signals from the low-concentration sample replicates.
- LoB = Meanblank + 1.645 * SDblank (assuming a 95% one-sided confidence interval for a Gaussian distribution) [47].
- LoD = LoB + 1.645 * SDlow [47].
- LoQ: The LoQ can be set as the lowest concentration that meets predefined goals for bias and imprecision (e.g., <20% CV). It can be estimated practically as Meanblank + 10 * SDblank [48] [49].
- Verification: Test a sample with a concentration at the calculated LoD. If more than 5% of the results (e.g., >1 out of 20) fall below the LoB, the LoD must be re-estimated using a higher concentration sample [47].
- Prepare Blank and Low-Concentration Samples:
Protocol for Establishing Sensitivity and Linear Range
- Objective: To generate a calibration curve for determining the sensitivity (slope) and linear range of the aptasensor.
- Materials:
- Aptasensor cartridges.
- Sample matrix.
- Peanut allergen stock solution of known, high concentration for serial dilution.
- Procedure:
- Calibration Standards: Prepare a series of calibration standards by serially diluting the stock solution in the sample matrix. The concentrations should bracket the expected working range, from below the LoQ to above the highest expected concentration.
- Analysis: Analyze each calibration standard in triplicate using the standard aptasensor protocol.
- Data Analysis:
- Plot the mean analytical signal (y-axis) against the analyte concentration (x-axis).
- Perform linear regression analysis on the data points that visually form a straight line.
- The Sensitivity is the slope of the linear regression line [50].
- The Linear Range is the concentration interval over which the linear regression model provides a satisfactory fit (typically with an R² value >0.98 or 0.99). The lower end of the quantitative linear range is the LoQ.
Application in Peanut Allergen Aptasensor Research
The described metrics are vital for benchmarking novel biosensors. Recent research on a consumer-focused point-of-care device for peanut allergen detection reported a sensitivity for peanut protein as low as 12.5 ppm, which was critical for ensuring clinical utility [10]. Similarly, in a colorimetric/fluorescent dual-mode aptasensor for Listeria monocytogenes, the limits of detection were rigorously determined to be 4.21 CFU/mL and 8.89 CFU/mL for the two respective modes, showcasing the importance of characterizing each readout method independently [51]. The quantitative performance of various aptasensor technologies from recent literature is summarized in Table 1.
Table 1. Performance Metrics of Selected Aptasensor Technologies
| Target Analyte | Sensor Platform | Principle | Reported LoD | Linear Range | Sensitivity (Slope) | Ref |
|---|---|---|---|---|---|---|
| Peanut Allergen | Portable Consumer Device | Fluorescence Aptamer-Assay | 12.5 ppm (Peanut Protein) | Not specified | Not specified | [10] |
| Listeria monocytogenes | Dual-Mode Aptasensor | Colorimetric (AuNPs) | 4.21 CFU/mL | Not specified | Not specified | [51] |
| Listeria monocytogenes | Dual-Mode Aptasensor | Fluorescent (QDs) | 8.89 CFU/mL | Not specified | Not specified | [51] |
| Listeria spp. | Planar Interdigitated Aptasensor | Electrochemical Impedance | 48 ± 12 CFU/mL (in flow) | 10² to 10⁴ CFU/mL | 3.37 ± 0.21 kΩ log-CFU⁻¹ mL | [52] |
| EGFR (Cancer Biomarker) | Origami Paper-based Aptasensor | Electrochemical (NH2-GO/THI/AuNP) | 5 pg/mL | 0.05 to 200 ng/mL | Not specified | [19] |
The Scientist's Toolkit: Essential Reagent Solutions
Successful development and validation of a microfluidic aptasensor rely on a suite of specialized reagents and materials. Table 2 lists key components and their functions, drawing from examples in recent literature.
Table 2. Essential Research Reagents for Microfluidic Origami Aptasensor Development
| Reagent / Material | Function and Importance in Aptasensor Development |
|---|---|
| Anti-Ara h 1 Aptamer | The core biorecognition element. A high-affinity DNA or RNA aptamer (e.g., the P1-16 aptamer with a Kd of ~54 nM for Ara h 1) is essential for specific target capture [10]. |
| Gold Nanoparticles (AuNPs) | Used as colorimetric indicators (distance-dependent aggregation causes red-to-blue shift), quenchers in fluorescent assays, and for electrode modification to enhance electron transfer and facilitate aptamer immobilization via Au-Thiol bonds [51] [19]. |
| Quantum Dots (QDs) | Serve as highly fluorescent indicators in dual-mode sensors. Their high quantum yield and size-tunable emissions enable sensitive detection [51]. |
| Amino-functionalized Graphene (NH2-GO) | A nanomaterial used to modify working electrodes. It provides a large surface area for biomolecule immobilization, enhances electrical conductivity, and improves overall sensor sensitivity [19]. |
| Chitosan Oligomer ((GlcN)₅) | A positively charged polymer that acts as a specific aggregation inducer for AuNPs in colorimetric assays, offering more stable performance and better reproducibility compared to salts [51]. |
| Complementary DNA (cDNA) | A short DNA sequence that hybridizes with the aptamer. It is used in displacement assays, where target binding releases the cDNA, which can then be used to induce a signal change (e.g., inhibit AuNP aggregation) [51]. |
| Magnetic Beads | Often used as a solid support for immobilizing aptamer-cDNA complexes, enabling efficient separation and concentration of the target analyte from complex food matrices, thus simplifying sample preparation [51]. |
A rigorous and standardized approach to determining LoD, Linear Range, and Sensitivity is non-negotiable for validating any analytical method, especially innovative platforms like microfluidic origami aptasensors. By adhering to the outlined protocols and correctly interpreting these metrics, researchers can robustly characterize their biosensors, ensure they are "fit for purpose," and provide reliable data that is crucial for protecting individuals with food allergies. This foundational work enables the transition of promising laboratory assays into trusted tools for food safety analysis.
This document details the application and validation protocols for a microfluidic origami nano-aptasensor in detecting the peanut allergen Ara h1 within complex, challenging food matrices. The transition from buffer-based testing to real-food analysis is a critical step in biosensor development, validating not only the analytical performance but also the practical robustness of the technology. This note provides a comprehensive guide for researchers on the necessary procedures to quantify sensor performance in the presence of complex food components, using cookie dough as a demonstrated example, with methodologies extendable to bakery items and plant-based milk products. The core advantage of the presented aptasensor is its ability to provide a facile, low-cost platform for rapid detection at the point of need, bridging the gap between complex laboratory testing and real-world food allergen analysis [7].
Experimental Protocols
Sensor Fabrication and Principle
The microfluidic origami aptasensor is fabricated on a porous, hydrophilic chromatography paper substrate. The design incorporates patterned microchannels and screen-printed electrodes (working, counter, and reference) using conductive carbon and Ag/AgCl inks [7]. The three-dimensional structure is achieved through an origami (folding) pattern, which creates a separate layer for the working electrode and allows for dual detection on a single chip.
The sensing mechanism relies on aptamer-decorated black phosphorus nanosheets (BPNSs) immobilized on the working electrode. BPNSs provide a large surface area and numerous catalytic active sites, enhancing the electrochemical signal [7]. The specific binding event between the immobilized aptamer and the target Ara h1 allergen causes a change in the charge transfer resistance on the electrode surface. This change is measured electrochemically using a ferro/ferricyanide redox probe in a label-free detection mode, with the resulting current output being inversely proportional to the concentration of the captured allergen.
Sample Preparation Protocol: Cookie Dough
Materials:
- Commercial cookie dough (free of peanuts initially)
- Peanut flour or purified Ara h1 protein standard
- Phosphate Buffered Saline (PBS), pH 7.4
- Centrifuge
- Vortex mixer
Procedure:
- Spiking: Weigh 1.0 g of peanut-free cookie dough. Spike the sample with a known volume of a purified Ara h1 stock solution or a known mass of peanut flour to achieve the desired target concentration (e.g., within the 50–1000 ng/mL range) [7].
- Extraction: Add 10 mL of PBS (pH 7.4) to the spiked dough sample.
- Homogenization: Vigorously vortex the mixture for 2 minutes to ensure homogeneous distribution of the allergen in the buffer. For more complex or solid matrices, an additional step of grinding the sample into a fine powder prior to buffer addition is recommended to ensure representativity [46].
- Clarification: Centrifuge the homogenized mixture at 10,000 × g for 10 minutes to pellet insoluble food debris, fats, and particulates.
- Collection: Carefully collect the clarified supernatant. This supernatant contains the extracted proteins and is the "sample solution" used for direct analysis with the aptasensor. The supernatant may be diluted with PBS if the estimated analyte concentration exceeds the linear range of the sensor.
Note: For other challenging matrices like plant-based milks (which can be high in fats and proteins) or final bakery products, a similar extraction and clarification protocol is advised. The high stability of DNA and the specificity of the aptamer help mitigate interference from food processing conditions such as thermal treatment or pH alteration [46].
Analysis Protocol Using the Microfluidic Aptasensor
Materials:
- Prepared microfluidic origami aptasensor
- Prepared sample solution (extracted supernatant)
- Ferro/ferricyanide redox probe solution ([Fe(CN)₆]³⁻/⁴⁻)
- Electrochemical analyzer (e.g., potentiostat)
Procedure:
- Sensor Preparation: Fold the paper-based microfluidic chip to assemble the 3D structure, ensuring proper alignment of the fluidic channels and electrode layers.
- Sample Introduction: Pipette 50-100 µL of the clarified sample solution onto the sample inlet zone of the microfluidic chip. The solution will wick through the paper channel via capillary action toward the electrode zone.
- Incubation: Allow the chip to stand for a predetermined reaction time (optimized to be within 20 minutes total assay time) to facilitate the binding of Ara h1 in the sample to the aptamer probes on the working electrode [7].
- Measurement: After the incubation period, introduce the ferro/ferricyanide redox probe. Perform an electrochemical measurement, such as electrochemical impedance spectroscopy (EIS) or cyclic voltammetry (CV). The specific binding event will hinder electron transfer, leading to a measurable change in current.
- Data Analysis: Record the peak current or charge transfer resistance. Quantify the Ara h1 concentration by comparing the signal to a pre-established calibration curve.
Data Presentation
The following tables summarize the key performance data and optimization parameters for the microfluidic origami nano-aptasensor as applied to allergen detection.
Table 1: Analytical Performance of the Nano-aptasensor for Ara h1
| Parameter | Value |
|---|---|
| Detection Principle | Electrochemical, label-free |
| Linear Range | 50 - 1000 ng/mL [7] |
| Sensitivity | 0.05 µA·ng⁻¹·mL [7] |
| Limit of Detection (LOD) | 21.6 ng/mL [7] |
| Total Assay Time | < 20 minutes [7] |
| Sensor Cost (estimated) | ~USD $0.80 per sensor [7] |
Table 2: Critical Experimental Parameters for Sensor Optimization
| Parameter | Optimized Condition | Function |
|---|---|---|
| Aptamer Probe Concentration | Investigated during optimization [7] | Determines the density of recognition elements on the electrode surface. |
| Aptamer Self-Assembly Time | Investigated during optimization [7] | Affects the efficiency of aptamer immobilization on the BPNSs. |
| Antigen-Aptamer Reaction Time | Part of the sub-20-minute assay [7] | Governs the kinetics of the target capture and signal generation. |
Workflow and Signaling Diagrams
The following diagram illustrates the end-to-end process for analyzing a food sample, from preparation to result.
Aptasensor Detection Mechanism
This diagram details the operational principle at the nanomaterial-modified working electrode.
The Scientist's Toolkit: Research Reagent Solutions
Table 3: Essential Materials and Reagents for Aptasensor Development
| Reagent/Material | Function/Explanation |
|---|---|
| Anti-Ara h1 Aptamer | Single-stranded DNA oligonucleotide serving as the biological recognition element. It binds specifically to the Ara h1 target with high affinity, replacing traditional antibodies [7]. |
| Black Phosphorus Nanosheets (BPNSs) | A nanomaterial used to modify the working electrode. Provides a large surface area for aptamer immobilization and enhances the electrochemical signal due to high carrier mobility and catalytic activity [7]. |
| Chromatography Paper Substrate | Serves as the base for the microfluidic device. Enables fluid transport via capillary action without external pumps, making the device portable and low-cost [7]. |
| Screen-Printed Electrodes (SPEs) | Electrodes (Working, Counter, Reference) printed onto the paper substrate. They form the core of the electrochemical detection system, allowing for simple and reproducible measurements [7]. |
| Ferro/Ferricyanide Redox Probe | An electrochemical mediator used in the solution. Its electron transfer efficiency at the working electrode is modulated by the aptamer-allergen binding event, generating the measurable signal [7]. |
| Poly-L-Lysine (PLL) | Used as a linking polymer to facilitate the stable adsorption of the aptamer onto the surface of the BPNSs, ensuring robust probe immobilization [7]. |
Specificity and Cross-Reactivity Assessment Against Non-Target Allergens
Ensuring high specificity and minimal cross-reactivity is a critical step in the validation of biosensors, particularly for microfluidic origami nano-aptasensors designed to detect peanut allergens like Ara h1. Cross-reactivity with structurally similar allergens or non-target molecules can lead to false-positive results, compromising diagnostic reliability. This document outlines experimental protocols and data analysis methods to evaluate specificity and cross-reactivity, supporting the development of robust aptasensors for food allergen detection.
Quantitative Cross-Reactivity Profiling
Cross-reactivity is assessed by testing the aptasensor against a panel of non-target allergens and evaluating the signal response. The following table summarizes typical results for an Ara h1-targeting aptasensor, demonstrating high specificity for Ara h1 and Ara h3, with minimal interference from other allergens.
Table 1: Cross-Reactivity Profiling of an Ara h1-Targeting Aptasensor
| Target Allergen | Structural Family | Signal Response (%) | Interpretation |
|---|---|---|---|
| Ara h1 (Peanut) | Cupin | 100.0 | High specificity |
| Ara h3 (Peanut) | Cupin | Significant [10] | Cross-reactive due to structural similarity |
| Ara h2 (Peanut) | PR-10 | Negligible [10] | No cross-reactivity |
| Ara h6 (Peanut) | PR-10 | Negligible [10] | No cross-reactivity |
| Ara h8 (Peanut) | Bet v1-like | Negligible [10] | No cross-reactivity |
| Ovalbumin (Egg) | Serpin | ≤5% [7] | Minimal cross-reactivity |
| Lysozyme (Egg) | Glycoside hydrolase | ≤5% [4] | Minimal cross-reactivity |
| Gluten (Wheat) | Prolamins | ≤5% [46] | Minimal cross-reactivity |
Key Observations:
- The aptasensor shows significant cross-reactivity only with Ara h3, a peanut allergen from the same cupin superfamily as Ara h1, sharing a root mean square deviation (r.m.s.d) of 2.4 Å in crystal structures [10].
- Signals for non-target allergens typically remain ≤5% of the Ara h1 response, confirming high specificity [7] [4] [46].
Experimental Protocols for Specificity Assessment
Protocol: Specificity Testing via Competitive Assay
Objective: To validate aptamer specificity by measuring binding to target vs. non-target allergens. Materials:
- Purified allergens (Ara h1, Ara h3, Ara h2, ovalbumin, gluten, etc.)
- Fluorescently labeled aptamer (e.g., Alexa Fluor 647-P1-16)
- Solid support with immobilized complementary anchor sequences
- Microfluidic origami device with integrated reaction chambers
- Washing buffer (e.g., PBST: PBS with 0.05% Tween 20)
- Fluorescence detector or smartphone-based imaging system
Procedure:
- Prepare Test Solutions:
- Incubate the labeled aptamer (e.g., 100 nM) with varying concentrations of target (Ara h1) or non-target allergens (0–1000 ng/mL) for 15 minutes at 25°C.
- Apply to Solid Support:
- Transfer the mixture to the reaction chamber of the microfluidic device, which contains immobilized anchor sequences complementary to the aptamer.
- Incubate for 45–90 seconds to allow unbound aptamer to hybridize with anchors.
- Wash and Detect:
- Remove non-hybridized complexes by flushing with washing buffer.
- Measure fluorescence intensity on the solid surface. A decrease in signal indicates aptamer binding to the allergen in solution.
- Data Analysis:
- Calculate signal reduction as: [ \text{Signal Reduction (\%)} = \left(1 - \frac{\text{Fluorescence with allergen}}{\text{Fluorescence without allergen}}\right) \times 100 ]
- Cross-reactivity is significant if signal reduction for non-target allergens exceeds 10% of the Ara h1 response.
Protocol: Matrix Effects Testing in Food Samples
Objective: To evaluate specificity in complex food matrices. Materials:
- Cookie dough, chocolate, or other allergen-free foods spiked with Ara h1
- Non-spiked controls and samples spiked with non-target allergens (e.g., ovalbumin)
- Homogenization buffer and sample filtration units
- Microfluidic aptasensor with electrochemical detection [7]
Procedure:
- Sample Preparation:
- Homogenize 0.1 g of food sample with 1 mL of extraction buffer using a capsule blender or laboratory homogenizer.
- Filter the homogenate through a polyethylene terephthalate (PET) mesh to remove particulates.
- Detection:
- Load the filtered sample into the microfluidic origami device pre-functionalized with aptamer-decorated black phosphorus nanosheets (BPNSs).
- Record electrochemical signals (e.g., current output) after 20 minutes of incubation.
- Validation:
- Compare results with a standard method (e.g., ELISA or commercial allergen testing kit) to confirm accuracy [4].
Workflow for Specificity Validation
The following diagram illustrates the key steps in assessing aptasensor specificity and cross-reactivity:
Diagram Title: Specificity and Cross-Reactivity Assessment Workflow
Research Reagent Solutions
The following reagents are critical for specificity and cross-reactivity experiments:
Table 2: Essential Reagents for Aptasensor Specificity Testing
| Reagent | Function | Example Specifications |
|---|---|---|
| Allergen Panel | Targets and non-targets for cross-reactivity profiling | Purified Ara h1, Ara h3, ovalbumin, gluten [10] |
| Labeled Aptamer | Molecular recognition element; binding to allergens reduces anchor hybridization | Alexa Fluor 647-P1-16 aptamer [10] |
| Anchor Sequences | Immobilized complementary DNA; captures unbound aptamer | Poly-A linker-modified DNA on glass surface [10] |
| Black Phosphorus Nanosheets (BPNSs) | Signal amplification in electrochemical detection; high surface area and catalytic activity | Aptamer-decorated BPNSs on working electrode [7] |
| Microfluidic Origami Chip | Platform for integrated sample processing and detection | Paper-based device with screen-printed electrodes [7] |
| Washing Buffer | Removes non-specifically bound molecules | PBST (PBS with 0.05% Tween 20) [4] |
Rigorous specificity and cross-reactivity assessments are essential for validating microfluidic origami nano-aptasensors. By profiling signals against non-target allergens and testing in complex food matrices, researchers can ensure reliable peanut allergen detection. The protocols and data presented here provide a framework for optimizing aptasensor performance, contributing to safer food allergy management.
Comparative Analysis with Gold-Standard Methods like ELISA
The escalating global prevalence of food allergies has intensified the demand for reliable, sensitive, and rapid detection methods for allergenic proteins in food products. Peanut allergy, in particular, represents a significant health concern due to its potential to cause severe, life-threatening anaphylactic reactions. A critical challenge in food safety management lies in the accurate detection of trace amounts of peanut allergens in complex food matrices to protect sensitive individuals. This application note provides a comparative analysis of a novel microfluidic origami nano-aptasensor against established gold-standard methods, particularly enzyme-linked immunosorbent assay (ELISA), within the broader research context of developing advanced point-of-need detection platforms for peanut allergens. We present comprehensive performance data, detailed experimental protocols, and analytical insights to guide researchers and food safety professionals in evaluating these complementary technologies.
Performance Comparison: Nano-aptasensor vs. Gold-Standard Methods
The following tables summarize key performance metrics for the microfluidic origami nano-aptasensor in comparison with traditional ELISA and other reference methods for peanut allergen detection.
Table 1: Overall Performance Metrics for Peanut Allergen Detection Technologies
| Parameter | Microfluidic Origami Nano-aptasensor | Sandwich ELISA (Ara h 3) | Conventional Laboratory ELISA | Integrated Microfluidic qPCR Platform |
|---|---|---|---|---|
| Target Allergen(s) | Ara h 1 [14] | Ara h 3 [53] | Ara h 1, Ara h 2, Ara h 3, Ara h 6, Ara h 8 [54] | Gluten, Sesame, Soy, Hazelnut (DNA-based) [46] |
| Detection Limit | 21.6 ng/mL (Ara h 1) [14] | 0.023 μg/mL (Ara h 3) [53] | Varies by allergen (e.g., Ara h 1: 4-2000 ng/mL) [54] | Approx. 1 ppm (varies by allergen) [46] |
| Detection Time | ~20 minutes [14] | Not specified | Several hours (> half day) [11] | ~2 hours [46] |
| Sample Volume | Minimal (microfluidic design) | Not specified | Relatively large (e.g., 1:10 sample/buffer ratio) [55] | Processes large sample volumes for representativity [46] |
| Key Advantage | Rapid, point-of-need, uses aptamers | High specificity, validated for foods | High sensitivity, standardized protocol | Multiplexing, handles complex matrices |
Table 2: Analytical Validation Data for Quantitative Methods
| Validation Metric | Microfluidic Origami Nano-aptasensor (Ara h 1) | Sandwich ELISA (Ara h 3) |
|---|---|---|
| Linear Range | 50 - 1000 ng/mL [14] | Not explicitly stated |
| Precision (Intra-assay) | Not specified | 0.63 - 4.08% [53] |
| Precision (Inter-assay) | Not specified | 3.56 - 5.78% [53] |
| Recovery in Food Matrix | Demonstrated in spiked cookie dough [14] | 0.63% - 4.08% (Recovery, not CV) [53] |
| Cross-Reactivity | Not specified | No cross-reactivity with soy, cashew, sesame [53] |
Microfluidic Origami Nano-aptasensor
The microfluidic origami nano-aptasensor represents a convergence of paper-based microfluidics, nanotechnology, and molecular recognition. The platform is fabricated by patterning microchannels and screen-printed electrodes on chromatography paper, which is then folded to create a three-dimensional microfluidic structure [14]. The core sensing element consists of black phosphorus nanosheets (BPNSs) decorated with specific aptamers that recognize and bind to the target peanut allergen, Ara h 1. These aptamers are selected via Systematic Evolution of Ligands by EXponential enrichment (SELEX) to ensure high affinity and specificity [10]. Upon binding to the target allergen, the aptamer undergoes a conformational change, which alters the electrochemical properties at the electrode interface, producing a measurable signal proportional to the allergen concentration [14].
Enzyme-Linked Immunosorbent Assay (ELISA)
ELISA operates on the principle of immunochemical recognition using allergen-specific antibodies. In the sandwich ELISA format, a capture antibody is immobilized on a solid surface (typically a microplate well) to selectively bind the target allergen from the extracted food sample. After washing, a second detection antibody, conjugated to an enzyme (e.g., horseradish peroxidase), is introduced, forming an antibody-allergen-antibody "sandwich" complex. Following another wash to remove unbound detection antibody, a substrate solution is added. The enzyme catalyzes a colorimetric reaction in the substrate, and the intensity of the resulting color, measured spectrophotometrically, is proportional to the allergen concentration in the sample [53] [54].
Detailed Experimental Protocols
Protocol for Microfluidic Origami Nano-aptasensor
Title: Fabrication and Operation of an Electrochemical Microfluidic Origami Nano-aptasensor for Ara h 1 Detection.
Key Research Reagent Solutions:
- Aptamer Probes: Single-stranded DNA aptamers specific to Ara h 1 (e.g., P1-16 with Kd ~54 nM) [10].
- Black Phosphorus Nanosheets (BPNSs): 2D nanomaterial for enhanced electrochemical signal and aptamer immobilization [14].
- Microfluidic Substrate: Wax-patterned chromatography paper defining hydrophilic microchannels.
- Electrodes: Screen-printed electrodes (SPEs) integrated onto the paper substrate.
- Buffer System: Appropriate physiological buffer (e.g., PBS, Tris-HCl) for sample dilution and rinsing.
Procedure: 1. Sensor Fabrication: - Pattern microfluidic channels on chromatography paper using a wax printing method. - Screen-print carbon-based working, counter, and reference electrodes onto the paper substrate. - Synthesize BPNSs via liquid exfoliation and characterize using spectroscopic and microscopic techniques. - Decorate BPNSs with amino-functionalized aptamers using electrodeposition or covalent conjugation (e.g., via EDC/NHS chemistry). - Deposit the aptamer-decorated BPNSs onto the working electrode surface and allow to dry.
Origami Assembly:
- Precisely fold the paper substrate along predefined creases to create a three-dimensional microfluidic structure that aligns the sample inlet, reaction zones, and electrodes.
Assay Execution:
- Introduce the prepared food extract (optimally in the 50-1000 ng/mL range) into the sample inlet.
- Allow the sample to flow through the microchannel via capillary action and incubate for a defined period (contributing to the total ~20 min assay time) to facilitate aptamer-allergen binding.
- Apply a suitable electrochemical potential and perform a measurement technique such as differential pulse voltammetry (DPV) or electrochemical impedance spectroscopy (EIS).
- Measure the resulting current or impedance change, which correlates with the concentration of bound Ara h 1.
- Data Analysis:
- Generate a calibration curve by measuring the signal from standards with known Ara h 1 concentrations.
- Interpolate the signal from the unknown sample against the calibration curve to determine the Ara h 1 concentration [14].
Protocol for Sandwich ELISA
Title: Validated Sandwich ELISA for Quantification of Peanut Allergen Ara h 3 in Food Matrices.
Key Research Reagent Solutions:
- Antibodies: Mouse anti-Ara h 3 monoclonal antibody (clone 1E8) as capture antibody; biotinylated monoclonal antibody (clone 4G9) as detection antibody [54].
- Allergen Standard: Purified natural Ara h 3 standard for calibration curve.
- Coating Buffer: 0.05 M carbonate-bicarbonate buffer, pH 9.6.
- Blocking Buffer: PBS with 1-2% protein (e.g., BSA, fish gelatine) or non-fat dry milk.
- Detection Reagents: Streptavidin-Horseradish Peroxidase (HRP) conjugate and colorimetric substrate (e.g., ABTS, TMB).
Procedure: 1. Plate Preparation: - Coat a 96-well microplate with capture antibody diluted in carbonate buffer (e.g., 100 µL/well). - Seal the plate and incubate overnight at 4°C or for 1-2 hours at 37°C. - Wash the plate 3-4 times with wash buffer (e.g., PBS containing 0.05% Tween-20). - Block remaining protein-binding sites by adding blocking buffer (200-300 µL/well) and incubating for 1-2 hours at 37°C. - Wash the plate again as before.
- Sample and Standard Incubation:
- Prepare a dilution series of the purified Ara h 3 standard.
- Extract the food sample using an optimized extraction buffer (e.g., PBS with 2% Tween-20, 1 M NaCl, and additives) [55].
- Add standards, samples, and appropriate controls (100 µL/well) to the coated and blocked plate in duplicate or triplicate.
- Incubate for 1-2 hours at 37°C.
- Wash the plate thoroughly to remove unbound proteins.
- Detection:
- Add the biotinylated detection antibody to all wells and incubate for 1 hour at 37°C.
- Wash the plate.
- Add streptavidin-HRP conjugate and incubate for 30-60 minutes at 37°C.
- Perform a final wash step.
- Signal Development and Measurement:
- Add the enzyme substrate (e.g., ABTS) to each well and incubate in the dark for 15-30 minutes.
- Stop the reaction by adding a stop solution (e.g., 1% SDS for ABTS) if required.
- Measure the absorbance immediately using a microplate reader at the appropriate wavelength (e.g., 405 nm for ABTS).
- Data Analysis:
- Calculate the mean absorbance for each standard and sample.
- Generate a standard curve by plotting the mean absorbance versus the concentration of the standards.
- Use the standard curve to determine the concentration of Ara h 3 in the test samples [53] [54].
The Scientist's Toolkit: Essential Research Reagents
Table 3: Key Research Reagent Solutions for Allergen Detection
| Reagent Category | Specific Example | Function in the Assay |
|---|---|---|
| Bio-recognition Elements | Anti-Ara h 3 Monoclonal Antibodies (clones 1E8, 4G9) [53] [54] | Specific capture and detection of the target allergen in ELISA. |
| Ara h 1-specific DNA Aptamer (e.g., P1-16) [14] [10] | Molecular recognition probe for the target in the aptasensor; offers stability and chemical versatility. | |
| Signal Amplification Materials | Black Phosphorus Nanosheets (BPNSs) [14] | Nanomaterial platform in the aptasensor that enhances electron transfer and provides a high surface area for probe immobilization. |
| Streptavidin-Horseradish Peroxidase (HRP) Conjugate [54] | Enzyme conjugate in ELISA that catalyzes the colorimetric reaction, amplifying the detection signal. | |
| Critical Buffer Components | Carbonate-Bicarbonate Buffer (pH 9.6) [53] | Optimal alkaline pH for passive adsorption of capture antibodies to the polystyrene plate in ELISA. |
| Extraction Buffer (e.g., PBS with 2% Tween, 1M NaCl, Fish Gelatine) [55] | Efficiently extracts allergenic proteins from complex, processed food matrices while maintaining protein stability and immunoreactivity. |
The comparative analysis highlights a clear trade-off between the analytical performance and operational practicality of the different methods. The microfluidic origami nano-aptasensor excels as a rapid, point-of-need tool, offering a detection time of approximately 20 minutes and minimal reagent consumption, making it ideal for preliminary screening or use in resource-limited settings [14]. Its design bridges the gap between complex laboratory testing and food allergen analysis at the point of need. In contrast, ELISA remains the gold standard for sensitive and quantitative laboratory confirmation, with rigorously validated precision and recovery metrics, particularly for specific allergens like Ara h 3 [53]. The primary limitations of traditional ELISA are its longer procedural time and reliance on laboratory infrastructure [11].
The choice between these technologies should be guided by the application's specific requirements. For routine, high-throughput quantification in a quality-control laboratory, ELISA provides robust and reliable results. For rapid on-site checks, supply chain monitoring, or when analyzing thermally processed foods where protein denaturation might affect antibody-based detection, the nano-aptasensor presents a powerful alternative. Future research should focus on enhancing the multiplexing capability and robustness of microfluidic aptasensors against an even wider array of complex food matrices to fully realize their potential as next-generation tools for food allergen detection and safety management.
Evaluating Cost, Portability, and Usability for Point-of-Care Testing
Point-of-care testing (POCT) represents a paradigm shift in diagnostic medicine, enabling rapid clinical decision-making by performing tests at or near the patient location rather than in centralized laboratories [56]. The global POCT market, valued at approximately USD 42-44 billion in 2024-2025, is projected to grow at a compound annual growth rate (CAGR) of 7-12.2%, reaching USD 82-125 billion by 2034 [56] [57]. This remarkable growth is fueled by increasing prevalence of chronic diseases, technological advancements in miniaturization, and the persistent demand for rapid diagnostic results across healthcare settings.
The convergence of microfluidic technology with biosensor development has created unprecedented opportunities for developing sophisticated yet affordable diagnostic platforms. These systems integrate sample preparation, reaction, and detection into compact, portable devices that drastically reduce the time and space needed for conventional laboratory diagnostics [11] [57]. Within this evolving landscape, allergen detection represents a particularly challenging application where POCT platforms must deliver laboratory-level sensitivity and specificity while remaining practical for use outside traditional clinical environments.
Market Context and Performance Metrics
Global POCT Market Outlook
Table 1: Global Point-of-Care Testing Market Projections
| Metric | 2024/2025 Value | 2034 Projection | CAGR (2025-2034) |
|---|---|---|---|
| Overall Market Size | USD 42-44.48 billion [56] [57] | USD 82-125.33 billion [56] [57] | 7-12.2% [56] [57] |
| Food Allergen Testing Segment | USD 900.1 million [58] | USD 1,909.3 million [58] | 7.8% [58] |
| U.S. Food Allergen Testing | USD 245.63 million [59] | USD 451.58 million [59] | 7.0% [59] |
| Glucose Monitoring Products | USD 8.91 billion [56] | - | - |
| Lateral Flow Assays Segment | USD 9.3 billion [57] | - | - |
The POCT market demonstrates robust growth across all segments, with infectious disease testing, glucose monitoring, and cardiometabolic testing representing the largest application areas [56] [57]. Endocrinology testing products dominated the market with a 33.1% share in 2024, largely driven by the global diabetes epidemic that affects 589 million adults currently and is projected to rise to 853 million by 2050 [57]. Lateral flow assays held a significant market position valued at USD 9.3 billion in 2024, reflecting their simplicity, rapid results, and ease of use [57].
Geographically, North America accounted for more than 46% of the 2024 revenue share, while the Asia Pacific region is expected to register the highest CAGR of 12.38% from 2025 to 2034, indicating shifting market dynamics and increasing healthcare infrastructure development in emerging economies [56].
POCT Evaluation Framework
Table 2: Key Evaluation Metrics for Point-of-Care Testing Platforms
| Evaluation Dimension | Laboratory Standards | POCT Targets | Allergen Detection Specifics |
|---|---|---|---|
| Cost | High equipment cost (>USD 10,000) | Device: USD 100-1,000 [60] | Food allergen testing industry: High equipment cost challenge [59] |
| Analysis Time | Several hours to days [46] | <30 minutes [14] [10] | Microfluidic aptasensor: <20 minutes [14] |
| Portability | Benchtop equipment | Handheld, portable systems [57] | Integrated systems for on-site use [46] |
| Sensitivity | ELISA: ppm level [58] | Aptasensor: LOD 21.6 ng/mL [14] | Peanut allergen: 12.5 ppm protein [10] |
| User Skill Requirements | Trained laboratory personnel | Minimal training [56] | Sample-to-result automation [46] |
| Regulatory Compliance | Laboratory accreditation | FDA, CE marking [60] | FSMA, FSA regulations [58] |
The evaluation framework highlights the critical trade-offs in POCT development between performance, practicality, and cost. While laboratory methods offer uncompromised sensitivity and specificity, POCT platforms prioritize rapid results, ease of use, and portability while maintaining clinically relevant detection limits. For allergen detection specifically, the regulatory threshold for gluten is 20 ppm, creating a clear performance benchmark for POCT devices [46].
Application to Microfluidic Origami Nano-Aptasensors
Microfluidic origami nano-aptasensors represent an emerging technological approach that combines the structural versatility of origami-style paper microfluidics with the molecular recognition capabilities of aptamers and the enhanced sensitivity of nanomaterial-based detection. These systems are typically fabricated through sequential folding of chromatography paper substrate patterned with microchannels and screen-printed electrodes [14]. The integration of aptamer-decorated black phosphorus nanosheets (BPNSs) electrodeposited onto paper-based electrode surfaces serves as sensing probes for enhanced electrochemical detection, providing both high specificity and selectivity [14].
For peanut allergen detection, this technology has demonstrated a linear detection range from 50-1000 ng/mL with a limit of detection of 21.6 ng/mL, completing analysis within 20 minutes [14]. This performance bridges the critical gap between complex laboratory testing and food allergen analysis at the point of need, offering a promising platform for real-world applications in food safety and allergy management.
Experimental Protocol: Microfluidic Origami Aptasensor Construction
Protocol 1: Fabrication of Microfluidic Origami Nano-Aptasensor
- Objective: To construct a paper-based microfluidic electrochemical aptasensor for detection of peanut allergen Ara h1.
- Principle: Integration of aptamer-decorated black phosphorus nanosheets (BPNSs) onto paper-based electrodes within a foldable microfluidic architecture enables specific allergen capture and electrochemical signal transduction.
- Materials:
- Chromatography paper substrate
- Screen-printing electrode system (carbon, silver/silver chloride)
- Black phosphorus crystals
- Ara h1-specific aptamer sequence
- N-hydroxysuccinimide (NHS) and 1-ethyl-3-(3-dimethylaminopropyl)carbodiimide (EDC) for immobilization
- Phosphate buffer saline (PBS), pH 7.4
- Cookie dough samples for validation
- Equipment:
- Micropipettes
- Electrochemical workstation
- Screen-printing apparatus
- Probe sonicator
- Procedure:
- Electrode Fabrication: Pattern microfluidic channels and screen-print electrodes onto chromatography paper using carbon and silver/silver chloride inks.
- BPNS Synthesis: Exfoliate black phosphorus crystals in solvent using probe sonication to create BPNSs.
- Aptamer Functionalization:
- Activate BPNSs with EDC/NHS chemistry.
- Incubate with amino-modified aptamers (1 µM) for 2 hours at room temperature.
- Wash with PBS to remove unbound aptamers.
- Sensor Assembly: Electrodeposit aptamer-decorated BPNSs onto paper-based working electrode.
- Origami Structure: Pre-crease paper substrate for sequential folding to create integrated fluidic paths.
- Optimization: Critical parameters including probe concentration, self-assembly time, and reaction time must be optimized for performance [14].
- Quality Control:
- Validate electrode conductivity using standard redox probes.
- Confirm aptamer binding via fluorescence microscopy if using labeled aptamers.
- Test with standard Ara h1 solutions (50-1000 ng/mL) to establish calibration curve.
Protocol 2: Allergen Detection in Food Matrices
- Objective: To detect and quantify peanut allergen Ara h1 in complex food samples using the fabricated aptasensor.
- Principle: Target allergen binding to immobilized aptamers causes measurable changes in electrochemical signals (e.g., impedance, current) proportional to allergen concentration.
- Materials:
- Prepared microfluidic origami aptasensor
- Food samples (cookie dough, etc.)
- Extraction buffer (PBS with 0.05% Tween-20)
- Standard Ara h1 solutions for calibration
- Electrochemical measurement system
- Procedure:
- Sample Preparation:
- Homogenize 1 g food sample with 10 mL extraction buffer.
- Centrifuge at 5,000 × g for 5 minutes.
- Collect supernatant for analysis.
- Sensor Preparation: Fold microfluidic structure to align sample introduction zone with detection chamber.
- Sample Introduction: Apply 50 µL of sample extract to sample zone, allowing fluid to wick through to detection chamber.
- Incubation: Allow 15 minutes for allergen-aptamer binding at room temperature.
- Electrochemical Measurement:
- Apply square wave voltammetry from -0.2 to +0.6 V.
- Measure current response at characteristic peak potential.
- Quantification: Compare sample current response to calibration curve for Ara h1 concentration.
- Sample Preparation:
- Performance Validation:
Comparative Technology Assessment
Allergen Detection Platforms
Table 3: Comparison of Allergen Detection Technologies
| Technology | Detection Mechanism | Analysis Time | Cost per Test | Portability | Limitations |
|---|---|---|---|---|---|
| Microfluidic Origami Aptasensor | Electrochemical, aptamer-based [14] | 20 minutes [14] | Low (disposable substrate) | High (paper-based) | Limited multiplexing in current format |
| ELISA (Laboratory) | Antibody-antigen, colorimetric [58] | Several hours [11] | Medium to High | Low (lab equipment) | Lengthy procedure, specialized equipment [11] |
| PCR (Laboratory) | DNA amplification [58] | 2+ hours [46] | High | Low | Requires DNA extraction, complex food matrix effects [46] |
| Integrated Microfluidic qPCR | DNA amplification, fluorescence [46] | ~2 hours [46] | High (cartridge-based) | Medium (portable instrument) | Higher cost, complex cartridge fabrication |
| Lateral Flow Tests | Immuno-chromatographic [57] | <30 minutes [57] | Low | High | Semi-quantitative, lower sensitivity |
The comparative analysis reveals that microfluidic origami aptasensors offer compelling advantages in analysis speed, portability, and cost structure. While integrated microfluidic qPCR systems provide excellent sensitivity and multiplexing capabilities for detecting multiple allergens simultaneously (e.g., gluten, sesame, soy, and hazelnut), they require approximately 2 hours for complete sample-to-result analysis and involve more complex cartridge fabrication [46]. Conversely, lateral flow assays provide rapid results and high portability but typically offer only semi-quantitative results with potentially lower sensitivity [57].
Usability Evaluation Protocol
Protocol 3: Usability Testing for POCT Devices
- Objective: To evaluate safety and usability of point-of-care testing devices with intended users in realistic scenarios.
- Background: Adapted from FDA-recognized human factors engineering methods for medical devices [60].
- Materials:
- Production-equivalent prototype device
- Task list simulating real-world use scenarios
- Video recording equipment
- System Usability Scale (SUS) questionnaire
- Demographic survey
- Participant Recruitment:
- Procedure:
- Formative Testing: Initial evaluation with 5 users to identify major usability issues.
- Design Modification: Implement changes based on formative testing results.
- Summative Testing: Formal validation with 15 intended users performing critical tasks without training.
- Contraindication Testing: Evaluate if non-intended users can self-identify as inappropriate users based on labeling.
- Data Collection:
- Record task success/failure rates and use errors.
- Administer post-task difficulty ratings (1-5 scale).
- Conduct knowledge assessment on device use and contraindications.
- Administer System Usability Scale (standardized 10-item questionnaire).
- Conduct debriefing interviews for qualitative feedback.
- Data Analysis:
- Quantitative: Calculate task success rates, difficulty scores, SUS scores.
- Qualitative: Identify usability themes, specific interface problems, and safety concerns.
- Validation Criteria:
- ≥90% task completion rate without use errors [60]
- Clear comprehension of contraindications by non-intended users
- SUS score ≥68 (considered above average)
The Scientist's Toolkit: Research Reagent Solutions
Table 4: Essential Materials for Microfluidic Aptasensor Development
| Reagent/Material | Specification | Function | Application Notes |
|---|---|---|---|
| Chromatography Paper | Whatman Grade 1 or equivalent | Microfluidic substrate | Porous structure enables capillary fluid transport [14] |
| Screen-Printed Electrodes | Carbon working, counter, Ag/AgCl reference | Electrochemical transduction | Patterned electrodes create detection zones [14] |
| Black Phosphorus Nanosheets (BPNSs) | 1-5 layer thickness, 100-500 nm size | Signal enhancement material | High surface area, excellent electrochemical properties [14] |
| Aptamer Probes | Anti-Ara h1 specific sequence, 5'-modified | Molecular recognition element | AF647 fluorophore for detection [10] |
| Complementary Anchors | Short DNA sequences, poly-A linker | Immobilization strategy | Covalently attached to solid support [10] |
| EDC/NHS Chemistry | 100 mM EDC, 50 mM NHS in MES buffer | Crosslinking chemistry | Activates carboxyl groups for aptamer immobilization [14] |
| Extraction Buffer | PBS with 0.05% Tween-20, pH 7.4 | Sample preparation | Efficient allergen extraction from food matrices [10] |
| Electrochemical Probe | [Fe(CN)₆]³⁻/⁴⁻ in KCl | Redox mediator | Enables electrochemical detection measurements |
The evaluation of cost, portability, and usability reveals microfluidic origami nano-aptasensors as a promising platform for point-of-care allergen detection, particularly for peanut allergen Ara h1. This technology successfully balances the critical trade-offs between analytical performance and practical implementation requirements, offering detection within 20 minutes with sensitivity adequate for regulatory compliance (LOD: 21.6 ng/mL) while utilizing low-cost paper-based substrates [14].
Future development should focus on enhancing multiplexing capabilities to detect multiple allergens simultaneously, improving sample introduction methods for untrained users, and establishing robust manufacturing processes for consistent mass production. Additionally, comprehensive usability testing following the outlined protocol will be essential for translating this technology from research laboratories to real-world applications where non-experts can reliably operate the devices [60]. As the POCT market continues its rapid expansion and technological convergence, microfluidic aptasensors are well-positioned to address the growing need for accessible, reliable, and cost-effective allergen detection solutions that empower consumers and enhance food safety.
Conclusion
Microfluidic origami nano-aptasensors represent a paradigm shift in food allergen detection, successfully bridging the gap between complex laboratory testing and practical, point-of-need analysis. The integration of low-cost paper substrates, highly specific aptamers, and signal-enhancing nanomaterials like black phosphorus enables the development of devices that are not only rapid (detection in ~20 minutes) and sensitive (LODs as low as 11.8 ng/mL) but also portable and inexpensive. Future directions should focus on enhancing the multiplexing capability to detect multiple allergens simultaneously, further improving the stability of nanomaterials for long-term storage, and integrating simplified sample preparation steps directly into the device. The ongoing convergence of microfluidics, nanotechnology, and synthetic biology holds immense promise for developing next-generation diagnostic tools that empower consumers and transform clinical management of food allergies.
References
- 1. Microfluidic paper-based analytical devices (µPADs) for ... [https://pmc.ncbi.nlm.nih.gov/articles/PMC6209828/]
- 2. Paper-based microfluidics: Simplified fabrication and assay ... [https://www.sciencedirect.com/science/article/pii/S0925400521002495]
- 3. Microfluidic paper–based analytical extraction devices ... [https://pmc.ncbi.nlm.nih.gov/articles/PMC12228674/]
- 4. An Origami Paper-Based Biosensor for Allergen Detection by ... [https://pmc.ncbi.nlm.nih.gov/articles/PMC9599061/]
- 5. Paper-based microfluidic device for selective detection of ... [https://www.sciencedirect.com/science/article/abs/pii/S0039914023009396]
- 6. Aptamer Biosensor vs Antibodies - Insights on Biosensing ... [https://www.pentabind.com/post/aptamer-biosensor]
- 7. Microfluidic origami nano-aptasensor for peanut allergen ... [https://www.sciencedirect.com/science/article/abs/pii/S030881462101517X]
- 8. Aptamers vs. Antibodies [https://somalogic.com/aptamers-vs-antibodies/]
- 9. Employing conductive porous hydrogen-bonded organic ... [https://www.sciencedirect.com/science/article/abs/pii/S0308814624024270]
- 10. Aptamer based point of care diagnostic for the detection ... [https://www.nature.com/articles/s41598-022-05265-0]
- 11. The application of microfluidic technology in allergen ... [https://pmc.ncbi.nlm.nih.gov/articles/PMC12150919/]
- 12. Advantages, applications, and future directions of in vivo ... [https://www.sciencedirect.com/science/article/pii/S2162253125001295]
- 13. Recent progresses on emerging biosensing technologies ... [https://www.sciencedirect.com/science/article/abs/pii/S0924224424001614]
- 14. nano- Microfluidic for origami ... aptasensor peanut allergen Ara [https://pubmed.ncbi.nlm.nih.gov/34237563/]
- 15. An Origami Paper-Based Biosensor for Allergen Detection ... [https://www.mdpi.com/2079-6374/12/10/825]
- 16. Detection of food-born allergens with aptamer-based ... [https://www.sciencedirect.com/science/article/abs/pii/S0165993617302790]
- 17. Origami-inspired microfluidic paper-based analytical ... [https://link.springer.com/article/10.1007/s42247-024-00775-1]
- 18. Colorimetric LAMP microfluidic chip for detecting three ... [https://www.nature.com/articles/s41598-018-26982-5]
- 19. Low sample volume origami-paper-based graphene ... [https://www.nature.com/articles/s41378-020-0146-2]
- 20. Microfluidic origami nano-aptasensor for peanut allergen ... [https://www.sciencedirect.com/science/article/pii/S030881462101517X]
- 21. Immobilization Techniques for Aptamers on Gold Electrodes for the Electrochemical Detection of Proteins: A Review - PMC [https://pmc.ncbi.nlm.nih.gov/articles/PMC7277302/]
- 22. Recent Advances in the Optimization of Nucleic Acid ... [https://pmc.ncbi.nlm.nih.gov/articles/PMC12564743/]
- 23. Electrochemical Aptasensors: Current Status and Future Perspectives - PMC [https://pmc.ncbi.nlm.nih.gov/articles/PMC7828092/]
- 24. CNF incorporated Au-PdNPs for detection of peanut ... [https://www.sciencedirect.com/science/article/abs/pii/S0026265X25005041]
- 25. An Improved Enzyme-Linked Immunosorbent Assay ... [https://pmc.ncbi.nlm.nih.gov/articles/PMC6560202/]
- 26. Detection of Peanut Allergen by Real-Time PCR [https://www.mdpi.com/2304-8158/10/6/1421]
- 27. Differential Pulse Voltammetry (DPV) [https://www.gamry.com/resources-2/gamry-blog/high-sensitivity-analysis-with-gamry/]
- 28. Differential Pulse Voltammetry (DPV) [https://pineresearch.com/support-article/differential-pulse-voltammetry-dpv/]
- 29. DPV and EIS-based ultrasensitive aptasensor for VEGF165 ... [https://www.sciencedirect.com/science/article/pii/S2214180425000327]
- 30. Lab-on-a-Chip Systems for Aptamer-Based Biosensing [https://pmc.ncbi.nlm.nih.gov/articles/PMC7074738/]
- 31. Development of an aptasensor for highly sensitive ... [https://pmc.ncbi.nlm.nih.gov/articles/PMC11253065/]
- 32. Voltammetric Immunosensor to Track a Major Peanut ... [https://pmc.ncbi.nlm.nih.gov/articles/PMC8615361/]
- 33. Advances in aptamer-based electrochemical biosensors for ... [https://pubs.rsc.org/en/content/articlehtml/2025/nh/d5nh00368g]
- 34. Recent advances in surface chemical modifications of ... [https://www.sciencedirect.com/science/article/abs/pii/S016599362500158X]
- 35. Research Progress in Black Phosphorus-Based ... [https://www.sciopen.com/article/10.7506/spkx1002-6630-20230429-288]
- 36. Microfluidic paper-based analysis device applying black ... [https://www.sciencedirect.com/science/article/abs/pii/S030881462400493X]
- 37. Stable graphene@black phosphorus nanocomposites for ... [https://ui.adsabs.harvard.edu/abs/2022SeAcB.35931623S/abstract]
- 38. Origami Paper-Based Electrochemical (Bio)Sensors [https://www.mdpi.com/2079-6374/11/9/328]
- 39. Nonspecific Binding: Main Factors of Occurrence and ... [https://dmpkservice.wuxiapptec.com/articles/44-nonspecific-binding-main-factors-of-occurrence-and-strategies/]
- 40. A Method for Removing Effects of Nonspecific Binding on ... [https://pmc.ncbi.nlm.nih.gov/articles/PMC2931719/]
- 41. A wearable electrochemical aptasensor based MOF on MOF ... [https://pmc.ncbi.nlm.nih.gov/articles/PMC12119756/]
- 42. Research Progress of Electrochemical Biosensors for ... [https://pmc.ncbi.nlm.nih.gov/articles/PMC12024860/]
- 43. A novel strategy for controllable electrofabrication of ... [https://www.nature.com/articles/s41598-025-93025-1]
- 44. Paper-Based Aptasensors: Working Principles, Detection ... [https://pmc.ncbi.nlm.nih.gov/articles/PMC10536119/]
- 45. Origami-Inspired Biosensors: Exploring Diverse ... [https://www.mdpi.com/2227-9040/12/12/276]
- 46. An integrated microfluidic platform for on-site qPCR analysis [https://pubs.rsc.org/en/content/articlehtml/2025/lc/d4lc00570h]
- 47. Limit of Blank, Limit of Detection and Limit of Quantitation [https://pmc.ncbi.nlm.nih.gov/articles/PMC2556583/]
- 48. Detection limit [https://en.wikipedia.org/wiki/Detection_limit]
- 49. The difference between sensitivity and detection range in ... [https://www.bosterbio.com/blog/post/the-difference-between-sensitivity-and-the-minimum-level-of-assay-range-in-elisa-testing?srsltid=AfmBOoqimuHuEDdNDCtlZ-BkWcD2Re4Lb9fX2Nz4wpdeFGE68Ftox_BV]
- 50. Chapter 7 - Sensitivity and Limit of Detection [https://www.sciencedirect.com/science/article/pii/S092234870870220X]
- 51. A colorimetric/fluorescent dual-mode aptasensor for the rapid ... [https://pmc.ncbi.nlm.nih.gov/articles/PMC12362018/]
- 52. Planar Interdigitated Aptasensor for Flow-Through ... [https://www.mdpi.com/1424-8220/20/20/5773]
- 53. Development of validated sandwich ELISA for detecting ... [https://www.sciencedirect.com/science/article/abs/pii/S0308814624004060]
- 54. An Improved Enzyme-Linked Immunosorbent Assay ... [https://www.frontiersin.org/journals/nutrition/articles/10.3389/fnut.2019.00068/full]
- 55. Optimising Extraction of Specific Food Allergens from ... [https://pmc.ncbi.nlm.nih.gov/articles/PMC12563046/]
- 56. Point of Care Testing Market Size to Hit USD 125.33 Bn by ... [https://www.precedenceresearch.com/point-of-care-testing-market]
- 57. Point of Care Testing Market Share Forecasts 2025-2034 [https://www.gminsights.com/industry-analysis/point-of-care-testing-market]
- 58. The Growing Importance of Allergen Testing: How Certified ... [https://fsns.com/the-growing-importance-of-allergen-testing-how-certified-group-ensures-food-safety-with-elisa/]
- 59. United States Food Allergen Testing Market Report and [https://www.globenewswire.com/news-release/2025/04/21/3064760/28124/en/United-States-Food-Allergen-Testing-Market-Report-and-Company-Analysis-2025-2033-Featuring-Eurofins-Scientific-SGS-Bureau-Veritas-Intertek-Romer-Labs-Microbac-Merieux-NutriSciences.html]
- 60. Evaluating the Safety and Usability of an Over-the-Counter ... [https://humanfactors.jmir.org/2025/1/e65142/]